Add it to your home screen and it opens full screen: no browser bars, one tap away, and everything stays signed in. Free, nothing to download from an app store.
- Tap the Share button in your browser
- Scroll down and choose “Add to Home Screen”
- Open GrowSomeFood from your home screen
- Open your browser’s menu
- Choose “Add to Home screen” or “Install app”
- Open GrowSomeFood from your home screen
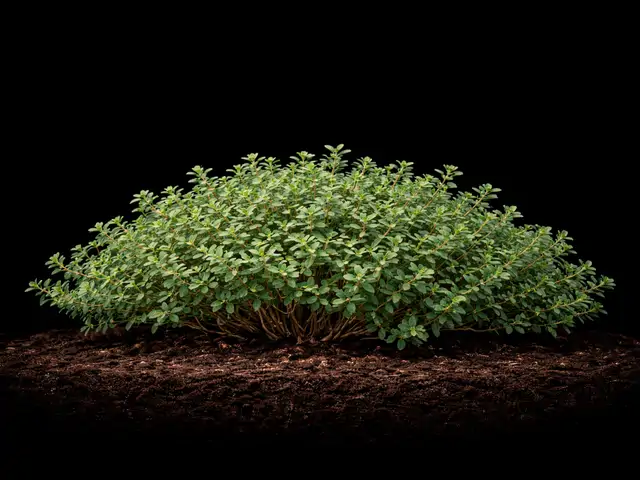
Thyme
Safe in culinary amounts. Concentrated thyme essential oil (rich in thymol) is potent, not for undiluted internal use, and best avoided in pregnancy.
Overview
A tough, low, woody Mediterranean perennial that thrives on drought and neglect - evergreen in mild zones, endlessly useful, and a top bee plant.
Thyme is the little workhorse of the herb garden: a low, spreading, semi-woody perennial from the sun-baked Mediterranean that asks for full sun, sharp drainage, and almost no water, then rewards you for years. In mild zones it stays evergreen, so you can snip fresh sprigs in January; in cold zones it dies back and returns in spring. Its early-summer flowers are among the best bee plants you can grow — thyme honey is legendary.
It comes in two broad forms: upright culinary thymes (common/English, French, German winter) grown for the kitchen, and low creeping thymes grown as fragrant groundcover between pavers — most creeping types are edible too, just milder. Like its Mediterranean cousins, thyme's one real weakness is wet feet.
At a glance
- Sun
- Full sun
- Water
- Low
- Spacing
- 8–18 in (typ. 12)
- Mature height
- 6–12 in (typ. 10)
- Start by
- Direct sow · Transplant · Cuttings · Division
- Frost
- Hardy
- Germination
- 14–28 days (typ. 21) @ 60–80 °F (typ. 70)
- Spread
- 8–18 in (typ. 14)
- Soil
- Well-drained
- Temperature
- Damaged below -20°F · struggles above 95°F
- Seed ready
- 90–130 days (typ. 110) (for saving)
When to plant
Zone 7a typical frost: last Apr 10 · first Oct 25 (spring frost runs Mar 27–Apr 24 in a typical spread of years)
Life stages
- Establishing (year 1) day 0–100 from sowing
-
Water to root in, then keep it dryevery 5 dGive a new plant enough water to establish, then let the soil dry between waterings - thyme is a drought lover that rots in wet ground.
-
Harvest lightly the first yearTake just a little the first season while the woody framework builds; full production comes from year two.
Root rot in rich or soggy soil (the main killer of a young plant)Slow start from seed - cuttings and transplants are much faster -
Water to root in, then keep it dryevery 5 d
- Spring regrowth Mar, Apr, May (yearly)
-
Trim back woody growth as it resproutsCut the plant back by up to a third in early spring - not into bare old wood - to force fresh, tender leaves and keep it from going leggy.
-
Begin cutting sprigs once 6 inches tallevery 10 dSnip 5-6 inch stem tips, staying above the woody base; regular cutting keeps the plant dense.
Bare, woody centers (needs regular light trimming, not hard cuts into old wood) -
Trim back woody growth as it resprouts
- Peak harvest (pre-flower) May, Jun (yearly)
-
Harvest hardest just before floweringThe essential oils and flavor peak in the days just before bloom - the ideal time to cut for drying and for the strongest fresh sprigs.
-
Trim to delay flowering and keep it tenderRegular cutting before bloom keeps leaves flavorful; leave some to flower for the bees once you've harvested.
Flower buds forming (harvest now for peak flavor)Powdery mildew or rust in humid crowding -
Harvest hardest just before flowering
- Bloom Jun, Jul (yearly)
-
Let it bloom for the beesThyme in flower is one of the best bee plants in the garden (thyme honey is prized). After bloom, shear lightly for a fresh flush.
-
Shear back after floweringA light all-over trim after bloom keeps the plant compact and often brings a second flush of tender leaves.
Plant sprawling open and woody after flowering (trim to tidy) -
Let it bloom for the bees
- Winter Jan, Feb, Nov, Dec (yearly)
-
Keep it dry; light mulch in the coldest zonesThyme is evergreen in mild zones and dies back in the coldest. Sharp drainage matters more than cold protection - wet winter soil is the real risk.
-
Keep snipping where it stays evergreenIn zones 5-9 thyme holds its leaves through winter, so you can harvest fresh sprigs year-round.
Crown rot in wet winter soilDieback of old woody stems (normal - trim in spring) -
Keep it dry; light mulch in the coldest zones
Harvest
- Style
- Cut and come again
- Typical yield
- 30–120 sprigs (typ. 60)
- By weight
- 3–16 oz (typ. 8)
- First production
- 0–1 yrs (typ. 1)
- Stems at least 6 inches long, cut above the woody base
- Best flavor and oil just before the plant flowers
- Snip tender green tips, avoiding the bare old wood
Watch out for
Root Rot High
Root rot is not one organism but a group of soil fungi and water molds - Pythium, Phytophthora, Fusarium, Rhizoctonia and others - that sit harmlessly in most soils and only turn destructive when the ground stays saturated. Waterlogged soil drives the air out, the roots suffocate, and the weakened tissue is invaded and goes soft, brown, and stringy. Because the damage is underground you usually see it first as something that looks like drought: wilting, yellowing, stunting, a plant that does not respond to being watered. Overwatering, heavy compacted ground, a low spot that collects runoff, a pot with no drainage or a saucer left standing full, and cold wet soil in winter are the usual causes. Once roots have actually rotted there is no cure - this is a problem you prevent rather than treat.
Watch for: Wilting in the middle of the day on a plant whose soil is damp - the classic tell, and the reason people water a rotting plant and finish it off. Leaves yellowing from the bottom up, dull off-color foliage, and growth that stalls for no visible reason. Whole shoots, or one side of the plant, collapsing while the rest still looks fine. Soft, dark, or mushy tissue at the base of the stem or at the crown, sometimes with a sour smell. Lift a failing plant and look at the roots: healthy ones are firm and pale, rotted ones are brown or black and slimy, and the outer layer slips off between your fingers leaving a thread of core behind. Seedlings that topple over at soil level are the same problem, called damping-off.
Prevent: Drainage is the whole defense. Match the plant to the site first - something that wants sharp drainage will not survive heavy clay or a low, water-collecting spot however well you tend it. Where the ground is heavy, plant on a raised bed, berm, or slope, or grow in a container. Set plants at the depth they were already growing, since burying the crown or the root flare is a common cause of rot, and keep mulch pulled back a few inches from the stem base instead of piled against it. Water the soil rather than the calendar: check that the top inch or two is dry before watering again, cut back hard in cool weather and winter dormancy, and never leave a pot standing in a full saucer. Do not plant or dig in soggy ground, and go easy on rich amendments for plants that want it lean. Rotate annual crops, and start with clean healthy plants and fresh mix.
Treat: There is no cure for tissue that has already rotted, so act on the conditions rather than looking for a spray. Stop watering at once and fix the drainage - open up compacted soil, or move the plant to a raised, sharply drained position or a container. Lift a badly affected plant, cut away every soft dark root and rotted section with a clean blade back to firm pale tissue, and replant only the healthy parts into fresh free-draining soil or mix. Often the better move is to give up on the plant and save its offspring instead: cuttings, offsets, or divisions taken from firm healthy growth root readily and give you a clean start. Bin the rotted material rather than composting it, and correct the drainage before you replant, because the rot comes straight back in the same wet spot.
Sharp drainage above all - lean, gritty soil, raised beds, or containers - and never let water sit around the crown. Salvage healthy cuttings before the plant is lost.
Aphids Low
Aphids are small soft-bodied sap-suckers - green, black, gray, pink, or waxy white, and mostly wingless - that gather in dense colonies on the tenderest new growth: shoot tips, buds, and the undersides of young leaves. They breed extremely fast in mild weather, so a few can become hundreds inside a week. Their feeding curls and distorts soft growth, and the sticky honeydew they excrete coats everything below and turns black with sooty mold. Ants often farm and defend the colonies for that honeydew. A few aphids are normal on almost any plant and a healthy plant shrugs them off; only dense, persistent colonies do real damage, and some aphids also spread plant viruses as they feed.
Watch for: Dense clusters of tiny insects packed onto shoot tips, flower buds, and the undersides of young leaves. Curled, cupped, or distorted new growth that never opens properly. A sticky shine on the leaves - and on whatever sits under the plant - that later goes black with sooty mold. Tiny white cast skins left behind where a colony has been feeding. Ants running steadily up and down the stems, which is often the first thing you notice. Mottled, streaked, or misshapen leaves that do not grow out can mean a virus the aphids brought with them rather than the feeding itself.
Prevent: Go easy on nitrogen: the soft, lush growth that heavy feeding produces is exactly what aphids breed on. Check new growth once a week through spring and early summer so you catch colonies while they are still small, and rub the first few out with your fingers. Leave flowering plants nearby and skip broad-spectrum sprays - ladybugs, lacewings, hoverflies, and parasitic wasps do most of this work for free, and they only stay if there is something for them to eat. Keep ants off the plant where you can, since they protect aphids from those predators. Water steadily so plants are not stressed, and check any new plant over before you bring it home or move it indoors, since aphids usually arrive on something else.
Treat: Knock the colonies off with a hard jet of water and repeat every few days - on most plants that alone ends it. Pinch out or prune off the worst-infested tips rather than treating the whole plant. If colonies keep rebuilding, spray insecticidal soap or horticultural oil directly onto the insects, covering leaf undersides, and repeat weekly until they are gone; treat early or late in the day, and never spray a wilted or heat-stressed plant. Avoid broad-spectrum insecticides - they kill the ladybugs, lacewings, and parasitic wasps that were about to solve the problem for you, and aphid numbers usually come back worse afterward. Anything you spray must be labeled for the plant you are treating; follow that label and observe its pre-harvest interval. On anything you eat, wash leaves, heads, and buds well before use, since aphids hide down in crowns, folds, and tight growth.
Powdery Mildew Low
Powdery mildew is a fungal disease that coats leaves - and often stems, buds, and fruit - in a white-to-gray powder that looks like spilled talcum. It is not one fungus but a large family of them, each fairly specialised to its own group of plants, which is why mildew on one crop rarely jumps to an unrelated one beside it. Unlike most leaf diseases it does not need wet leaves: it thrives on warm dry days followed by humid nights, and it takes hold fastest where plants stand crowded in still air or in shade. The coating blocks light, so heavily covered leaves yellow, brown, and drop early. On many plants that is mostly disfiguring and arrives late enough not to matter; where it strips away the leaves a crop still needed to finish, it costs you size, sweetness, and quality.
Watch for: Round white powdery spots on the upper leaf surfaces that spread and merge until whole leaves look dusted. It usually starts on the oldest, lowest, most shaded leaves and works upward, so check there first. Look at the undersides too, and at stems, buds, and flower stalks, which get coated as it advances. Leaves that yellow, brown, curl, or go crisp and drop early under the coating. New growth that opens small, crumpled, or twisted where the fungus has reached the shoot tips. On plants where it gets onto the fruit, a dull gray film, russeted or scarred skin, and cracking. Late in the season, tiny dark specks scattered through the white felt - that is the fungus setting up to overwinter on the debris.
Prevent: Give plants room. Crowding and still air are the biggest single driver, so space at the full recommended distance, thin seedlings properly, and divide or prune out congested growth until air moves through the plant. Full sun and an open position help; deep shade and a still corner against a wall are where it always starts. Water at the base rather than overhead, and water early in the day so nothing stays damp overnight. Keep plants evenly watered - drought stress at the roots leaves them far more susceptible, even though the fungus itself likes dry air. Go easy on nitrogen, since soft lush growth is the most vulnerable. Where resistant varieties exist for what you are growing, choosing one is the single most effective thing you can do on a plant that mildews every year. Clear infected leaves and stems away at the end of the season rather than composting them.
Treat: Start early: sprays protect healthy tissue, they do not clean up leaves that are already coated. Pick off and bin the worst leaves as soon as you see them, and open the plant up by thinning or pruning so air moves through. On anything that regrows quickly, shearing the whole plant back forces a clean flush and beats spraying. If it keeps spreading, potassium bicarbonate, horticultural oil, or neem applied weekly will hold it - cover both leaf surfaces. Sulfur also works, but it burns the foliage of some plants, should never go on in heat, and must not be mixed with or applied close behind an oil spray. Whatever you use must be labeled for the plant you are treating: follow that label and observe its pre-harvest interval on anything you eat. Do not compost badly infected material. Late-season mildew on a plant that is finishing anyway is usually cosmetic; on a crop still filling out it is worth acting on.
Trim to open the plant at the first sign. Thyme wants lean, sunny, well-drained conditions - crowded, rich, damp plantings are the ones that mildew.
Spider Mites Low
Spider mites are not insects but tiny sap-feeding arachnids, smaller than a grain of salt, and you almost always notice the damage before you notice them. They live on the undersides of leaves and drain the cells one at a time, which is why the leaf goes finely stippled with pale dots before it bronzes and dries. They breed explosively in hot, dry, dusty, still air - a generation can pass in a week at high temperature - so a barely visible population becomes a webbed, bronzed plant within a fortnight. Drought-stressed plants and plants wintered indoors in dry heated air are the classic hosts. Broad-spectrum insecticides make matters worse rather than better, because they kill the predatory mites and lady beetles that normally hold mites in check.
Watch for: Fine pale stippling or speckling across the upper leaf surface, as though the color had been sandblasted out of it, and later a dull bronze or rusty cast over the whole leaf. Delicate webbing across leaf joints, shoot tips, and undersides - that comes with a heavy infestation and means you caught it late. Leaves that dry, curl, and drop early while the plant looks thirsty no matter how much you water it. Hold a leaf over a sheet of white paper and tap it: the specks that fall and then start walking are mites. With a hand lens, look on the undersides for the mites themselves, pale or reddish, and their round translucent eggs. Damage that shows up first on the hottest, dustiest, most sheltered side of a plant, or on a pot sitting near a radiator indoors.
Prevent: Do not let plants get drought-stressed - that is the single strongest trigger, and a plant watered steadily through heat is far less likely to have a mite problem at all. Hose the foliage down, undersides included, during hot dry spells: it knocks mites off, washes away the dust they thrive in, and raises the humidity around the plant for a while. Indoors and under cover, keep the air from going hot, dry, and stagnant, wipe or rinse the leaves occasionally, and keep pots away from radiators and heating vents. Inspect any plant carefully before you bring it indoors for winter or set it among others, since mites almost always arrive on something else. Avoid broad-spectrum insecticides: they wipe out the predatory mites, lacewings, and lady beetles that do most of this work for you, and reliably leave you with a worse outbreak than you started with.
Treat: Start with water. A strong jet aimed at the leaf undersides, repeated every few days for a couple of weeks, knocks populations down and breaks the cycle - on many plants that alone ends it. On anything that regrows quickly, shearing back badly infested growth resets the plant to clean foliage. If it keeps building, spray insecticidal soap or horticultural oil directly onto the undersides where the mites actually live, and repeat every five to seven days for three rounds: contact sprays do not kill the eggs, so a single application always fails. Anything you spray must be labeled for the plant you are treating - follow the label and observe its pre-harvest interval on anything you eat. Predatory mites are an effective release in a greenhouse or on an indoor plant. Above all, correct the heat, dust, and drought stress that caused it, or the mites simply come back.
More common on stressed and indoor plants. Keep plants unstressed; a periodic hose-down of the foliage in heat discourages them.
Rust Low
Fungal rust that occasionally produces small orange-brown pustules on thyme leaves in damp, crowded conditions, weakening heavily infected plants.
Watch for: Small orange to rust-brown pustules on the leaves and stems, worst in humid weather and dense growth.
Prevent: Space for airflow, grow in full sun and dry conditions, and avoid overhead watering.
Treat: Remove affected growth and improve airflow; rarely serious enough to need more.
Rust is uncommon on thyme and rarely serious - the orange pustules look alarming, but a trim and better airflow usually end it.
Good & bad neighbors
Varieties · 6
Dense low mat of tiny aromatic leaves, covered in pink to purple flowers in summer.
Low, mat-forming thyme (Thymus serpyllum and relatives) grown as a fragrant, walkable groundcover between stepping stones and in rock gardens, smothered in pink-purple flowers that bees adore. Edible but milder than culinary thyme - grown mainly for looks and pollinators.
Narrow gray-green leaves on thin woody stems, with tiny pale pink to lavender flowers.
The standard culinary thyme (Thymus vulgaris): a small woody perennial with narrow gray-green leaves and the classic warm thyme flavor. The dependable all-purpose kitchen thyme and a good first choice.
Small, narrow, gray-green leaves on a low woody plant with pale flowers.
A refined selection of common thyme with a sweeter, more subtle flavor prized by cooks and traditional to bouquet garni and herbes de Provence. Slightly narrower, grayer leaves; a touch less hardy than English thyme.
Small dark green leaves on a bushy, upright plant with tiny pink flowers.
The hardiest culinary thyme, bred to survive cold winters with a robust, full flavor - the choice for cold zones and the most reliable overwinterer. Bushy, sturdy, and productive.
Small oval green (or gold-variegated) leaves with a strong lemon scent.
A citrus-scented thyme (Thymus x citriodorus) with a bright lemon aroma layered over the thyme flavor - superb with fish, chicken, vegetables, and in tea. Comes in green and variegated forms; grown just like common thyme.
Small green leaves with distinct silver-white margins on a compact woody plant.
A decorative culinary thyme with green leaves edged in creamy silver-white, adding ornamental value to borders and containers while staying fully usable in the kitchen. A little less vigorous than plain common thyme.
Grow
Start from a transplant or cutting in full sun and gritty, well-drained soil; keep it dry and lean.
The easiest, fastest start is a transplant or rooted cutting — thyme germinates slowly and unevenly from seed, so seed is rarely worth the wait unless you start it indoors 6-10 weeks ahead. Set plants out after frost, about a foot apart, in full sun. If you do sow, press the tiny seed onto the surface and keep it warm and barely moist.
The make-or-break condition is drainage. Thyme is a rock-garden plant that rots in rich, wet soil; give it lean, gritty, sharply drained ground — even sandy or gravelly — water only to establish and then in real drought, and skip the fertilizer. It's superb in containers and troughs, which guarantee the drainage it needs, and creeping types thrive in the cracks between stepping stones.
Care
Trim lightly and often to prevent woodiness, harvest before flowering, water sparingly, and renew from cuttings every few years.
Thyme's care is a light touch. Trim it regularly — cut back by up to a third in spring and shear lightly after flowering — to keep it compact and force tender new growth, but never cut hard into the bare old wood, which won't resprout. Harvest through the season by snipping green stem tips above the woody base.
Water sparingly; this is a drought-lover that suffers from overwatering, and wet winter soil is its main cause of death. After three or four years, plants tend to get woody and sparse in the center — that's the signal to renew from cuttings or division rather than trying to rescue the old plant. In mild zones it stays evergreen for year-round harvest; in cold zones a light winter mulch and sharp drainage carry it through.
Harvest
Snip green tips above the woody base anytime; harvest hardest just before flowering, when the oils peak.
Harvest thyme by snipping 5-6 inch tender stem tips, staying above the woody part of the stem so the plant can regrow. You can take sprigs whenever you cook, and regular light cutting keeps the plant bushy. The flavor is strongest in the morning after the dew dries — and, as with oregano, it peaks in the days just before the plant flowers, which is the moment to cut a big batch for drying.
To use, strip the tiny leaves by running your fingers down the stem against the grain (or drop whole sprigs into a stew and fish out the bare stem later). Take up to a third of the plant at a time; it rebounds fast, and where it's evergreen you can harvest fresh right through winter.
Storage
Dries beautifully and keeps its flavor; also freezes and refrigerates well, and stays harvestable on the living plant year-round in mild zones.
Thyme is one of the best herbs for drying — it holds its flavor superbly. Cut whole stems just before flowering, bundle and hang them in a warm, airy, shaded spot until crisp, then strip the leaves and store them whole in a jar (crumble as you cook). Dried thyme keeps its punch for a year or more, and dried is what most recipes assume.
For fresh use, refrigerate sprigs wrapped in a barely-damp paper towel for a couple of weeks, or freeze whole sprigs and strip the leaves frozen, or freeze chopped leaves in oil cubes. Because thyme is evergreen in mild zones and a hardy perennial everywhere, the simplest approach is to harvest fresh as needed and dry the pre-flowering surplus.
Propagation & seed saving
Free plants forever: cuttings, layering, and division all root easily - and vegetative propagation keeps the flavor true.
Thyme multiplies effortlessly by three vegetative routes, which is how you turn one good plant into a lifetime supply. Cuttings: root 3-inch stem tips (lower third stripped) in gritty mix through spring and summer. Layering: thyme's low stems often root themselves where they touch the soil — just sever the rooted piece and move it. Division: split an established clump in spring. All three give you an exact copy of the parent.
That matters because named culinary and creeping thymes are specific clones, and seed is slow and variable. So for reliable flavor and form, propagate the plant you like rather than sowing seed. A single thyme plant, renewed from cuttings every few years as it gets woody, means you never need to buy thyme again.
Nutrition
A seasoning-quantity source of vitamin C, vitamin A, iron, and manganese, packed with the antioxidant oils thymol and carvacrol.
Thyme is nutritionally dense for a herb you use by the pinch: it supplies vitamin C, vitamin A, iron, manganese, and fiber, and it's especially rich in antioxidant phenolic compounds — chiefly thymol and carvacrol, the aromatic oils behind its flavor and its long medicinal reputation. Fresh thyme carries meaningful vitamin C; dried concentrates the minerals and oils.
As with other Mediterranean herbs, the realistic framing is that you season with it rather than eat it in quantity, so it's a flavorful, healthful boost rather than a dietary staple — but those thymol-rich oils are exactly why thyme is one of the most-studied culinary herbs for antimicrobial and antioxidant activity.
In the kitchen
The quiet backbone herb: it goes in early, holds up to long cooking, and anchors stocks, braises, roasts, and bouquet garni.
Thyme is the herb that works behind the scenes. Its warm, earthy, faintly lemony-minty flavor is durable, so — unlike delicate basil — it goes in early and deepens over long cooking: it's a cornerstone of stocks, braises, stews, roasts, and slow-simmered sauces, and one of the three herbs (with parsley and bay) in a classic bouquet garni. It's central to Provençal cooking (herbes de Provence) and Middle Eastern za'atar.
Toss whole sprigs into the pot and remove the bare stems later, or strip the leaves for even distribution. The many flavored thymes widen the range: lemon thyme is superb with fish, chicken, and in tea; caraway and orange-balsam types add their own twists. The flowers are edible, mild, and a pretty garnish — and they make thyme honey.
Traditional & historical uses
One of the most genuinely medicinal kitchen herbs - thymol is a real antiseptic, and thyme has a deep, evidence-supported tradition for coughs.
This section records how people have traditionally used this plant, and what is known about the risks. It is history and general information — not medical advice, and not a recommendation to treat anything. Plants are not dosed like medicines, some interact with prescriptions, and some are harmful in ways that are not obvious. Talk to a clinician before using any plant medicinally.
Thyme has one of the strongest medicinal track records of any culinary herb, resting on real chemistry. Its main oil, thymol, is a proven antiseptic and antimicrobial — so much so that it's used in mouthwashes and sanitizers — and thyme has a long, well-documented tradition as a cough and respiratory remedy. Thyme tea and syrup for coughs, congestion, and sore throats appear across European herbal medicine, and thyme is a recognized expectorant in some modern herbal pharmacopeias, with clinical support for cough relief.
The honest caveats: the leaf and a mild tea are gentle and safe as food and folk remedy, but concentrated thyme essential oil is potent, can irritate skin and mucous membranes, must be diluted, and is best avoided in pregnancy. As kitchen herbs go, thyme earns its medicinal reputation about as well as any — but respect the difference between the sprig and the extract.
History
A Greek symbol of courage, an Egyptian embalming herb, and a medieval antiseptic - thyme has scented kitchens and sickrooms for millennia.
Thyme's history runs deep into antiquity. Its name is often linked to the Greek thymos, and the Greeks burned it as fragrant temple incense and associated it with courage — a sprig of thyme was a compliment to a warrior. The Egyptians used it in embalming, and the Romans spread it across Europe as a flavoring, a strewing herb, and a purifier of the air.
Through the Middle Ages thyme was prized as an antiseptic and a charm: ladies embroidered thyme sprigs onto knights' scarves for bravery, and it was tucked under pillows to ward off nightmares. Long before anyone isolated thymol, people had discovered its preservative and disinfectant powers by experience — a Mediterranean groundcover that earned a permanent place in both the kitchen and the medicine chest.
Growing across climates
Hardy and near-universal - evergreen in mild zones, dies back in cold ones - with winter wet, not cold, as the only real enemy.
Zones 3-4: the cold edge, and past it — thyme takes about -20°F, which zone 4b just meets and zones 3a-4a do not, so in the coldest gardens grow it in a pot wintered under cover or replant each spring. German winter thyme is the only type with a real chance in the ground there, and it still needs sharp drainage plus a light mulch, because frozen wet soil kills far more thyme than cold does. Zones 5-9: thyme's sweet spot — evergreen through winter, so you harvest fresh year-round, with easy care in lean, sunny, well-drained ground. Zones 9-10: loves the heat and drought once established; plant in fall and grow it hard and dry, watching for humidity-driven mildew and rot. Zones 11+: possible in cooler, drier months and in containers for guaranteed drainage; humidity is the limiting factor. Everywhere, the rule holds: full sun, lean, and sharply drained.
Troubleshooting
Woody and sparse means it needs renewing from cuttings; wilting despite water is root rot; leggy means too much water or shade.
Bare, woody, and sparse in the center: normal aging — trim lightly each year, and after three or four years renew the plant from cuttings or division rather than cutting hard into old wood (which won't resprout). Wilting despite moist soil, with soft brown roots: root rot from overwatering or poor drainage — the classic thyme killer; improve drainage and water far less. Leggy, floppy, weak-flavored growth: too much water, too rich a soil, or too little sun — grow it lean, dry, and in full sun. White powdery film or orange pustules in humid weather: powdery mildew or rust — improve airflow, space plants, and avoid overhead watering. Dieback after a wet winter: crown rot — raise the bed or move to sharper-draining soil.
Cook it
All 38 recipes →Grower tips
No grower tips for Thyme yet. Yours could be the first.
Sign in to share what works in your garden.