
Add it to your home screen and it opens full screen: no browser bars, one tap away, and everything stays signed in. Free, nothing to download from an app store.
- Tap the Share button in your browser
- Scroll down and choose “Add to Home Screen”
- Open GrowSomeFood from your home screen
- Open your browser’s menu
- Choose “Add to Home screen” or “Install app”
- Open GrowSomeFood from your home screen

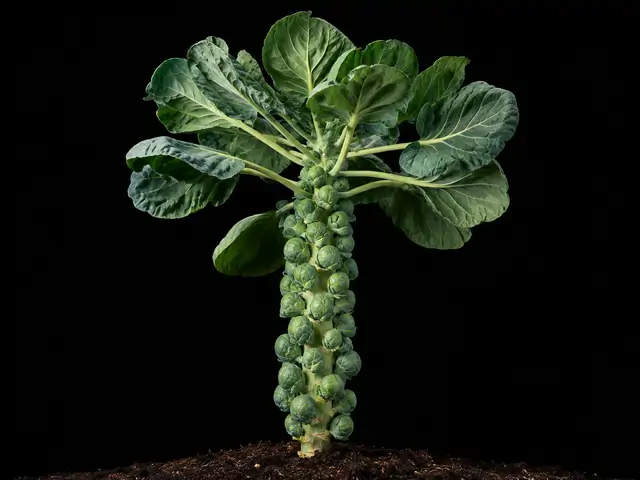
Brussels Sprouts
The garden's longest-season brassica: a tall stalk hung with dozens of mini-cabbages that only get sweet after fall frost - patience rewarded.
Safety notes Entirely edible - the sprouts (small axillary buds) are the crop, and the large leaves are edible cooked like collards. Like all brassicas, sulfur compounds can cause gas in some people; roasting mellows them.
Overview
Brussels sprouts are the marathon of the cabbage family. Instead of one head, a single tall stalk produces dozens of small, dense 'mini-cabbages' in the leaf axils, ripening from the bottom up over a long, cool fall. They ask for 90-110 days after transplant and a good deal of patience, but they pay it back with a harvest that stretches for weeks and a flavor most vegetables can't claim.
The one thing to knowThe secret every experienced grower knows: frost makes them sweet.
Quick facts
- Sprouts in
- 7 daysRange: 4–10 days
- Soil temperature
- 70 °FRange: 45–85 °F
- Start indoors
- 5 weeks before transplantRange: 4–6 weeks
- Height
- 30 inRange: 24–40 in
- Spread
- 24 inRange: 18–30 in
- Cold
- Takes hard frostdamaged below 15°F
- Heat
- Struggles above 80°F
- Life cycle
- Grown as an annualBotanically a biennial
- Save seeds
- About 150 days after plantingRange: 120–180 days
- Soil
- Well-drained
- Water
- Medium
- Plant spacing
- 24 inRange: 18–30 in
When to plant
Nothing is open today. Summer indoor sowing opens 8 months, Jun 12 to Jul 7.
- Start indoors Jun 12 – Jul 7 Opens in 236 daysAbout 19 weeks before to 16 weeks before your first frost (Oct 25 here)Start seed 4-6 weeks before transplanting; the whole plan is to have plants maturing as cool fall weather arrives.
- Transplant Jul 7 – Aug 1 Opens in 261 daysAbout 16 weeks before to 12 weeks before your first frost (Oct 25 here)Set transplants out ~90-110 days before your first fall frost so sprouts fill and sweeten in the cold.
Frost here: last around Apr 10 (Mar 27 to Apr 24 most years), first around Oct 25. Zone averages, your own yard may run a week or two either way.
Life stages
From the first start to harvest
Follow the growing sequence. Choose a stage to see its care and signs to watch for.
Stage 1 of 5 · The growing sequence
Germination
Day 0 to 7 from sowing
Care at this stage
-
Keep the seed mix evenly moist
Sow 1/4-1/2 inch deep in warm mix (65-75°F); brassica seed comes up fast and even when it never dries out.
-
Start midsummer for the fall crop
Sprouts are a long-season fall crop - sow indoors or in a shaded nursery bed in early-to-mid summer so plants mature into cool fall weather.
Stages can overlap; weather, variety, and growing conditions change the pace.
Harvest
- Sprouts firm and tight, 1-2 inches across
- Firming from the bottom of the stalk upward
- Sweeter after the first hard frosts of fall
- Pick from the bottom up, after frost · weekly
- Or cut the whole stalk at season's end
Per plant 40 to 100 sprouts, 1 to 3 lbPicking pick as they ripen
Cook with Brussels Sprouts
Watch out for
6 to know. 3 are high-risk: Aphids, Cabbage Worms & Loopers, Clubroot. 3 are active in October.
AphidsSeverity High PestnowSeason: Jun–OctDense clusters of tiny insects packed onto shoot tips, flower buds, and the undersides of young leaves.
The gray waxy cabbage aphid burrows into the tight gaps between sprouts and stalk where sprays cannot reach, so catch it early while colonies are still on open leaves. Hidden aphids are the reason to soak or split-and-rinse sprouts before cooking.
Dense clusters of tiny insects packed onto shoot tips, flower buds, and the undersides of young leaves. Curled, cupped, or distorted new growth that never opens properly. A sticky shine on the leaves - and on whatever sits under the plant - that later goes black with sooty mold. Tiny white cast skins left behind where a colony has been feeding. Ants running steadily up and down the stems, which is often the first thing you notice. Mottled, streaked, or misshapen leaves that do not grow out can mean a virus the aphids brought with them rather than the feeding itself.
Knock the colonies off with a hard jet of water and repeat every few days - on most plants that alone ends it. Pinch out or prune off the worst-infested tips rather than treating the whole plant. If colonies keep rebuilding, spray insecticidal soap or horticultural oil directly onto the insects, covering leaf undersides, and repeat weekly until they are gone; treat early or late in the day, and never spray a wilted or heat-stressed plant. Avoid broad-spectrum insecticides - they kill the ladybugs, lacewings, and parasitic wasps that were about to solve the problem for you, and aphid numbers usually come back worse afterward. Anything you spray must be labeled for the plant you are treating; follow that label and observe its pre-harvest interval. On anything you eat, wash leaves, heads, and buds well before use, since aphids hide down in crowns, folds, and tight growth.
Go easy on nitrogen: the soft, lush growth that heavy feeding produces is exactly what aphids breed on. Check new growth once a week through spring and early summer so you catch colonies while they are still small, and rub the first few out with your fingers. Leave flowering plants nearby and skip broad-spectrum sprays - ladybugs, lacewings, hoverflies, and parasitic wasps do most of this work for free, and they only stay if there is something for them to eat. Keep ants off the plant where you can, since they protect aphids from those predators. Water steadily so plants are not stressed, and check any new plant over before you bring it home or move it indoors, since aphids usually arrive on something else.
Aphids are small soft-bodied sap-suckers - green, black, gray, pink, or waxy white, and mostly wingless - that gather in dense colonies on the tenderest new growth: shoot tips, buds, and the undersides of young leaves. They breed extremely fast in mild weather, so a few can become hundreds inside a week. Their feeding curls and distorts soft growth, and the sticky honeydew they excrete coats everything below and turns black with sooty mold. Ants often farm and defend the colonies for that honeydew. A few aphids are normal on almost any plant and a healthy plant shrugs them off; only dense, persistent colonies do real damage, and some aphids also spread plant viruses as they feed.
Cabbage Worms & LoopersSeverity High PestnowSeason: Jun–OctRagged holes in the leaves, dark-green frass in the crown, and green caterpillars that match the leaf and hide along midribs and leaf undersides.
Sprouts stand in the garden for months, so this crop takes the longest exposure of any brassica here - a tall plant also outgrows most row cover, so plan on hand-picking from midsummer on. Worms bore into the sprouts themselves; soak them in salt water before cooking to float out any hidden ones.
Ragged holes in the leaves, dark-green frass in the crown, and green caterpillars that match the leaf and hide along midribs and leaf undersides. White butterflies fluttering low over the bed mean eggs are going down now - look under the leaves for the small pale-yellow eggs, laid one at a time rather than in clusters.
Bt (Bacillus thuringiensis kurstaki) is the one to reach for first: it affects only caterpillars and is safe around bees, parasitic wasps, and hoverflies. Spinosad also works, but it is not caterpillar-specific - while the spray is still wet it is toxic to bees and to the parasitic wasps that hunt cabbage worms for you. If you use it, spray at dusk so it dries before bees are out, and never wet open flowers, including flowering companions like dill or nasturtium. Follow the label for both. On a small planting, hand-picking and rubbing off eggs is enough on its own.
Floating row cover from sowing or transplant is the near-complete fix - it stops the adults ever laying. Seal it at the soil edges and lift it only to weed or harvest. Otherwise check leaf undersides twice a week, rub off the eggs, and hand-pick the caterpillars. Let dill, cilantro, or other umbels flower nearby to feed the parasitic wasps that do this work for you.
The brassica caterpillar complex: velvety green imported cabbageworms (larvae of the white cabbage butterfly) and inch-worming cabbage loopers (a moth larva). Both chew large ragged holes through the leaves, then work into whatever folds up at the center - head, curd, sprout, or growing crown - fouling it with green pellet droppings. Fast leaf crops are usually cut before the damage matters; slow heading crops suffer most. Nasturtium carries the same mustard-oil chemistry that cues the butterflies to lay, so it hosts them too and is often planted nearby as a decoy.
ClubrootSeverity High DiseasenowSeason: Jun–OctMidday wilting that recovers overnight, yellowing and stunting with no obvious cause, and - the giveaway - swollen, distorted, clubbed roots instead of clean ones when a plant is pulled.
A long-season crop like sprouts is especially punished by clubroot, because it has to stand in infested soil for months before it gives you anything.
Midday wilting that recovers overnight, yellowing and stunting with no obvious cause, and - the giveaway - swollen, distorted, clubbed roots instead of clean ones when a plant is pulled.
There is no cure once the soil is infested. Pull and destroy affected plants - bag them, do not compost them - lime the bed, and keep brassicas off that ground for years. Rotation and pH are the whole game here.
Rotate at least 4 years out of every brassica, counting the fast salad ones and any brassica cover crop. Lime toward pH 7.0-7.2, since the pathogen dislikes alkaline soil, and improve drainage. Plant only clean seed and transplants, never move infested soil or plants around the garden, and grow resistant or tolerant varieties where the disease is known to be present.
A soil-borne pathogen (Plasmodiophora brassicae) that infects brassica roots and swells them into distorted, clubbed galls. Affected plants stunt and yellow, wilt on warm afternoons and recover overnight, and never size up properly. It is worst in acidic, poorly drained ground, and the resting spores survive in soil for up to 20 years, moving around on soil, tools, boots, water and infected transplants.
Cabbage Root MaggotSeverity Medium PestSeason: Apr, May, Jun, SepSudden wilting on the first warm days even though the soil is moist, stunted plants with a bluish cast, and - on pulling a failing plant - brown tunnels and slimy scarring through the roots with small white maggots inside.
Sprouts are usually set out late enough to miss the worst spring flight, but a plant checked early still has to stand all season on damaged roots, and it will lean or topple in wind.
Sudden wilting on the first warm days even though the soil is moist, stunted plants with a bluish cast, and - on pulling a failing plant - brown tunnels and slimy scarring through the roots with small white maggots inside.
There is no rescue once the maggots are inside the roots. Pull and destroy badly infested plants rather than composting them, and reset the bed with row cover and rotation. Beneficial nematodes drenched into the soil help suppress the larvae in a bed you have to keep using.
Cover the crop with floating row fabric from the day you sow or transplant, sealing the edges down to the soil so the fly cannot reach the stems, or fit a cardboard or felt collar disc flat around each stem to block egg-laying. Rotate at least three years away from ground that grew brassicas, and do not plant into fresh manure.
The larvae of a small gray fly that lays its eggs at the soil line against brassica stems. The white maggots hatch and tunnel down into the roots, scarring and rotting them, so plants wilt on warm days, stunt, take on a blue-green cast, and can die outright; root brassicas are tunneled through and spoiled. It is worst in cool, wet spring soil, on transplants and early sowings, and in ground that grew brassicas the year before.
Flea BeetlesSeverity Medium PestSeason: May–JulDozens of pinhead-sized round holes peppered across the leaves, thickest on the youngest, most tender growth.
Mainly a threat to seedlings and transplants; the tall mature plant is untroubled.
Dozens of pinhead-sized round holes peppered across the leaves, thickest on the youngest, most tender growth. Tiny beetles that spring away as you brush the plants or lean in for a closer look - that jump is the identification. Seedlings that go lacy and stop growing, and transplants that sit and sulk instead of taking off. Damage heaviest in warm, dry weather and along the edge of a bed nearest weedy ground or last year's crop debris. On root crops, shallow narrow grooves or channels scarring the skin at harvest, from larvae feeding underground.
Row cover and healthy fast growth carry most crops through, and on an established plant the damage is usually cosmetic and needs nothing at all. Where a young planting is genuinely being stripped, kaolin clay coats the leaves and deters feeding, and spinosad will knock the beetles back. Spinosad is acutely toxic to bees while the spray is still wet - apply it at dusk when bees are not flying, never onto plants in flower, and follow the product label. Anything you spray must be labeled for the plant you are treating, and you must observe its pre-harvest interval on a crop you are picking. Yellow sticky traps are useful for telling you when the beetles have arrived. Where the damage falls on the part you eat, harvesting young often beats them outright; where you are growing for a root or a fruit, leaf damage can simply be tolerated. Larvae feeding underground cannot be reached by a foliar spray, so rotation and clean beds are what work against those.
Floating row cover or fine insect mesh, laid over the bed from the day of sowing or transplanting and sealed at the edges so nothing can walk in underneath, is the single best defense - and on the crops they favor it is close to essential. Leave it on until plants are large and growing strongly, or until flowering on anything that needs pollinating. Push growth: a well-watered, unchecked plant outgrows the damage, so the whole game is getting seedlings through their vulnerable weeks fast. Keep beds weed-free, since related weeds host the beetles alongside your crop, and clear crop debris at the end of the season where the adults overwinter. Rotate away from a bed that grew a related crop last year. Where you can, shift sowing dates - cooler-season and fall plantings often miss the peak of adult feeding entirely.
Flea beetles are tiny dark beetles - often shiny black or bronze, rarely more than a couple of millimeters long - with enlarged back legs that let them spring away like fleas the moment you lean in. The adults chew countless small round pits and shot-holes through leaves, giving the foliage a peppered, buckshot-riddled look. They overwinter as adults in leaf litter, hedgerows, and crop debris, emerge hungry in spring, and are worst in warm dry spells. The damage is mostly a seedling and transplant problem: a small plant with a few leaves can be checked, stunted, or killed outright, while the same plant shrugs them off once it is large and growing strongly. Different species specialize on different plant families, so the beetles hammering your brassicas are not the ones on your nightshades. Some species also have larvae that feed on roots and tubers underground.
Harlequin BugSeverity Medium PestSeason: Jun–SepBright orange-and-black shield bugs on leaves and stems, whitish or yellow cloudy stippling and wilting, and barrel-shaped black-and-white striped eggs standing in rows on leaf undersides.
Most damaging in southern and mid-Atlantic gardens; northern growers see it rarely.
Bright orange-and-black shield bugs on leaves and stems, whitish or yellow cloudy stippling and wilting, and barrel-shaped black-and-white striped eggs standing in rows on leaf undersides.
Hand-pick the conspicuous adults into soapy water and crush egg rows; insecticidal soap or spinosad on heavy nymph populations. Spinosad is acutely toxic to bees while the spray is wet - apply at dusk when bees are not flying, never to plants in flower, and follow the product label.
Clean up brassica and cruciferous-weed debris where adults overwinter; row cover young plants; handpick early-season adults before they breed.
A shield-shaped stink bug boldly patterned in orange/red and black that sucks sap from mustard leaves, leaving pale cloudy blotches and wilting. A major pest of leafy brassicas in warm regions, and mustard is a preferred host - which also makes it a useful trap crop.
Good & bad neighbors
Plant nearby
-
Its flowers draw parasitic wasps and hoverflies that hunt cabbage worms and aphids.
-
Aphid trap crop - often colonized in preference to the sprouts, and it lures aphid predators.
-
Allium scent is traditionally credited with deterring cabbage moths and root-maggot flies from the brassica bed.
- Traditional pairings, thin evidence
-
Roots occupy a different soil layer and share the bed's rich, moist conditions without competing.
-
General pest-confusing and nematode-suppressing reputation; modest evidence.
-
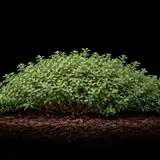
Aromatic groundcover said to mask brassicas from cabbage-worm moths; thin but harmless.


Keep apart
- Traditional pairings, thin evidence
-
Traditional antagonist that competes for feed and shares some pests; keep in separate beds.
-
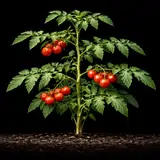
Two heavy feeders competing for the same rich soil; the classic advice separates them.
-
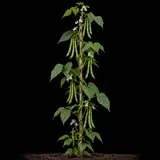
Traditional lore holds climbing beans and brassicas suppress each other; evidence is thin, but the tall beans shade the sprouts.

Varieties · 7
You pick one when you add Brussels Sprouts to your garden. Its days to maturity set your harvest window.
Long Island Improved
The classic American heirloom and the standard open-pollinated sprout: compact 20-24 inch plants pack in dense, dark-green sprouts with reliable, heavy yields.
Variety details for Long Island Improved
Compact plants heavily set with firm, medium, dark-green sprouts.
heirloomopen-pollinatedgreenThe one to grow if you want to save seed, and a dependable all-rounder.
Jade Cross
An All-America Selections winner and a favorite early hybrid: short, sturdy, wind-tolerant plants that set firm sprouts fast, making it a good pick for shorter seasons and exposed sites.
Variety details for Jade Cross
Short, stocky plants with tightly set medium-green sprouts.
hybridearlygreenwind-resistantDiablo
A high-yielding main-season hybrid prized for uniform, smooth, firm sprouts and excellent holding ability in the field.
Variety details for Diablo
Tall stalks densely packed with uniform, round, green sprouts.
hybridmain-seasongreenhigh-yieldWants a full long season and rewards it with a heavy, even set.
Falstaff
A striking red-purple sprout that holds much of its color when cooked (best steamed or roasted quickly).
Variety details for Falstaff
Deep red-purple sprouts on purple-flushed stalks.
hybridredpurpleornamentalHandsome and sweet after frost, though yields run a bit lighter than the green workhorses.
Red Rubine
An open-pollinated red-purple heirloom with rich color and full, nutty flavor.
Variety details for Red Rubine
Reddish-purple sprouts along a purple-tinged stalk.
heirloomopen-pollinatedredpurpleLower-yielding and later than hybrids but beautiful in the garden and on the plate, and it can be saved as seed.
Churchill
A widely adaptable early hybrid that performs across many climates and produces smooth, uniform sprouts over a long picking window.
Variety details for Churchill
Medium-tall plants with smooth, uniform green sprouts.
hybridearlygreenadaptableA forgiving, reliable choice for a first crop.
Grower tips
Notes from growers, tagged with the zone they grow in. A person reads every post before it appears.
Nobody has posted about Brussels Sprouts yet. The first one usually saves someone a season.
Free account. Your post shows your grower name and zone, never your email.