Add it to your home screen and it opens full screen: no browser bars, one tap away, and everything stays signed in. Free, nothing to download from an app store.
- Tap the Share button in your browser
- Scroll down and choose “Add to Home Screen”
- Open GrowSomeFood from your home screen
- Open your browser’s menu
- Choose “Add to Home screen” or “Install app”
- Open GrowSomeFood from your home screen
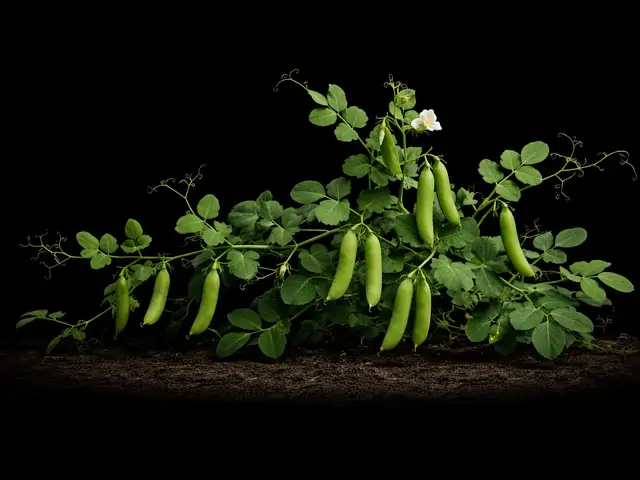
Pea
The garden pea is entirely safe. Do not confuse with ornamental sweet pea (Lathyrus), whose seeds are toxic.
Overview
The cool-season legume that opens and closes the garden year: sweet pods in spring and fall, frost-hardy vines, and free nitrogen for the bed.
Peas are the crop that races the calendar from the other end. While the tomatoes are still under lights, peas are already in the cold spring ground, climbing and flowering in weather that would kill a bean. They're a cool-season legume — frost-hardy, quick, and sweetest when nights are chilly — which makes them the natural bookend around your summer crops, sown in earliest spring and again for fall.
Three types share the name: shelling (English) peas, grown for the round seeds you pop from the pod; snap peas, with plump edible pods eaten whole; and snow peas, with flat tender pods for stir-fries. All three grow identically — the only real decision beyond type is dwarf vs. tall, and even the dwarfs climb better with support. As legumes, they fix their own nitrogen and leave the bed richer than they found it.
At a glance
- Sun
- Full sun · Part sun
- Water
- Medium
- Spacing
- 1–3 in (typ. 2)
- Mature height
- 18–84 in (typ. 48)
- Start by
- Direct sow · Transplant
- Frost
- Hardy
- Germination
- 6–21 days (typ. 9) @ 40–85 °F (typ. 65)
- Spread
- 4–12 in (typ. 8)
- Soil
- Well-drained
- Temperature
- Damaged below 24°F · struggles above 85°F
- Seed ready
- 85–110 days (typ. 95) (for saving)
- Support
- Trellis-friendly
When to plant
Zone 7a typical frost: last Apr 10 · first Oct 25 (spring frost runs Mar 27–Apr 24 in a typical spread of years)
Life stages
- Germination day 0–9 from sowing
-
Keep soil moist, not soggyevery 3 dPeas germinate in cold soil but rot in cold wet soil. Water in at sowing, then let the surface dry slightly between waterings.
-
Cover the row from birdsBirds pull emerging pea sprouts for the swollen seed below. A floating row cover or netting over the row protects them for the first two weeks.
Seeds rotting in cold, saturated soil (sow into raised, well-drained beds)Birds tugging up sprouts -
Keep soil moist, not soggyevery 3 d
- Seedling day 9–28 from sowing
-
Set the trellis before they reach for itEven 'dwarf' peas climb better than they stand. Install netting, brush, or a fence at planting or first-leaf stage so the tendrils grab from day one.
-
Thin to 2 inches apartPeas tolerate crowding better than most crops, but 2 inches in the row gives airflow that holds off powdery mildew.
Damping off in cold wet spellsPale, stunted seedlings (soil still too cold, they will catch up) -
Set the trellis before they reach for it
- Vining day 24–45 from sowing
-
Guide tendrils onto the supportevery 7 dTuck the first climbing shoots into the netting; after that they self-attach. Well-supported vines dry fast and dodge disease.
-
Water about 1 inch per weekevery 7 dSteady moisture through vining builds the vines that will carry the crop. Water at the base to keep foliage dry.
-
Weed shallowlyPeas have delicate surface roots; pull weeds small and avoid deep hoeing near the row.
Aphids clustering on shoot tipsWhite powdery film on leaves in warm, still air -
Guide tendrils onto the supportevery 7 d
- Flowering day 45–70 from sowing
-
Keep water steady through bloomevery 4 dMoisture swings at flowering drop blossoms and produce tough, uneven pods. Same schedule, every week.
-
Watch for heat cutting bloom shortSustained days above 80°F abort flowers and end the crop. Nothing fixes it but cooler weather or an earlier sowing next year.
Blossoms dropping as days warm past 80°FPowdery mildew climbing the vines -
Keep water steady through bloomevery 4 d
- Pod fill day 58–85 from sowing
-
Keep pods filling with even waterevery 4 dThis is when consistent moisture pays off as plump, sweet pods. Drought now makes small, starchy peas.
-
Scout for pea weevil at the podsSmall notches on pods and adults on blossoms signal pea weevil laying into developing seeds.
Pea weevil damage in the podsFlat, undersized pods from heat or drought -
Keep pods filling with even waterevery 4 d
- Harvest day 62–90 from sowing
-
Pick every 2-3 days at peakevery 3 dSnow peas when pods are flat and tender; snap peas when plump and crisp; shelling peas when the pods swell round but the peas are still bright and sweet. Frequent picking keeps the vines producing.
-
Pull spent vines when heat ends the cropChop-and-drop the nitrogen-rich vines or turn them under - they feed the bed for whatever follows.
Pods turning dull, waxy, or starchy (overmature - pick and shell for the pot)Whole planting fading fast as heat arrives -
Pick every 2-3 days at peakevery 3 d
Harvest
- Style
- Repeated picking
- Typical yield
- 20–70 pods (typ. 40)
- By weight
- 8–32 oz (typ. 16)
- Snow types: pods flat, bright, and tender with tiny peas inside
- Snap types: pods plump, glossy, and crisp enough to snap
- Shelling types: pods rounded and full but peas still bright green and sweet
Watch out for
Powdery Mildew High
Powdery mildew is a fungal disease that coats leaves - and often stems, buds, and fruit - in a white-to-gray powder that looks like spilled talcum. It is not one fungus but a large family of them, each fairly specialised to its own group of plants, which is why mildew on one crop rarely jumps to an unrelated one beside it. Unlike most leaf diseases it does not need wet leaves: it thrives on warm dry days followed by humid nights, and it takes hold fastest where plants stand crowded in still air or in shade. The coating blocks light, so heavily covered leaves yellow, brown, and drop early. On many plants that is mostly disfiguring and arrives late enough not to matter; where it strips away the leaves a crop still needed to finish, it costs you size, sweetness, and quality.
Watch for: Round white powdery spots on the upper leaf surfaces that spread and merge until whole leaves look dusted. It usually starts on the oldest, lowest, most shaded leaves and works upward, so check there first. Look at the undersides too, and at stems, buds, and flower stalks, which get coated as it advances. Leaves that yellow, brown, curl, or go crisp and drop early under the coating. New growth that opens small, crumpled, or twisted where the fungus has reached the shoot tips. On plants where it gets onto the fruit, a dull gray film, russeted or scarred skin, and cracking. Late in the season, tiny dark specks scattered through the white felt - that is the fungus setting up to overwinter on the debris.
Prevent: Give plants room. Crowding and still air are the biggest single driver, so space at the full recommended distance, thin seedlings properly, and divide or prune out congested growth until air moves through the plant. Full sun and an open position help; deep shade and a still corner against a wall are where it always starts. Water at the base rather than overhead, and water early in the day so nothing stays damp overnight. Keep plants evenly watered - drought stress at the roots leaves them far more susceptible, even though the fungus itself likes dry air. Go easy on nitrogen, since soft lush growth is the most vulnerable. Where resistant varieties exist for what you are growing, choosing one is the single most effective thing you can do on a plant that mildews every year. Clear infected leaves and stems away at the end of the season rather than composting them.
Treat: Start early: sprays protect healthy tissue, they do not clean up leaves that are already coated. Pick off and bin the worst leaves as soon as you see them, and open the plant up by thinning or pruning so air moves through. On anything that regrows quickly, shearing the whole plant back forces a clean flush and beats spraying. If it keeps spreading, potassium bicarbonate, horticultural oil, or neem applied weekly will hold it - cover both leaf surfaces. Sulfur also works, but it burns the foliage of some plants, should never go on in heat, and must not be mixed with or applied close behind an oil spray. Whatever you use must be labeled for the plant you are treating: follow that label and observe its pre-harvest interval on anything you eat. Do not compost badly infected material. Late-season mildew on a plant that is finishing anyway is usually cosmetic; on a crop still filling out it is worth acting on.
The single most common reason a pea planting quits - and it often arrives hand-in-hand with the heat that was ending the crop anyway. Sowing early so the crop finishes before mildew weather peaks, and trellising the vines up off the ground, do more than any spray. Once it takes a warm-weather crop, harvest what you can and pull the vines.
Aphids Medium
Aphids are small soft-bodied sap-suckers - green, black, gray, pink, or waxy white, and mostly wingless - that gather in dense colonies on the tenderest new growth: shoot tips, buds, and the undersides of young leaves. They breed extremely fast in mild weather, so a few can become hundreds inside a week. Their feeding curls and distorts soft growth, and the sticky honeydew they excrete coats everything below and turns black with sooty mold. Ants often farm and defend the colonies for that honeydew. A few aphids are normal on almost any plant and a healthy plant shrugs them off; only dense, persistent colonies do real damage, and some aphids also spread plant viruses as they feed.
Watch for: Dense clusters of tiny insects packed onto shoot tips, flower buds, and the undersides of young leaves. Curled, cupped, or distorted new growth that never opens properly. A sticky shine on the leaves - and on whatever sits under the plant - that later goes black with sooty mold. Tiny white cast skins left behind where a colony has been feeding. Ants running steadily up and down the stems, which is often the first thing you notice. Mottled, streaked, or misshapen leaves that do not grow out can mean a virus the aphids brought with them rather than the feeding itself.
Prevent: Go easy on nitrogen: the soft, lush growth that heavy feeding produces is exactly what aphids breed on. Check new growth once a week through spring and early summer so you catch colonies while they are still small, and rub the first few out with your fingers. Leave flowering plants nearby and skip broad-spectrum sprays - ladybugs, lacewings, hoverflies, and parasitic wasps do most of this work for free, and they only stay if there is something for them to eat. Keep ants off the plant where you can, since they protect aphids from those predators. Water steadily so plants are not stressed, and check any new plant over before you bring it home or move it indoors, since aphids usually arrive on something else.
Treat: Knock the colonies off with a hard jet of water and repeat every few days - on most plants that alone ends it. Pinch out or prune off the worst-infested tips rather than treating the whole plant. If colonies keep rebuilding, spray insecticidal soap or horticultural oil directly onto the insects, covering leaf undersides, and repeat weekly until they are gone; treat early or late in the day, and never spray a wilted or heat-stressed plant. Avoid broad-spectrum insecticides - they kill the ladybugs, lacewings, and parasitic wasps that were about to solve the problem for you, and aphid numbers usually come back worse afterward. Anything you spray must be labeled for the plant you are treating; follow that label and observe its pre-harvest interval. On anything you eat, wash leaves, heads, and buds well before use, since aphids hide down in crowns, folds, and tight growth.
The pea aphid is a large green species that colonizes growing tips and flower stalks and can carry viruses into the crop - the main concern here, more than the feeding itself, which is usually cosmetic on vigorous vines.
Root Rot Medium
Root rot is not one organism but a group of soil fungi and water molds - Pythium, Phytophthora, Fusarium, Rhizoctonia and others - that sit harmlessly in most soils and only turn destructive when the ground stays saturated. Waterlogged soil drives the air out, the roots suffocate, and the weakened tissue is invaded and goes soft, brown, and stringy. Because the damage is underground you usually see it first as something that looks like drought: wilting, yellowing, stunting, a plant that does not respond to being watered. Overwatering, heavy compacted ground, a low spot that collects runoff, a pot with no drainage or a saucer left standing full, and cold wet soil in winter are the usual causes. Once roots have actually rotted there is no cure - this is a problem you prevent rather than treat.
Watch for: Wilting in the middle of the day on a plant whose soil is damp - the classic tell, and the reason people water a rotting plant and finish it off. Leaves yellowing from the bottom up, dull off-color foliage, and growth that stalls for no visible reason. Whole shoots, or one side of the plant, collapsing while the rest still looks fine. Soft, dark, or mushy tissue at the base of the stem or at the crown, sometimes with a sour smell. Lift a failing plant and look at the roots: healthy ones are firm and pale, rotted ones are brown or black and slimy, and the outer layer slips off between your fingers leaving a thread of core behind. Seedlings that topple over at soil level are the same problem, called damping-off.
Prevent: Drainage is the whole defense. Match the plant to the site first - something that wants sharp drainage will not survive heavy clay or a low, water-collecting spot however well you tend it. Where the ground is heavy, plant on a raised bed, berm, or slope, or grow in a container. Set plants at the depth they were already growing, since burying the crown or the root flare is a common cause of rot, and keep mulch pulled back a few inches from the stem base instead of piled against it. Water the soil rather than the calendar: check that the top inch or two is dry before watering again, cut back hard in cool weather and winter dormancy, and never leave a pot standing in a full saucer. Do not plant or dig in soggy ground, and go easy on rich amendments for plants that want it lean. Rotate annual crops, and start with clean healthy plants and fresh mix.
Treat: There is no cure for tissue that has already rotted, so act on the conditions rather than looking for a spray. Stop watering at once and fix the drainage - open up compacted soil, or move the plant to a raised, sharply drained position or a container. Lift a badly affected plant, cut away every soft dark root and rotted section with a clean blade back to firm pale tissue, and replant only the healthy parts into fresh free-draining soil or mix. Often the better move is to give up on the plant and save its offspring instead: cuttings, offsets, or divisions taken from firm healthy growth root readily and give you a clean start. Bin the rotted material rather than composting it, and correct the drainage before you replant, because the rot comes straight back in the same wet spot.
Cold, wet spring soil is when peas are vulnerable. Sow into raised, well-drained beds, do not overwater cold ground, rotate legumes, and resow into warmer, drier soil if an early planting fails.
Fusarium Wilt Medium
A soil-borne fungus (Fusarium oxysporum f. lini) that infects flax roots and clogs the water-conducting tissue, causing wilting, yellowing, stunting, and death, and persisting in the soil for years - the classic 'flax sick' soil problem.
Watch for: Wilting, yellowing, and browning of plants (often in patches), stunting, and death, worse where flax has grown before ('flax sick' ground).
Prevent: Grow resistant varieties; rotate away from okra (and related mallows) for several years; ensure good drainage; control root-knot nematodes, which open the door to wilt.
Treat: No cure for infected plants - remove them, and rotate away from flax for several years; resistant varieties and rotation are the real controls.
Resistant varieties are the real defense; look for wilt-resistant labeling if it has appeared in your beds.
Pea Weevil Medium
A small brownish beetle whose larvae bore into developing pea seeds inside the pod; adults overwinter in debris and lay eggs on young pods at bloom.
Watch for: Adults on blossoms in spring, small notches chewed in pods, and round exit holes or hollowed peas at shelling or in stored seed.
Prevent: Float row cover over the crop through flowering, clean up crop debris in fall, and rotate the pea patch away from last year's site.
Treat: Hand-pick adults and destroy infested pods; freezing saved seed for several days kills any larvae before storage.
Mainly a problem for seed-savers and dry-pea growers - freeze saved seed to be sure it is weevil-free.
Good & bad neighbors
Varieties · 6
Large flat, medium-green pods, often two to a stem.
The standard-bearer snow pea: broad, flat, tender pods borne in pairs on compact 30-inch vines with an unusually strong disease package. Productive, easy, and forgiving - the snow pea to grow if you grow only one.
Plump, rounded bright-green pods on vigorous tall vines.
The original snap pea and still the benchmark: plump, intensely sweet edible pods on tall 6-foot vines that need a real trellis. A 1979 All-America Selections winner, born from a cross of snow and shelling peas. Pick young for pods, or let them fill for shell-and-snap. Best eaten within minutes of picking.
Small, smooth, light-green peas in short straight pods on 2-3 foot vines.
The classic extra-early shelling pea from the early 1900s, prized for cold tolerance and the earliest harvest of the season. Its smooth (starchy rather than wrinkled) seeds germinate in cold soil better than most, so it's the pea to sow at the very first opening of spring. Less sugary than modern wrinkled types - traditionally a soup and canning pea.
Long, pointed dark-green pods held in pairs above the foliage.
A favorite shelling pea for the freezer: long, slender pods carrying 8-11 sweet peas each, borne in pairs for fast picking, on tidy 28-inch vines. High-yielding and disease-resistant - the reliable choice for putting peas up.
Short, bushy plants with small dark-green pods.
A compact 18-inch bush shelling pea that has stayed popular for over a century for its sweet flavor and tidy habit - the pea for small beds, containers, and short supports. Each plump pod holds 6-9 tender peas.
Medium-sized dark-green pods on 24-30 inch vines.
The pea for warmer gardens and late plantings: bred to hold sweetness in heat that turns other shelling peas starchy, and cold-hardy at the other end. The go-to for zone 7-9 spring crops that risk running into early heat.
Grow
Peas are usually direct-sown into cool workable soil, a trellis in place, weeks before your last frost - but they transplant fine from deep modules or soil blocks if you keep the rootball intact.
Peas are normally direct-sown — the seed germinates in soil down to 40°F, so there's usually no reason to bother with anything else. Sow 1 inch deep and about 2 inches apart as soon as the ground is workable in spring, 4 to 6 weeks before your last frost. Cold soil just means slower sprouting (up to three weeks near 40°F versus a week in warm soil); soaking seed overnight speeds things along.
What peas resent is root disturbance, not indoor starting. Started in deep modules, root trainers, soil blocks or a length of guttering and slid out with the rootball intact, they transplant perfectly well — and that's worth doing for an early crop in a short season, in a cold wet spring when seed would rot, and anywhere birds and mice strip the row before it emerges (a problem this file raises under Threats). Set them out young, at three or four true leaves, before the roots circle.
Set the support before or at sowing: netting, brush, a fence, or twine between stakes. Peas fix their own nitrogen, so skip nitrogen-heavy fertilizer — it grows lush vines with few pods. A one-time dusting of pea/bean inoculant (the right Rhizobium bacteria) in soil that has never grown legumes pays off in bigger yields; after a couple of legume seasons the bacteria are already there.
Care
Steady water, a good trellis, shallow weeding - and a race against heat, which is what ends the crop.
Pea care is short because their season is short. Give about an inch of water a week, kept steady — moisture swings drop blossoms and toughen pods — and water at the base to keep the foliage dry against powdery mildew. Keep vines tucked onto their support; well-aired vines dry quickly and dodge disease. Weed shallowly, since pea roots run near the surface.
Resist the urge to fertilize. Peas make their own nitrogen through root nodules, and extra nitrogen means leaves instead of peas. The one thing you can't manage is heat: once days settle above 80°F, flowering stalls and the vines fade. That's not a failure — it's the signal to pull the nitrogen-rich vines into the compost or turn them under, and hand the warm bed to beans or squash.
Harvest
Pick every couple of days at the sweet spot for your type - sugars turn to starch fast once pods peak.
Peas run on sugar, and that sugar converts to starch within hours of peak, so harvest is a frequent, hands-on job. Snow peas: pick when pods are flat, bright, and tender, before the peas swell. Snap peas: pick when pods are plump, glossy, and crisp enough to snap cleanly. Shelling peas: pick when pods have rounded and filled but the peas inside are still bright green and sweet — a dull, waxy pod has gone starchy. Pick with two hands so you don't tear the vine.
Go through the vines every two or three days at peak. Frequent picking is not just about catching the sweet window — it keeps the plant setting new pods instead of ripening seed. Any pods that get away and turn tough can dry fully on the vine and become next year's seed.
Storage
Eat or chill fast - peas are a race against their own sugar. Freeze the surplus the day you pick it.
Fresh peas are the definition of perishable: their sugar starts turning to starch the moment they leave the vine, faster at room temperature. Refrigerate them the instant you come in, unwashed, in a bag or container — they hold 5 to 7 days but lose sweetness daily. For the best flavor, cook or freeze on picking day.
Freezing is where a big pea harvest shines: blanch shelled peas or whole snap/snow pods for 90 seconds, plunge into ice water, drain, and freeze flat on a tray before bagging. Home-frozen peas keep their garden sweetness for 8 to 12 months and put store-frozen to shame. Shelling peas left to fully dry on the vine store for years as soup peas.
Propagation & seed saving
Peas self-pollinate and come true - leave a few pods to dry on the vine and you never buy seed again.
Peas are one of the easiest seed crops there is, second only to lettuce. They self-pollinate inside the closed flower before it even opens, so varieties come true with almost no isolation — a few feet between varieties is plenty. This is the plant Gregor Mendel used to found the science of genetics precisely because its offspring are so predictable.
To save seed, simply stop picking a few of your best pods and let them ripen fully on the vine until the pods are tan, papery, and rattle. Pull them (or the whole plant at season's end), dry another week or two indoors, then shell. Store the dry peas cool and dark and they stay viable 3 to 4 years. One healthy plant makes far more seed than you sowed — a short row of saved seed replants your whole pea patch next spring for free.
Nutrition
A rare vegetable with real protein, plus fiber, vitamin C, vitamin K, and folate - and garden-fresh, they're sweetest of all.
Peas punch above their weight nutritionally because, as legumes, they carry genuine plant protein — around 8 grams per cooked cup — alongside the vitamins you'd expect from a green vegetable. They're an excellent source of vitamin C, vitamin K, thiamine, manganese, and folate, and their fiber (both soluble and insoluble) supports steady digestion and blood sugar.
The freshness advantage is real and measurable: because pea sugars convert to starch and vitamin C degrades within days of picking, garden peas eaten fresh are meaningfully sweeter and more nutritious than any that traveled to a store. Pea shoots — the tender growing tips — are a bonus green rich in vitamins A and C, worth harvesting when you thin the vines.
In the kitchen
Snap and snow pods raw or barely cooked; shelling peas sweet from the pod or into soup - and don't skip the shoots.
Match the type to the plate. Snap peas are the great garden snack — eaten raw, tossed whole into stir-fries, or blanched 60 seconds for a crisp side. Snow peas are built for high heat: they stay crisp in stir-fries and hold their shape in a quick sauté. Shelling peas are sweetest straight from the pod in the garden; in the kitchen they shine with butter and mint, folded into risotto and pasta, or blitzed into a bright spring soup.
Cook peas briefly — a couple of minutes at most — because overcooking is what gave institutional peas their grey, mushy reputation; garden peas need barely any. When the vines wind down, harvest the tender pea shoots and use them raw in salads or wilted like spinach. And a glut of shelling peas that outran you? Let them dry into split-pea soup stock for winter.
Traditional & historical uses
No herbal tradition to speak of - peas are food, but their fiber and protein carry real dietary health value.
This section records how people have traditionally used this plant, and what is known about the risks. It is history and general information — not medical advice, and not a recommendation to treat anything. Plants are not dosed like medicines, some interact with prescriptions, and some are harmful in ways that are not obvious. Talk to a clinician before using any plant medicinally.
Honest answer: peas have no meaningful herbal or folk-medicine tradition — they've always been food, not remedy. Their health contribution is entirely dietary, and on those terms it's a good one: as a legume, the pea delivers protein and soluble fiber that help steady blood sugar and cholesterol, the same mechanisms that put beans and lentils in every heart-healthy eating pattern. The vitamin C and folate are ordinary vegetable virtues, best preserved by eating them fresh and lightly cooked. Treat peas as excellent, nutrient-dense food and skip the supplement aisle.
History
One of humanity's oldest crops - a Neolithic staple, a Mendel research subject, and the plant that founded genetics.
The pea is among the very first plants humans farmed. Domesticated in the Fertile Crescent alongside wheat and barley around 10,000 years ago, dried peas were a staple protein across the ancient world — carried, stored, and boiled into pottage long before anyone ate them green. Fresh 'garden' peas eaten sweet from the pod are a comparative luxury, a fashion that swept European courts only in the 1600s.
The pea's most famous role came in a monastery garden in the 1860s, where Gregor Mendel crossed pea varieties — tall and short, round and wrinkled, green and yellow — and from their tidy, predictable offspring worked out the laws of inheritance, founding the science of genetics. It was the pea's reliable self-pollination, the same trait that makes it so easy to save true seed, that made the discovery possible.
Troubleshooting
Most pea trouble is heat, cold-wet soil, or powdery mildew - timing and airflow solve nearly all of it.
Vines fine, but no pods / dropped blossoms: heat above 80°F — peas simply stop in warm weather; sow earlier next year or grow a fall crop. Seeds never came up: cold, saturated soil rotted them; sow into raised, well-drained beds and don't overwater. White powdery film on leaves: powdery mildew, worst in warm, still, crowded plantings — space for airflow, water at the base, and choose resistant varieties. Yellowing, wilting from the base: fusarium wilt or root rot in wet soil — rotate away from legumes and improve drainage. Tiny holes in pods and seeds: pea weevil — row cover through bloom, and clean up debris where adults overwinter. All leaves, few pods: too much nitrogen; peas make their own, so hold the feed.
Growing across climates
Cold zones grow a long spring crop; mild zones flip to fall, winter, and late-winter windows around the summer heat wall.
Zones 2-5: pea heaven — long, cool springs let the crop take its time; sow as soon as the soil is workable and often squeeze in a fall crop too. Zones 6-7: a classic two-season crop, early spring and again in late summer for fall, though spring plantings must beat the first hot spells. Zones 8-9: the calendar flips — peas become a fall, winter, and late-winter crop, with summer as the off-season; sow in fall for winter pods and again in January-February for a spring crop. Zones 10-11: grow strictly through the cool, dry months, the window wrapping the new year. Zones 12-13: genuinely marginal — the tropics rarely cool enough; try the very coolest weeks with heat-tolerant varieties and afternoon shade, and manage expectations.
Cook it
All 11 recipes →Grower tips
No grower tips for Pea yet. Yours could be the first.
Sign in to share what works in your garden.