
Add it to your home screen and it opens full screen: no browser bars, one tap away, and everything stays signed in. Free, nothing to download from an app store.
- Tap the Share button in your browser
- Scroll down and choose “Add to Home Screen”
- Open GrowSomeFood from your home screen
- Open your browser’s menu
- Choose “Add to Home screen” or “Install app”
- Open GrowSomeFood from your home screen
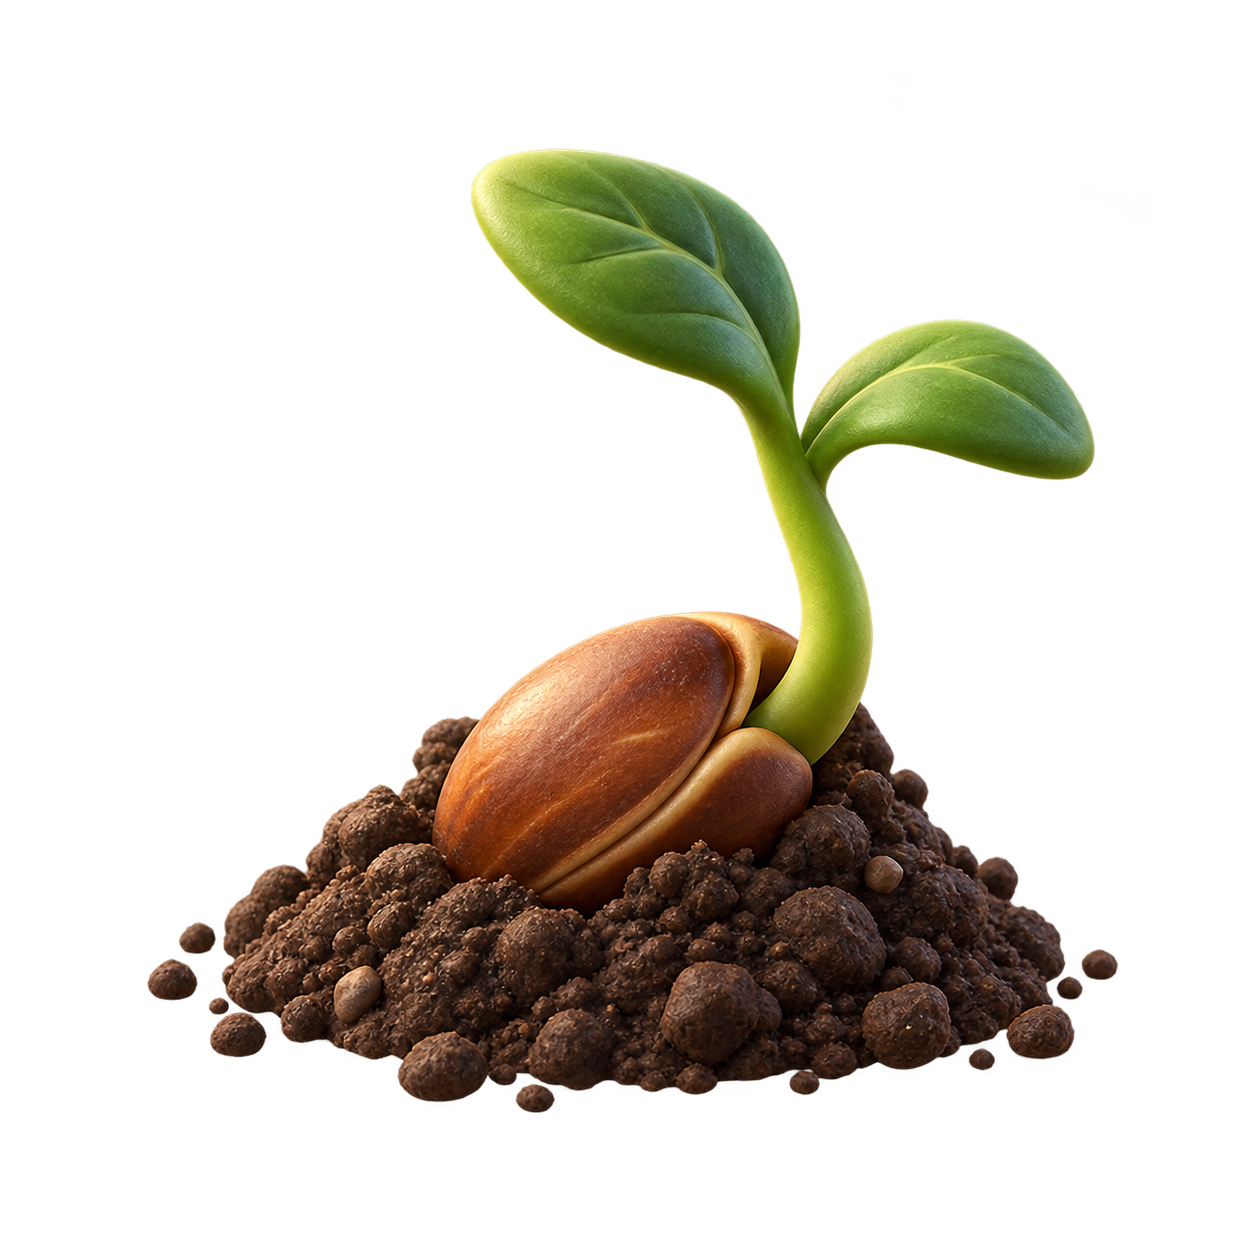
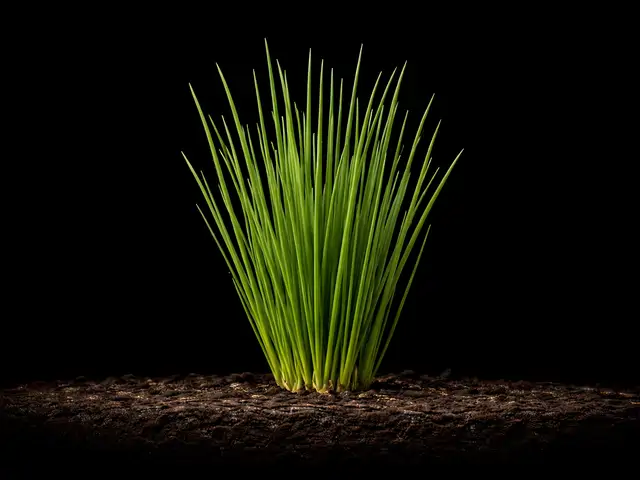
Chives
The easiest perennial herb: a cold-hardy allium that returns every spring, gives edible flowers, and multiplies by division for free.
Safety notes Safe for people; like all alliums, toxic to dogs and cats in quantity.
Overview
Chives are the herb that asks almost nothing and gives for a decade. A hardy perennial member of the onion family, a single clump comes back every spring - usually the first green thing up in the garden - and supplies mild, oniony snips right through the season. Deer and rabbits leave it alone, and the purple pompom flowers in late spring are both beautiful and edible.
Quick facts
- Sprouts in
- 14 daysRange: 7–21 days
- Soil temperature
- 70 °FRange: 60–80 °F
- Height
- 12 inRange: 8–18 in
- Spread
- 12 inRange: 6–18 in
- Cold
- Takes hard frostdamaged below -30°F
- Heat
- Struggles above 90°F
- Life cycle
- Perennial, lives about 10 years
- Save seeds
- About 90 days after plantingRange: 80–110 days
- Self-sows
- Yes, expect volunteers
- Soil
- Well-drained
- Water
- Medium
- Plant spacing
- 10 inRange: 6–12 in
When to plant
Nothing is open today. Spring transplanting opens 5 months, Mar 13 to May 1.
- Transplant Mar 13 – May 1 Opens in 144 daysAbout 4 weeks before to 3 weeks after your last frost (Apr 10 here)Set out divisions or transplants around last frost; chives are cold-hardy and establish in cool weather.
- Direct sow Mar 27 – May 1 Opens in 158 daysAbout 2 weeks before to 3 weeks after your last frost (Apr 10 here)Seed is slower to establish than division; sow in cool soil and be patient.
- Transplant Aug 30 – Sep 27 Opens in 314 daysAbout 8 weeks before to 4 weeks before your first frost (Oct 25 here)Divide and replant established clumps in early fall so roots settle before winter.
Frost here: last around Apr 10 (Mar 27 to Apr 24 most years), first around Oct 25. Zone averages, your own yard may run a week or two either way.
Life stages
Establish, grow, repeat
Getting established and returning each season are different parts of the story.
Stage 1 of 5 · Getting established
Establishing (year 1)
Day 0 to 90 from sowing
Care at this stage
-
Keep new clumps evenly moist
Whether from seed, a divided clump, or a transplant, steady moisture the first season builds the root mass that carries it for years.
-
Harvest lightly the first year
Take only a little the first season so the clump can bulk up; it will reward you generously from year two on.
Months are typical seasonal windows; climate, variety, and plant age can shift them.
Harvest
- Stems 6 inches or taller and deep green
- Cut whole stems about an inch above the crown, not just the tips
- Flowers picked just as the purple pompoms open
- Cut stems as needed all season · weekly
- Water in dry spells to keep leaves tender
Per plant 30 to 120 stems, 4 to 20 ozPicking cut and it regrows
Cook with chives
Watch out for
5 to know. None are high-risk for chives. None are active in October.
Root RotSeverity Medium DiseaseSeason: Nov–MarWilting in the middle of the day on a plant whose soil is damp - the classic tell, and the reason people water a rotting plant and finish it off.
Rots at the crown where winters are wet, and raising the bed is the single best defense. Lift and divide an affected clump, replanting only firm, healthy pieces.
Wilting in the middle of the day on a plant whose soil is damp - the classic tell, and the reason people water a rotting plant and finish it off. Leaves yellowing from the bottom up, dull off-color foliage, and growth that stalls for no visible reason. Whole shoots, or one side of the plant, collapsing while the rest still looks fine. Soft, dark, or mushy tissue at the base of the stem or at the crown, sometimes with a sour smell. Lift a failing plant and look at the roots: healthy ones are firm and pale, rotted ones are brown or black and slimy, and the outer layer slips off between your fingers leaving a thread of core behind. Seedlings that topple over at soil level are the same problem, called damping-off.
There is no cure for tissue that has already rotted, so act on the conditions rather than looking for a spray. Stop watering at once and fix the drainage - open up compacted soil, or move the plant to a raised, sharply drained position or a container. Lift a badly affected plant, cut away every soft dark root and rotted section with a clean blade back to firm pale tissue, and replant only the healthy parts into fresh free-draining soil or mix. Often the better move is to give up on the plant and save its offspring instead: cuttings, offsets, or divisions taken from firm healthy growth root readily and give you a clean start. Bin the rotted material rather than composting it, and correct the drainage before you replant, because the rot comes straight back in the same wet spot.
Drainage is the whole defense. Match the plant to the site first - something that wants sharp drainage will not survive heavy clay or a low, water-collecting spot however well you tend it. Where the ground is heavy, plant on a raised bed, berm, or slope, or grow in a container. Set plants at the depth they were already growing, since burying the crown or the root flare is a common cause of rot, and keep mulch pulled back a few inches from the stem base instead of piled against it. Water the soil rather than the calendar: check that the top inch or two is dry before watering again, cut back hard in cool weather and winter dormancy, and never leave a pot standing in a full saucer. Do not plant or dig in soggy ground, and go easy on rich amendments for plants that want it lean. Rotate annual crops, and start with clean healthy plants and fresh mix.
Root rot is not one organism but a group of soil fungi and water molds - Pythium, Phytophthora, Fusarium, Rhizoctonia and others - that sit harmlessly in most soils and only turn destructive when the ground stays saturated. Waterlogged soil drives the air out, the roots suffocate, and the weakened tissue is invaded and goes soft, brown, and stringy. Because the damage is underground you usually see it first as something that looks like drought: wilting, yellowing, stunting, a plant that does not respond to being watered. Overwatering, heavy compacted ground, a low spot that collects runoff, a pot with no drainage or a saucer left standing full, and cold wet soil in winter are the usual causes. Once roots have actually rotted there is no cure - this is a problem you prevent rather than treat.
Rust (Allium)Severity Medium DiseaseSeason: Jun–AugOrange-red raised dots and streaks on the leaf blades, worst in humid spells and on crowded, poorly spaced or congested plantings.
Rarely fatal to an established clump. Shearing the whole thing off and letting a clean flush regrow is the fix and the harvest at once.
Orange-red raised dots and streaks on the leaf blades, worst in humid spells and on crowded, poorly spaced or congested plantings.
Strip or shear off the worst-affected leaves early and let clean growth come back, improving airflow at the same time. A bulb crop usually still matures, so harvest on schedule rather than writing it off - rust rarely reaches the bulb itself.
Give wide spacing and full sun so the leaves dry quickly, avoid overhead watering and excess nitrogen, divide congested perennial clumps, and rotate alliums on a three-year cycle. Rust-tolerant varieties are available in some allium crops.
A fungal disease that raises bright orange pustules on allium leaves. The pustules destroy green tissue, and since those leaves are what feed the bulb, a heavy infection shrinks the crop or weakens the clump. It builds in humid weather, in crowded plantings and in high-nitrogen soil, and it rarely reaches the bulb itself.
AphidsSeverity Low PestSeason: Apr–JulDense clusters of tiny insects packed onto shoot tips, flower buds, and the undersides of young leaves.
Aphids tuck in among the stems and on the flower buds. A hard shear of the clump removes an infested flush outright and it regrows clean.
Dense clusters of tiny insects packed onto shoot tips, flower buds, and the undersides of young leaves. Curled, cupped, or distorted new growth that never opens properly. A sticky shine on the leaves - and on whatever sits under the plant - that later goes black with sooty mold. Tiny white cast skins left behind where a colony has been feeding. Ants running steadily up and down the stems, which is often the first thing you notice. Mottled, streaked, or misshapen leaves that do not grow out can mean a virus the aphids brought with them rather than the feeding itself.
Knock the colonies off with a hard jet of water and repeat every few days - on most plants that alone ends it. Pinch out or prune off the worst-infested tips rather than treating the whole plant. If colonies keep rebuilding, spray insecticidal soap or horticultural oil directly onto the insects, covering leaf undersides, and repeat weekly until they are gone; treat early or late in the day, and never spray a wilted or heat-stressed plant. Avoid broad-spectrum insecticides - they kill the ladybugs, lacewings, and parasitic wasps that were about to solve the problem for you, and aphid numbers usually come back worse afterward. Anything you spray must be labeled for the plant you are treating; follow that label and observe its pre-harvest interval. On anything you eat, wash leaves, heads, and buds well before use, since aphids hide down in crowns, folds, and tight growth.
Go easy on nitrogen: the soft, lush growth that heavy feeding produces is exactly what aphids breed on. Check new growth once a week through spring and early summer so you catch colonies while they are still small, and rub the first few out with your fingers. Leave flowering plants nearby and skip broad-spectrum sprays - ladybugs, lacewings, hoverflies, and parasitic wasps do most of this work for free, and they only stay if there is something for them to eat. Keep ants off the plant where you can, since they protect aphids from those predators. Water steadily so plants are not stressed, and check any new plant over before you bring it home or move it indoors, since aphids usually arrive on something else.
Aphids are small soft-bodied sap-suckers - green, black, gray, pink, or waxy white, and mostly wingless - that gather in dense colonies on the tenderest new growth: shoot tips, buds, and the undersides of young leaves. They breed extremely fast in mild weather, so a few can become hundreds inside a week. Their feeding curls and distorts soft growth, and the sticky honeydew they excrete coats everything below and turns black with sooty mold. Ants often farm and defend the colonies for that honeydew. A few aphids are normal on almost any plant and a healthy plant shrugs them off; only dense, persistent colonies do real damage, and some aphids also spread plant viruses as they feed.
Onion MaggotSeverity Low PestSeason: Apr–JunIndividual plants yellowing and wilting while their neighbors look fine, and - on pulling one - small white maggots with brown, slimy rot in the bulb base, shank or stem.
An established chive clump usually shrugs off light pressure - lift it, cut away the damaged portions, and replant only firm pieces.
Individual plants yellowing and wilting while their neighbors look fine, and - on pulling one - small white maggots with brown, slimy rot in the bulb base, shank or stem.
There is no rescue for a maggot-riddled bulb. Pull and destroy infested plants rather than composting them, and never save affected bulbs for replanting. Beneficial nematodes drenched into the soil help suppress the larvae in a bed you have to keep using.
Rotate alliums yearly, cover the crop with row fabric through the fly's spring egg-laying window, space plants out rather than growing them in dense rows, and never plant into fresh manure, which draws the flies in.
The larvae of a small gray fly - the onion fly is the same insect - that lays its eggs at the base of allium plants. The white maggots tunnel into the bulb, shank or stem base, and the damage they leave opens the door to soft rot, so the plant yellows, wilts and collapses into a mush. It is worst in cool, wet springs, in unrotated allium beds, and in dense rows where the maggots can work from one plant to the next.
ThripsSeverity Low PestSeason: Jun–AugSilvery-white streaks and fine speckling on leaves and petals, brown discolored patches, distorted buds and blooms that fail to open properly, and tiny sliver-like insects that drop out when you shake foliage or a flower over a sheet of white paper.
Cosmetic on chives, and since the leaves are the crop, cutting the clump hard and letting it regrow is both the harvest and the control.
Silvery-white streaks and fine speckling on leaves and petals, brown discolored patches, distorted buds and blooms that fail to open properly, and tiny sliver-like insects that drop out when you shake foliage or a flower over a sheet of white paper. Worst in hot, dry spells and on drought-stressed plants.
A strong water spray dislodges light infestations, and on a plant that can take it a hard shear and clean regrowth clears them outright. For heavier pressure use insecticidal soap, neem or spinosad, aimed down into the leaf sheaths and buds where thrips actually shelter, and repeat at intervals since eggs and pupae escape a single spray. Spinosad is a registered insecticide: use only a product labeled for the crop you are treating, follow the label exactly, and observe its pre-harvest interval.
Scout early, before the damage reaches the part of the plant you care about. Start with clean planting stock, keep plants well watered since drought-stressed plants suffer worst, avoid heavy nitrogen, clear weedy hosts nearby, and hang blue or yellow sticky traps to catch the first arrivals. Reflective mulch deters them, and predatory mites, lacewings and minute pirate bugs do real work outdoors.
Tiny slender sap-sucking insects that rasp at leaves, buds and petals and drink what runs out, leaving silvery-white streaking and fine flecking, brown scorched patches, and new growth that comes out twisted or fails to open. They breed fast in hot, dry weather, shelter deep in leaf sheaths, folds and unopened buds where sprays struggle to reach, and several species also transmit plant viruses - which is often more damaging than the feeding itself.
Good & bad neighbors
Plant nearby
-
A classic pairing - the allium scent is credited with deterring carrot rust fly, and the two don't compete for the same space.
-
Cross-reference rather than a companion-planting claim: garlic chives (Allium tuberosum) are the sibling species, split out of this entry into their own page. Flat solid leaves, garlic flavor, white stars in late summer, and much harder self-sowing. The two grow happily side by side and give you both flavors plus two separate bloom seasons.
-
RoseThe classic ornamental pairing - chives underplanted to discourage aphids and, by tradition, black spot on roses.
- Traditional pairings, thin evidence
-
Often interplanted; the allium scent is said to discourage pests, and the perennial habits suit each other. Evidence is anecdotal.
-
Allium aroma may mask the crop from pests; some growers report fewer aphids on nearby tomatoes.

Varieties · 4
You pick one when you add Chives to your garden. Its days to maturity set your harvest window.
Common Chives
The standard onion chive (Allium schoenoprasum): slender hollow grass-like leaves with a mild onion flavor and round purple pompom flowers.
Variety details for Common Chives
Slender, hollow, grass-like green leaves with spherical purple flowers.
onion-flavorpurple-flowerstandardThe default garden chive and the one most seed packets contain.
Staro
A robust culinary selection with thicker, more upright leaves and strong onion flavor, bred for heavy cutting and good disease resistance - a favorite where a productive, chef-grade chive matters.
Variety details for Staro
Dark green, thick, upright tubular leaves, sturdier than common chives.
thick-leafhigh-yieldculinaryGrolau
A Swiss variety selected for vigorous growth and forcing indoors - it thrives in pots and lower light, making it the go-to for a productive winter windowsill chive.
Variety details for Grolau
Long, slender, dark green hollow leaves; compact and pot-friendly.
indoorforcingvigorousForescate
An ornamental-and-culinary chive prized for large, showy rose-pink flowers on a robust clump.
Variety details for Forescate
Slender green tubular leaves with bright pink to rose-purple flowers.
pink-flowerornamentalculinaryFully edible like common chives, but grown as much for its border-worthy bloom.
Grower tips
Notes from growers, tagged with the zone they grow in. A person reads every post before it appears.
Nobody has posted about Chives yet. The first one usually saves someone a season.
Free account. Your post shows your grower name and zone, never your email.