Add it to your home screen and it opens full screen: no browser bars, one tap away, and everything stays signed in. Free, nothing to download from an app store.
- Tap the Share button in your browser
- Scroll down and choose “Add to Home Screen”
- Open GrowSomeFood from your home screen
- Open your browser’s menu
- Choose “Add to Home screen” or “Install app”
- Open GrowSomeFood from your home screen
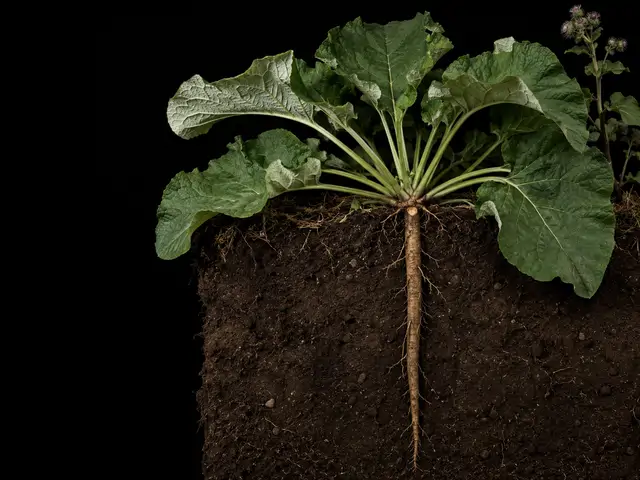
Burdock
Japanese gobo: a long, earthy-sweet taproot that is easy to grow and genuinely hard to dig - and an aggressive self-seeder you must harvest in its first year and never allow to flower.
The root, young peeled leaf stalks and peeled flower stalk are food, and nothing in the plant is poisonous. Two real cautions. Never let it set seed: the hooked burrs tangle in fur, hair and clothing, regularly trap and kill small birds and bats, and are how burdock becomes a weed problem. And buy dried burdock root only from a reputable source - documented atropine poisonings have come from burdock tea adulterated with belladonna root, which looks similar once dried.
Overview
Burdock is grown in Japan as gobo, and it is a serious vegetable there rather than a curiosity - a slender, bark-brown taproot with crisp ivory flesh and a flavor somewhere between artichoke heart, parsnip, and fresh earth. Shredded and stir-fried with carrot, soy, and sesame it becomes kinpira gobo, a dish on tables all over Japan. In the West the same plant is mostly known as the weed with the burrs, which is a pity: it is one of the more interesting things you can pull out of a vegetable bed.
Growing it is easy. Digging it is not. A well-grown gobo root runs two to three feet straight down, is no thicker than a thumb, and snaps if you tug it, so the harvest is a trenching job rather than a pulling job - and that single fact decides how you should plant it. Deep loose soil, a raised bed, a dug trench backfilled with loose compost, or a short-rooted variety in a deep container all make the difference between a satisfying dig and a broken root.
The honest warning comes with it. A second-year burdock throws a five-foot flower stalk and hundreds of hooked burrs that stick to fur, clothing, and passing animals - the burrs are how the plant travels, and small birds and bats are regularly trapped and killed in dense heads of them. Arctium is a listed noxious weed in several states, usually as common burdock (Arctium minus), so check your state list before you sow. The good news is that the containment rule and the quality rule are the same rule: dig the whole crop in its first autumn and never let a plant flower.
Quick facts
- Sprouts in
- 12 days7 to 21
- Soil to sprout
- 68 °F50 to 80
- Life cycle
- Biennial, grown as an annual
- Seed to save
- Second yearafter overwintering a few plants
- Height
- 36 in24 to 96
- Spread
- 30 in18 to 48
- Cold
- Takes hard frostdamaged below -30°F
- Heat
- Struggles above 90°F
- Self-sows
- Yes, expect volunteers
Full sun or part sun · medium water · well-drained soil · 6 in apart (4 to 8) · direct sow
When to plant
Nothing is open today. Spring sowing opens 6 months, Mar 27 to May 10.
- Direct sow Mar 27 – May 10 Opens in 187 daysAbout 2 weeks before to 4 weeks after your last frost (Apr 10 here)Sow as early as the ground can be worked and dug deeply - burdock needs 100-150 days and you want the whole crop out before winter rather than overwintering it.
- Direct sow Jun 7 – Jul 7 Opens in 259 daysAbout 20 weeks before to 16 weeks before your first frost (Oct 25 here)A midsummer sowing sized for a late-autumn dig. Roots come shorter than from a spring sowing, which makes the harvest considerably easier.
Frost here: last around Apr 10 (Mar 27 to Apr 24 most years), first around Oct 25. Zone averages, your own yard may run a week or two either way.
Life stages
Five stages, about 4 months from sowing to the first pull. Windows are typical; your zone and weather move them.
Germination
Day 0 to 12 from sowing- WaterSoak the seed overnight, then keep the bed dampdailyBurdock seed has a hard coat and germinates unevenly over two to three weeks. An overnight soak in water speeds and evens it up. Sow ½ inch deep and do not let the surface dry out while you wait.
Watch for- Nothing up after three weeks (normal for burdock - give it time before resowing)
- Soil crusting over the row
Seedling
Day 12 to 45 from sowing- ThinThin to 4-6 inches apartCrowded burdock makes thin, twisted roots and a lot of leaf. Thin once seedlings have two or three true leaves, snipping at the base rather than pulling so you leave the neighbors' taproots undisturbed.
- WeedKeep the row clean while plants are smallevery 2 weeksBurdock is slow off the mark and easily swamped by weeds in its first six weeks. Once the big rhubarb-like leaves close over, it shades out almost everything and needs no more help.
Watch for- Slugs shredding the young leaves in a wet spring
- Weeds outcompeting slow seedlings
Root growth
Day 45 to 115 from sowing- WaterWater deeply, not oftenweeklyBurdock drives a taproot two to three feet down and follows moisture as it goes. Deep, thorough soakings every week or so grow a long straight root; frequent shallow watering keeps it near the surface and stubby.
- MulchMulch the bed for the long haulThe crop is in the ground four to five months. A mulch layer steadies moisture, keeps the soil workable for the dig ahead, and stops the bed baking hard in midsummer.
- FertilizeFeed lightly - and never with fresh manureBurdock is a light feeder. Heavy nitrogen and fresh manure grow enormous leaves and forked, hairy roots. Compost worked deeply into the bed before sowing is all it needs.
Watch for- Powdery mildew whitening the big leaves in late summer
- Forked or twisted roots from stones, manure, or a compacted layer
- Aphids on the leaf undersides
Harvest
Day 95 to 150 to the first pull from sowing, picking to about day 200- HarvestDig a trench beside the row - this is the whole jobA full-length gobo root is two to three feet deep and snaps easily. Dig a trench alongside the row to the root's full depth, then work each root sideways into the open trench and lift it. Do not try to pull one out of undisturbed ground; you will get the top six inches and leave the rest.
- HarvestHarvest in the first autumn, before it ever flowersFirst-year roots are tender and sweet. A plant that overwinters spends its root on a flower stalk the next spring and leaves you something woody and hollow - and then it sets burrs. Digging the whole crop in year one is both the quality rule and the containment rule.
- ProtectWash and use quickly, or bury the roots in damp sandBurdock roots shrivel fast in dry air once lifted. Leave them unwashed and pack them in damp sand or a bag in the crisper; scrub only as you cook, and drop cut pieces straight into water so they do not brown.
Watch for- Roots snapping off deep in undisturbed soil (dig the trench first)
- Hollow, woody cores in roots left too long
- Any plant you missed - mark it now and deal with it before spring
Second year - do not let it get here
Day 300 to 400 from sowing- WeedDig out or cut down anything still standing in springA second-year burdock shoots up to five or more feet, flowers, and sets hundreds of hooked burrs that stick to fur, clothing, and passing wildlife. If you missed a root, cut the plant at the crown before the flower heads open and dig the crown out - a plant cut after seeding has already done the damage.
- HarvestIf you keep one, eat the stalk instead of the rootThe one good reason to let a plant run on is the spring flower stalk. Cut it while it is still soft, before the buds open, peel off the bitter green rind, and cook the tender white pith like a mild artichoke - then pull the plant.
Watch for- Flower heads forming (the last moment to act)
- Dried burrs from last season still on the ground or on the dog
Harvest
- Root shoulders about 1-1.5 inches across, 100-150 days after sowing
- Leaves still large and healthy - do not wait for the plant to die back
- Dug in the first autumn, before the plant has flowered
- Dig a trench beside the row - this is the whole job
- Harvest in the first autumn, before it ever flowers
- Wash and use quickly, or bury the roots in damp sand
Per plant 1 root, 4 to 24 ozPicking pull once
Cook with Burdock
Watch out for
6 to know. 1 is high-risk: Burr Hazard (to animals and to you). 5 are active in September.
Burr Hazard (to animals and to you)Severity High DisordernowThis is the single reason burdock is rated Caution rather than Recommended in this catalog.
It is entirely avoidable: dig the crop in year one and no burr is ever produced.
A plant entering its second spring, shooting up to five feet or more and forming globe-shaped flower heads - that is the last comfortable moment to act. Dry brown burrs still clinging to old stalks through winter, and burrs turning up on a dog, on trouser cuffs, or on gloves. Any small bird or bat caught in a burr head, which needs freeing immediately and gently. Volunteer seedlings appearing well away from where you planted, which means burrs have already travelled.
If heads have already formed, cut and bag them before they dry and shatter rather than leaving them on the ground or composting them - dry burrs stay hooked and viable. Wear gloves and eye protection when handling dry heads. Burrs in an animal's coat are worked out with fingers and a comb using oil or conditioner to loosen the hooks, and badly matted areas are usually clipped out; a vet or groomer is the right call for a heavily affected animal, and any burr near an eye or in an ear needs professional attention. Free a trapped bird or bat by cutting away the burrs around it rather than pulling the animal loose, and take it to a wildlife rehabilitator.
Harvest the whole crop in its first autumn - that single habit removes the hazard entirely, since a plant that never overwinters never flowers. Mark the row so you know where every plant is, and walk the bed the following spring to find anything missed. Cut any second-year plant at the crown before the flower heads open, and dig the crown out, since burdock resprouts from a crown left behind. Site the bed away from paths, fence lines, pasture, and anywhere dogs or livestock brush past. Check your state noxious-weed list before planting: Arctium is listed in several states, most often as common burdock, Arctium minus.
Not a threat to the plant but a hazard the plant creates. A second-year burdock produces hundreds of seed heads covered in stiff hooked bracts that grip fur, wool, hair, and fabric on contact and do not let go - the mechanism that George de Mestral copied to invent Velcro. Burrs matted into a dog's coat or a sheep's fleece are painful and difficult to remove and often have to be cut out. Small birds and bats are regularly caught in dense burr heads and die there, unable to free themselves; hummingbirds, kinglets, and several bat species are documented casualties. The burrs also carry the seed onto clothing, animals, and vehicles, which is how a single plant becomes a patch and how a patch escapes the garden. The bracts themselves can splinter and lodge in skin and eyes when you handle dry heads.
Slugs & SnailsSeverity Medium PestnowOnly the seedling stage is genuinely at risk, and burdock sits in it for weeks because it germinates so slowly.
The taproot rules out the usual escape of raising plants in pots, so protect the row for its first month; a mature plant's coarse leaves are of no interest to them.
Irregular ragged holes chewed out of the middle of leaves and along the edges - not the clean-edged cuts a caterpillar leaves. Seedlings that vanish overnight, or that are cut off at soil level with nothing left behind. Silvery dried slime trails across leaves, soil, pots, and paving in the morning: this is the giveaway that tells you it was mollusks rather than an insect. Chewed pits in ripe fruit, especially where it rests on the ground. Damage that shows up on the lowest, dampest leaves first and gets worse after rain or evening watering. Turn over a board, an upturned pot, or a clump of dense mulch during the day and look for the animals themselves sheltering in the cool underneath.
Hand-picking works and costs nothing: go out an hour after dark with a headlamp, drop what you find into soapy water, and repeat nightly for a week or two - persistence is what wins, not any single product. Shallow beer traps sunk to soil level catch them too, but need emptying and refilling daily to be worth anything. Iron-phosphate bait is the standard control and is far lower-risk around pets and wildlife than the old metaldehyde products, but it is not harmless: many formulations include EDTA, and a dog that eats a quantity of pellets can develop iron toxicosis. Scatter it thinly per the label, never in piles, and keep dogs off a baited bed. Clear fallen foliage and debris in autumn, where the eggs are laid. In a wet climate this is a population you manage each season rather than one you eradicate - and on most established plants light grazing is cosmetic and needs nothing at all.
Take away the daytime shelter first: lift boards and upturned pots, clear piles of debris, keep dense mulch pulled back from crowns and stems, and give crowded plantings enough airflow to dry out. Water in the morning rather than the evening so the surface is dry by the time they come out. Copper tape around containers and raised beds gives them a shock they will not cross, and it is the one barrier that reliably works. Get plants past the vulnerable stage quickly - start seedlings in pots and set them out at a decent size rather than direct-sowing into a cold wet bed, since most plants stop being worth defending once the leaves toughen. Leave the ground beetles, frogs, toads, and ground-feeding birds alone, because they eat mollusks all night for free and broad-spectrum slug pellets kill them too. Where thick-leaved or resistant varieties exist for what you are growing, they take far less damage.
Slugs and snails are nocturnal mollusks that rasp ragged holes in soft leaves, shear off seedlings at ground level, and chew into ripe fruit that touches the soil. They feed at night and in the early morning and spend the day hidden under boards, pots, dense mulch, leaf litter, and low foliage, becoming active in exactly the cool, damp, shaded conditions that suit young plants. Damage is heaviest in wet spells and on tender spring growth: a single wet week can erase a row of seedlings while an established, tough-leaved plant of the same species is barely marked. They lay clusters of small pearly eggs in damp soil and under debris, so a garden with plenty of cover carries a resident population year after year rather than being invaded from outside.
WirewormSeverity Medium PestnowTunnels open a slender gobo root to rot and are worth avoiding, though the damage is usually confined to the upper foot of soil where the larvae live.
Ground broken from lawn in the last two years is the classic trouble spot - which is often exactly the newly dug bed people choose for burdock.
Thin, clean holes and shallow tunnels in roots at harvest, and stiff orange-brown 'worms' in the soil - worst in beds recently converted from lawn or sod.
No rescue for holed tubers - trim and eat them soon (they don't store); trap with buried potato or carrot pieces before planting to gauge and reduce numbers.
Avoid planting potatoes into ground that was grass/sod the year before; rotate; cultivate the soil to expose larvae to birds; bait with buried potato chunks and remove them with their feeders.
The tough, wiry, orange-brown larvae of click beetles, which live in soil for years and bore narrow holes and tunnels through storage roots.
Root-Knot NematodesSeverity Medium PestnowProduces exactly the beaded, branched, unliftable roots that gardeners otherwise blame on stones.
If you de-stoned the bed and still got forking, dig one root in midsummer and look for swellings on the side rootlets. Worst in warm sandy soils in the South.
Stunted, yellowing, unthrifty plants that wilt in the heat even though the soil is moist, and poor yields for no obvious reason. Confirm by digging: beady swellings strung along the roots and side rootlets, and root crops that are forked, branched, cracked or knotted rather than clean.
There is no in-season cure. Pull and destroy affected plants rather than composting them, and bring that ground back over several seasons with rotation, resistant varieties and marigold cover crops. Where a crop can be grown in a container of fresh mix, that sidesteps the problem entirely.
Rotate to non-hosts, and grow resistant varieties where they exist for your crop. A French marigold cover crop grown thickly the season before and turned in genuinely lowers populations. Build organic matter and mulch heavily, which feeds the soil life that suppresses them. Plant only clean stock, never move soil from an infested bed around the garden, and solarize badly infested ground through the hottest part of summer.
Microscopic soil roundworms (Meloidogyne species) that invade roots and force them to swell into beady galls. A galled root cannot take up water and nutrients properly, so the plant stunts, yellows, wilts in heat despite watering, and yields poorly, and root and tuber crops come up forked, knobbly, hairy or cracked instead of clean. They are worst in warm, sandy soils and build up steadily wherever a susceptible crop is grown in the same ground year after year. The wounds they leave also open the way for fusarium wilt and rots.
Powdery MildewSeverity Medium DiseasenowBurdock's leaves are enormous and crowd each other, so mildew is close to inevitable by late summer.
Because the crop is the root and the leaves have done most of their work by then, it is usually cosmetic - space rows at 18-24 inches and leave it alone unless it strikes before the root has sized up.
Round white powdery spots on the upper leaf surfaces that spread and merge until whole leaves look dusted. It usually starts on the oldest, lowest, most shaded leaves and works upward, so check there first. Look at the undersides too, and at stems, buds, and flower stalks, which get coated as it advances. Leaves that yellow, brown, curl, or go crisp and drop early under the coating. New growth that opens small, crumpled, or twisted where the fungus has reached the shoot tips. On plants where it gets onto the fruit, a dull gray film, russeted or scarred skin, and cracking. Late in the season, tiny dark specks scattered through the white felt - that is the fungus setting up to overwinter on the debris.
Start early: sprays protect healthy tissue, they do not clean up leaves that are already coated. Pick off and bin the worst leaves as soon as you see them, and open the plant up by thinning or pruning so air moves through. On anything that regrows quickly, shearing the whole plant back forces a clean flush and beats spraying. If it keeps spreading, potassium bicarbonate, horticultural oil, or neem applied weekly will hold it - cover both leaf surfaces. Sulfur also works, but it burns the foliage of some plants, should never go on in heat, and must not be mixed with or applied close behind an oil spray. Whatever you use must be labeled for the plant you are treating: follow that label and observe its pre-harvest interval on anything you eat. Do not compost badly infected material. Late-season mildew on a plant that is finishing anyway is usually cosmetic; on a crop still filling out it is worth acting on.
Give plants room. Crowding and still air are the biggest single driver, so space at the full recommended distance, thin seedlings properly, and divide or prune out congested growth until air moves through the plant. Full sun and an open position help; deep shade and a still corner against a wall are where it always starts. Water at the base rather than overhead, and water early in the day so nothing stays damp overnight. Keep plants evenly watered - drought stress at the roots leaves them far more susceptible, even though the fungus itself likes dry air. Go easy on nitrogen, since soft lush growth is the most vulnerable. Where resistant varieties exist for what you are growing, choosing one is the single most effective thing you can do on a plant that mildews every year. Clear infected leaves and stems away at the end of the season rather than composting them.
Powdery mildew is a fungal disease that coats leaves - and often stems, buds, and fruit - in a white-to-gray powder that looks like spilled talcum. It is not one fungus but a large family of them, each fairly specialised to its own group of plants, which is why mildew on one crop rarely jumps to an unrelated one beside it. Unlike most leaf diseases it does not need wet leaves: it thrives on warm dry days followed by humid nights, and it takes hold fastest where plants stand crowded in still air or in shade. The coating blocks light, so heavily covered leaves yellow, brown, and drop early. On many plants that is mostly disfiguring and arrives late enough not to matter; where it strips away the leaves a crop still needed to finish, it costs you size, sweetness, and quality.
AphidsSeverity Low PestColonies build on the undersides of the big leaves but almost never affect the root, so on a crop grown for gobo this is something to note and ignore.
Hose them off if the plant is small enough for the feeding to check its growth.
Dense clusters of tiny insects packed onto shoot tips, flower buds, and the undersides of young leaves. Curled, cupped, or distorted new growth that never opens properly. A sticky shine on the leaves - and on whatever sits under the plant - that later goes black with sooty mold. Tiny white cast skins left behind where a colony has been feeding. Ants running steadily up and down the stems, which is often the first thing you notice. Mottled, streaked, or misshapen leaves that do not grow out can mean a virus the aphids brought with them rather than the feeding itself.
Knock the colonies off with a hard jet of water and repeat every few days - on most plants that alone ends it. Pinch out or prune off the worst-infested tips rather than treating the whole plant. If colonies keep rebuilding, spray insecticidal soap or horticultural oil directly onto the insects, covering leaf undersides, and repeat weekly until they are gone; treat early or late in the day, and never spray a wilted or heat-stressed plant. Avoid broad-spectrum insecticides - they kill the ladybugs, lacewings, and parasitic wasps that were about to solve the problem for you, and aphid numbers usually come back worse afterward. Anything you spray must be labeled for the plant you are treating; follow that label and observe its pre-harvest interval. On anything you eat, wash leaves, heads, and buds well before use, since aphids hide down in crowns, folds, and tight growth.
Go easy on nitrogen: the soft, lush growth that heavy feeding produces is exactly what aphids breed on. Check new growth once a week through spring and early summer so you catch colonies while they are still small, and rub the first few out with your fingers. Leave flowering plants nearby and skip broad-spectrum sprays - ladybugs, lacewings, hoverflies, and parasitic wasps do most of this work for free, and they only stay if there is something for them to eat. Keep ants off the plant where you can, since they protect aphids from those predators. Water steadily so plants are not stressed, and check any new plant over before you bring it home or move it indoors, since aphids usually arrive on something else.
Aphids are small soft-bodied sap-suckers - green, black, gray, pink, or waxy white, and mostly wingless - that gather in dense colonies on the tenderest new growth: shoot tips, buds, and the undersides of young leaves. They breed extremely fast in mild weather, so a few can become hundreds inside a week. Their feeding curls and distorts soft growth, and the sticky honeydew they excrete coats everything below and turns black with sooty mold. Ants often farm and defend the colonies for that honeydew. A few aphids are normal on almost any plant and a healthy plant shrugs them off; only dense, persistent colonies do real damage, and some aphids also spread plant viruses as they feed.
Good & bad neighbors
All of these are traditional pairings. The evidence is thin, so treat them as a nudge, not a rule.
Plant nearby
-
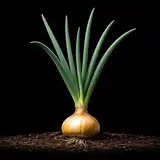
Shares the same deep, stone-free, unmanured bed and none of the same pests - convenient to prepare the ground once, and the two are cooked together in kinpira anyway.
-
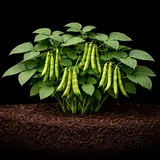
Uses the ground between rows while burdock is still small, and is gone before the big leaves close over and shade everything out.
-
Fast and shallow - marks the slow burdock row, breaks the soil crust, and is pulled long before the taproot needs the space.
-
A different root profile and no real competition; a tidy neighbor in a long-season root bed.
Keep apart
-
Anything low and light-hungry loses out once burdock's rhubarb-sized leaves close over the bed in midsummer. Give burdock its own row and its own light.
-
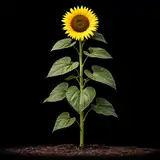
Two big, deep-rooted, thirsty plants competing for the same water at the same depth, and both hosts for powdery mildew.
Varieties · 3
You pick one when you add Burdock to your garden. Its days to maturity set your harvest window.
Long gobo (24-36 inch roots) 2 varieties
Takinogawa Long
Long, slender, straight roots an inch across with rough brown skin and ivory flesh, under big heart-shaped leaves.
heirloomopen-pollinatedjapaneselong-rootThe standard Japanese gobo and the variety most seed for the West comes from - an Edo-period heirloom named for a district of Tokyo, with slender bark-brown roots two to three feet long and crisp, sweet, fine-grained flesh. It wants deep loose soil and rewards it; in shallow or stony ground it forks and becomes almost impossible to lift whole.
Watanabe Early
Straight brown roots around two feet long, a little stouter and shorter than Takinogawa.
open-pollinatedjapaneseearlylong-rootAn earlier long-rooted Japanese selection that sizes up two or three weeks ahead of Takinogawa, which makes it the better choice for short seasons and for a midsummer sowing dug in late autumn. Roots are slightly shorter and just as tender, so the harvest is marginally less punishing.
Short gobo (12-18 inch roots) 1 variety
Salada Musume
Slim, pale, finger-thick roots 12-18 inches long with smooth skin and very tender flesh.
hybridjapaneseshort-rootcontainerA short, quick Japanese variety bred for tenderness rather than length - roots 12-18 inches long and finger-thick, mild enough to shred raw into a salad, which is what the name refers to. The sensible pick for heavy or shallow soil, for a deep container, or for anyone who has once tried to dig a three-foot Takinogawa and would rather not repeat it.
Grower tips
Notes from growers, tagged with the zone they grow in. A person reads every post before it appears.
Nobody has posted about Burdock yet. The first one usually saves someone a season.
Free account. Your post shows your grower name and zone, never your email.