Add it to your home screen and it opens full screen: no browser bars, one tap away, and everything stays signed in. Free, nothing to download from an app store.
- Tap the Share button in your browser
- Scroll down and choose “Add to Home Screen”
- Open GrowSomeFood from your home screen
- Open your browser’s menu
- Choose “Add to Home screen” or “Install app”
- Open GrowSomeFood from your home screen
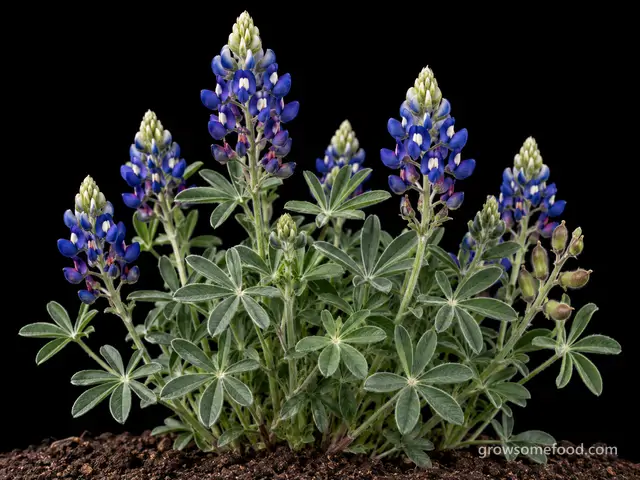
Texas Bluebonnet
The Texas state flower and the state's spring signature: a true winter annual lupine sown in fall, wintering as a low rosette, and blooming blue for a few weeks in spring before it sets seed and dies. Easy on lean, sunny, sharply drained ground, freely self-sowing - and toxic, with the pea-like seeds and pods the part to keep from children and animals.
Bluebonnet is an ornamental wildflower and is TOXIC - do not eat any part of it. Every part carries quinolizidine alkaloids and the pea-like seeds and pods carry the most, which is exactly what tempts a child who thinks they are peas; pick fallen pods up and keep saved seed out of reach. Foliage and seed also poison grazing livestock. Edible lupini beans come from de-bittered low-alkaloid crop lupines and are a different plant entirely. Wash your hands after handling seed.
Overview
The one thing to knowEach plant is small: a low rosette of palmate, finger-like leaves, and a stubby spike of deep blue pea flowers, every one carrying a white spot on its upper petal.
The Texas bluebonnet (Lupinus texensis) is the plant behind the blue that washes over Texas roadsides, pastures, and fencelines every spring - the state flower, the backdrop of a hundred thousand family photographs, and one of the great mass wildflower displays anywhere in North America. Each plant is small: a low rosette of palmate, finger-like leaves, and a stubby spike of deep blue pea flowers, every one carrying a white spot on its upper petal. What makes the display is the sheer number of them, seeded into open ground and left alone.
The thing to understand before you sow is that a bluebonnet is a winter annual. It is not a perennial and it is not a spring-sown bedding plant. Seed goes in from September to November, germinates on the first cool rains, spends the winter as a flat frost-hardy rosette, bolts and blooms from late March into May, sets its pods, and dies - the whole plant, on purpose, every year. Next spring's patch is the seed this one flung. Get the fall sowing right and it repeats itself for decades with no help at all.
It is also toxic. Every part carries quinolizidine alkaloids, and the fuzzy pods and the pea-like seeds inside carry the most - which is exactly the part a small child will pick up. Grow bluebonnets for the flowers, the bumblebees, and the nitrogen they fix into lean soil, keep the pods away from children, pets, and grazing animals, and never treat any part of the plant as food.
Quick facts
- Sprouts in
- 20 days10 to 60
- Soil to sprout
- 65 °F55 to 75
- Life cycle
- Annual
- Seed to save
- About 240 days after planting200 to 275
- Height
- 14 in8 to 18
- Spread
- 10 in6 to 14
- Cold
- Takes hard frostdamaged below 10°F
- Heat
- Struggles above 95°F
- Self-sows
- Yes, expect volunteers
Full sun · low water · well-drained soil · 10 in apart (6 to 14) · direct sow or transplant
When to plant
Fall sowing is open for 55 more days. Next: fall, Oct 1 to Nov 30.
- Direct sow Sep 1 – Nov 15 Open now · 55 days leftThe main window across Texas and the South: sow scarified seed from early September to mid-November so it germinates on the first cool rains and winters over as a rosette. Press it a quarter inch into firm soil, keep the bed damp two to three weeks, then leave it to the weather.
- Transplant Oct 1 – Nov 30 Opens in 10 daysNursery transplants sold in fall work if you set them out young and disturb the taproot as little as you can - slide the plug in whole and do not tease the roots apart. Direct sowing is cheaper, denser, and usually better.
Frost here: last around Apr 10 (Mar 27 to Apr 24 most years), first around Oct 25. Zone averages, your own yard may run a week or two either way.
Life stages
Six stages, about 9 months from sowing in all. Windows are typical; your zone and weather move them.
Sprouting (fall, from scarified seed)
Day 0 to 20 from sowing- DoScarify the seed, or expect only a fraction of it to come upBluebonnet seed has a hard, waterproof coat that holds most of a wild sowing dormant for years - staggering that suits a prairie and frustrates a flower bed. Nick each seed with a file or sandpaper, or buy pre-scarified seed (it usually comes pre-inoculated with the right Rhizobium too), and sow it within a few weeks. Treat it as the toxic material it is and wash your hands afterwards.
- DoSow in fall - a spring sowing will not bloomThis is a winter annual, so the whole cycle starts in autumn. Seed sown from early September to mid-November germinates with the first cool rains, and the seedlings need the winter to build the rosette that funds the spring bloom. Seed sown in spring may sprout, but it will not have time to flower before the heat ends it.
- WaterKeep the seedbed damp for two to three weeks, then stopSow about a quarter inch deep and press the seed into firm contact with the soil - seed left lying loose on the surface rarely takes. Water lightly whenever the top of the bed dries until the seedlings are up, usually two to three weeks, then cut right back. From there the winter rains are enough, and a soggy bed rots the young taproot.
Watch for- Patchy, staggered germination from unscarified hard seed
- Seed washing away or drying out on loose, uncompacted ground
- Seedlings toppling at soil level in a wet seedbed (damping off)
First true leaves & the young rosette
Day 20 to 75 from sowing- InspectLearn the seedling so you do not weed it outTwo plain oval seed leaves come first, then the true leaves, which are palmate - five to seven narrow leaflets spreading from one point like fingers, often silky-haired and holding a bead of dew at the centre. Nothing else in a fall bed looks quite like it, and once you know the shape you can weed confidently around it.
- WeedWeed hard - seedlings lose every fight with grassYoung bluebonnets are small, slow, and easily smothered. Keep winter weeds and turf grass off them all season, and never sow into standing bermudagrass or a fall ryegrass overseeding, which will simply take the bed. A clean, lean, sunny patch of ground with no competition is worth more than any amount of aftercare.
Watch for- Pill bugs and snails shearing seedlings off in mild damp spells
- Winter weeds and grass closing over the young rosettes
- Water standing after rain - choose higher, sharper ground next year
Winter rosette (frost-hardy)
Day 75 to 150 from sowing- ProtectLeave it be - cold is not the danger, wet isAn established rosette shrugs off hard frost and takes brief drops into the low teens without help. What kills it is water standing around the crown in a warm wet winter. Do not mulch over the top of the plants, do not water, and if the bed puddles after rain, plan to move the planting somewhere sharper-draining next fall.
- FertilizeDo not feed it - it makes its own nitrogenBluebonnet is a legume and fixes its own nitrogen in root nodules, given the right Rhizobium bacteria. Fertilizer buys you soft leafy growth, floppy spikes, and fewer flowers. The only useful amendment is a bluebonnet inoculant at sowing, and only on ground that has never grown lupines before.
Watch for- Leaves tinged purple in a cold snap (normal)
- Crown rot where winter water stands
- Rosettes lost to a hard freeze on the back of a warm wet spell
Bolting: stems rise from the rosette
Day 150 to 190 from sowing- InspectStems lengthen and buds form as the days draw outIn late winter the flat rosette lifts into a leafy plant eight to eighteen inches tall, with tight grey-green buds forming at the tips. This is the fast phase, and it is short - from first bud to full spike is a matter of weeks. Nothing needs doing except keeping the weeds down and staying off the crowns.
- WaterWater only if late winter turns bone dryA dry February can leave plants stunted and shorten the bloom, so one deep soaking in a genuinely rainless spell is worth it. Otherwise leave the hose alone. Bluebonnets bloom best on lean, dry, sharply drained ground, and a well-watered bed gives lush foliage and a disappointing show.
Watch for- Aphid colonies building on the tender flower stems
- Floppy, leafy growth on rich or fertilized ground
- Buds blackening after a late hard freeze
Blue spikes (late March into May)
Day 190 to 240 from sowing- InspectThe white banner spot turns red once a flower is pollinatedEach flower carries a white spot on its upper petal, the banner. Within a day or two of a bumblebee working it, that spot turns magenta and then deep red, telling later bees not to waste the trip. A spike that is white-spotted at the top and red-spotted at the bottom is not fading - it is a pollinated spike doing precisely what it should.
- DoLeave the spikes standing - do not deadheadBluebonnets are annuals, so next spring's display is entirely the seed this one drops. Resist tidying. Let every spike finish, and hold off mowing or cutting the patch until the pods have dried and split, usually late May or June - the same rule Texas highway crews follow on the roadside stands, and the reason those stands come back.
Watch for- Bumblebees and other large native bees working the spikes
- White banner spots turning red behind the bees (normal)
- Fuzzy pea-like pods forming - the seed inside is the most toxic part
Pods split, then the plant dies
Day 240 to 270 from sowing- DoLet the pods dry and burst before you clear anythingPods ripen from green to brown-black and split with an audible pop, flinging seed a few feet. That scattered seed is the whole of next year's patch, so wait until the pods have gone and the plants are brown and brittle before pulling or mowing. Then pull them - the plant is finished, and nothing you do will bring it back.
- DoSave seed if you want to, and store it dry and labelledCollect a few brown pods just before they split, dry them in a paper bag indoors so they can burst safely, and keep the seed cool and dry until fall, scarifying it before you sow. Label it and store it away from the kitchen and out of reach of children - it is toxic and it looks like a small pea. Colour selections do not come true from saved seed.
Watch for- Pods popping and flinging seed (this is the point)
- Volunteer seedlings appearing with the first cool rains in fall
- Brown, dead plants in June - the normal end, not a failure
Watch out for
5 to know. 1 is high-risk: Hard-Seed Dormancy (Poor, Staggered Germination). 1 is active in September.
Hard-Seed Dormancy (Poor, Staggered Germination)Severity High DisordernowThe single most common reason a bluebonnet sowing disappoints.
Untreated seed can trickle up over several years, so scarify it or buy scarified, pre-inoculated seed, sow between September and mid-November, and press it a quarter inch into firm soil. Sow thickly the first fall; after that the patch builds its own seed bank.
A sowing that produces far fewer seedlings than the seed count suggested, thin and patchy across the bed rather than failing outright. Seedlings appearing in dribs and drabs over weeks or months instead of together in one flush. Volunteers turning up a year or two later in a spot you sowed once and gave up on, which is the clearest sign the seed was dormant rather than dead. Seed that still looks plump, hard, and undamaged when you dig it back up, with no swelling and no sign of rot. A soak test settles it: leave a sample in warm water overnight and count how many have swollen. Seed that has taken up water goes visibly fatter and softer, while hard seed sits unchanged at the bottom of the glass.
There is nothing to treat once the seed is in the ground - dormant seed is not sick, and no drench or feed will wake it. Give it time first: keep the bed weeded and unturned and look again after the next season of rain, because a sowing that looked like a failure often fills in over the following year or two as the coats break down on their own. If you want the display sooner, sow again in the same window with properly scarified seed rather than assuming the site is at fault. Do not dig or hoe the bed deeply while you wait, since that buries viable seed too far down to emerge. Once a patch has established this stops being a problem at all: seed shed in place is weathered by sun, soil, and frost exactly as the plant intends, and volunteers come up on their own schedule year after year.
Scarify before sowing. Nick each seed through the coat with a nail file or a sharp knife, taking care not to cut into the pale interior, or shake a batch between two sheets of coarse sandpaper or in a jar lined with it. An overnight soak in warm water helps a little on its own and much more after scarifying; treat again any seed that has not swollen by morning. Buying pre-scarified seed is easier and far more even than doing it by hand, and it is usually sold pre-inoculated with the right Rhizobium bacteria as well. Sow scarified seed promptly, within a few weeks, because once the coat is breached the seed no longer stores. Sow in the season the plant actually wants, press it into firm contact with the soil at the shallow depth the packet gives, and keep the bed evenly damp until the seedlings are up, since scarified seed that dries out mid-germination is simply lost. Sow more thickly than seems necessary the first year.
Lupine seed is physically dormant: the coat is a hard, waxy, waterproof shell that does not let water in until weather, soil microbes, or an animal has worn it through. That is deliberate on the plant part - a single year of seed germinates across several seasons, so one bad spring cannot wipe out the population. In a garden it reads as failure. Untreated seed sown into a prepared bed often gives a scattered, disappointing stand in the first year while the rest of it sits in the soil waiting, and the gardener concludes the seed was dead or the site was wrong. Nothing is attacking the seed and this is not a disease; it is a mechanical barrier, and the fix is mechanical too.
Root RotSeverity Medium DiseaseBluebonnets evolved on thin, sharply drained limestone ground, and winter water standing around the crown is what kills a fall-sown stand.
Never irrigate an established planting, never mulch over the rosettes, and if the bed puddles after rain move the planting to a slope or a raised bed next fall rather than trying to nurse it.
Wilting in the middle of the day on a plant whose soil is damp - the classic tell, and the reason people water a rotting plant and finish it off. Leaves yellowing from the bottom up, dull off-color foliage, and growth that stalls for no visible reason. Whole shoots, or one side of the plant, collapsing while the rest still looks fine. Soft, dark, or mushy tissue at the base of the stem or at the crown, sometimes with a sour smell. Lift a failing plant and look at the roots: healthy ones are firm and pale, rotted ones are brown or black and slimy, and the outer layer slips off between your fingers leaving a thread of core behind. Seedlings that topple over at soil level are the same problem, called damping-off.
There is no cure for tissue that has already rotted, so act on the conditions rather than looking for a spray. Stop watering at once and fix the drainage - open up compacted soil, or move the plant to a raised, sharply drained position or a container. Lift a badly affected plant, cut away every soft dark root and rotted section with a clean blade back to firm pale tissue, and replant only the healthy parts into fresh free-draining soil or mix. Often the better move is to give up on the plant and save its offspring instead: cuttings, offsets, or divisions taken from firm healthy growth root readily and give you a clean start. Bin the rotted material rather than composting it, and correct the drainage before you replant, because the rot comes straight back in the same wet spot.
Drainage is the whole defense. Match the plant to the site first - something that wants sharp drainage will not survive heavy clay or a low, water-collecting spot however well you tend it. Where the ground is heavy, plant on a raised bed, berm, or slope, or grow in a container. Set plants at the depth they were already growing, since burying the crown or the root flare is a common cause of rot, and keep mulch pulled back a few inches from the stem base instead of piled against it. Water the soil rather than the calendar: check that the top inch or two is dry before watering again, cut back hard in cool weather and winter dormancy, and never leave a pot standing in a full saucer. Do not plant or dig in soggy ground, and go easy on rich amendments for plants that want it lean. Rotate annual crops, and start with clean healthy plants and fresh mix.
Root rot is not one organism but a group of soil fungi and water molds - Pythium, Phytophthora, Fusarium, Rhizoctonia and others - that sit harmlessly in most soils and only turn destructive when the ground stays saturated. Waterlogged soil drives the air out, the roots suffocate, and the weakened tissue is invaded and goes soft, brown, and stringy. Because the damage is underground you usually see it first as something that looks like drought: wilting, yellowing, stunting, a plant that does not respond to being watered. Overwatering, heavy compacted ground, a low spot that collects runoff, a pot with no drainage or a saucer left standing full, and cold wet soil in winter are the usual causes. Once roots have actually rotted there is no cure - this is a problem you prevent rather than treat.
Slugs & SnailsSeverity Medium PestPill bugs, snails, and slugs work on the tiny fall and winter rosettes, which is the one stage a bluebonnet cannot outgrow damage at.
Damp mild spells after sowing are when it happens. Clear boards, pots, and heaped debris off the bed and sow thickly enough that losing some seedlings does not thin the stand.
Irregular ragged holes chewed out of the middle of leaves and along the edges - not the clean-edged cuts a caterpillar leaves. Seedlings that vanish overnight, or that are cut off at soil level with nothing left behind. Silvery dried slime trails across leaves, soil, pots, and paving in the morning: this is the giveaway that tells you it was mollusks rather than an insect. Chewed pits in ripe fruit, especially where it rests on the ground. Damage that shows up on the lowest, dampest leaves first and gets worse after rain or evening watering. Turn over a board, an upturned pot, or a clump of dense mulch during the day and look for the animals themselves sheltering in the cool underneath.
Hand-picking works and costs nothing: go out an hour after dark with a headlamp, drop what you find into soapy water, and repeat nightly for a week or two - persistence is what wins, not any single product. Shallow beer traps sunk to soil level catch them too, but need emptying and refilling daily to be worth anything. Iron-phosphate bait is the standard control and is far lower-risk around pets and wildlife than the old metaldehyde products, but it is not harmless: many formulations include EDTA, and a dog that eats a quantity of pellets can develop iron toxicosis. Scatter it thinly per the label, never in piles, and keep dogs off a baited bed. Clear fallen foliage and debris in autumn, where the eggs are laid. In a wet climate this is a population you manage each season rather than one you eradicate - and on most established plants light grazing is cosmetic and needs nothing at all.
Take away the daytime shelter first: lift boards and upturned pots, clear piles of debris, keep dense mulch pulled back from crowns and stems, and give crowded plantings enough airflow to dry out. Water in the morning rather than the evening so the surface is dry by the time they come out. Copper tape around containers and raised beds gives them a shock they will not cross, and it is the one barrier that reliably works. Get plants past the vulnerable stage quickly - start seedlings in pots and set them out at a decent size rather than direct-sowing into a cold wet bed, since most plants stop being worth defending once the leaves toughen. Leave the ground beetles, frogs, toads, and ground-feeding birds alone, because they eat mollusks all night for free and broad-spectrum slug pellets kill them too. Where thick-leaved or resistant varieties exist for what you are growing, they take far less damage.
Slugs and snails are nocturnal mollusks that rasp ragged holes in soft leaves, shear off seedlings at ground level, and chew into ripe fruit that touches the soil. They feed at night and in the early morning and spend the day hidden under boards, pots, dense mulch, leaf litter, and low foliage, becoming active in exactly the cool, damp, shaded conditions that suit young plants. Damage is heaviest in wet spells and on tender spring growth: a single wet week can erase a row of seedlings while an established, tough-leaved plant of the same species is barely marked. They lay clusters of small pearly eggs in damp soil and under debris, so a garden with plenty of cover carries a resident population year after year rather than being invaded from outside.
AphidsSeverity Medium PestLupine aphid is the one to know here, and it masses on the flower stems and spikes in spring rather than on the leaves.
A heavy colony can weaken a plant just as it is about to bloom. Check the stems as the buds rise and knock colonies off with a jet of water before they build.
Dense clusters of tiny insects packed onto shoot tips, flower buds, and the undersides of young leaves. Curled, cupped, or distorted new growth that never opens properly. A sticky shine on the leaves - and on whatever sits under the plant - that later goes black with sooty mold. Tiny white cast skins left behind where a colony has been feeding. Ants running steadily up and down the stems, which is often the first thing you notice. Mottled, streaked, or misshapen leaves that do not grow out can mean a virus the aphids brought with them rather than the feeding itself.
Knock the colonies off with a hard jet of water and repeat every few days - on most plants that alone ends it. Pinch out or prune off the worst-infested tips rather than treating the whole plant. If colonies keep rebuilding, spray insecticidal soap or horticultural oil directly onto the insects, covering leaf undersides, and repeat weekly until they are gone; treat early or late in the day, and never spray a wilted or heat-stressed plant. Avoid broad-spectrum insecticides - they kill the ladybugs, lacewings, and parasitic wasps that were about to solve the problem for you, and aphid numbers usually come back worse afterward. Anything you spray must be labeled for the plant you are treating; follow that label and observe its pre-harvest interval. On anything you eat, wash leaves, heads, and buds well before use, since aphids hide down in crowns, folds, and tight growth.
Go easy on nitrogen: the soft, lush growth that heavy feeding produces is exactly what aphids breed on. Check new growth once a week through spring and early summer so you catch colonies while they are still small, and rub the first few out with your fingers. Leave flowering plants nearby and skip broad-spectrum sprays - ladybugs, lacewings, hoverflies, and parasitic wasps do most of this work for free, and they only stay if there is something for them to eat. Keep ants off the plant where you can, since they protect aphids from those predators. Water steadily so plants are not stressed, and check any new plant over before you bring it home or move it indoors, since aphids usually arrive on something else.
Aphids are small soft-bodied sap-suckers - green, black, gray, pink, or waxy white, and mostly wingless - that gather in dense colonies on the tenderest new growth: shoot tips, buds, and the undersides of young leaves. They breed extremely fast in mild weather, so a few can become hundreds inside a week. Their feeding curls and distorts soft growth, and the sticky honeydew they excrete coats everything below and turns black with sooty mold. Ants often farm and defend the colonies for that honeydew. A few aphids are normal on almost any plant and a healthy plant shrugs them off; only dense, persistent colonies do real damage, and some aphids also spread plant viruses as they feed.
Powdery MildewSeverity Low DiseaseTurns up on tired foliage in late spring on a plant that is finishing anyway, so it is cosmetic rather than a problem to spray.
It is worse in a crowded, humid, or shaded planting; the answer is a sunnier, more open, drier site next fall rather than any treatment this year.
Round white powdery spots on the upper leaf surfaces that spread and merge until whole leaves look dusted. It usually starts on the oldest, lowest, most shaded leaves and works upward, so check there first. Look at the undersides too, and at stems, buds, and flower stalks, which get coated as it advances. Leaves that yellow, brown, curl, or go crisp and drop early under the coating. New growth that opens small, crumpled, or twisted where the fungus has reached the shoot tips. On plants where it gets onto the fruit, a dull gray film, russeted or scarred skin, and cracking. Late in the season, tiny dark specks scattered through the white felt - that is the fungus setting up to overwinter on the debris.
Start early: sprays protect healthy tissue, they do not clean up leaves that are already coated. Pick off and bin the worst leaves as soon as you see them, and open the plant up by thinning or pruning so air moves through. On anything that regrows quickly, shearing the whole plant back forces a clean flush and beats spraying. If it keeps spreading, potassium bicarbonate, horticultural oil, or neem applied weekly will hold it - cover both leaf surfaces. Sulfur also works, but it burns the foliage of some plants, should never go on in heat, and must not be mixed with or applied close behind an oil spray. Whatever you use must be labeled for the plant you are treating: follow that label and observe its pre-harvest interval on anything you eat. Do not compost badly infected material. Late-season mildew on a plant that is finishing anyway is usually cosmetic; on a crop still filling out it is worth acting on.
Give plants room. Crowding and still air are the biggest single driver, so space at the full recommended distance, thin seedlings properly, and divide or prune out congested growth until air moves through the plant. Full sun and an open position help; deep shade and a still corner against a wall are where it always starts. Water at the base rather than overhead, and water early in the day so nothing stays damp overnight. Keep plants evenly watered - drought stress at the roots leaves them far more susceptible, even though the fungus itself likes dry air. Go easy on nitrogen, since soft lush growth is the most vulnerable. Where resistant varieties exist for what you are growing, choosing one is the single most effective thing you can do on a plant that mildews every year. Clear infected leaves and stems away at the end of the season rather than composting them.
Powdery mildew is a fungal disease that coats leaves - and often stems, buds, and fruit - in a white-to-gray powder that looks like spilled talcum. It is not one fungus but a large family of them, each fairly specialised to its own group of plants, which is why mildew on one crop rarely jumps to an unrelated one beside it. Unlike most leaf diseases it does not need wet leaves: it thrives on warm dry days followed by humid nights, and it takes hold fastest where plants stand crowded in still air or in shade. The coating blocks light, so heavily covered leaves yellow, brown, and drop early. On many plants that is mostly disfiguring and arrives late enough not to matter; where it strips away the leaves a crop still needed to finish, it costs you size, sweetness, and quality.
Good & bad neighbors
First rule: keep Bermudagrass apart. The single most common reason a bluebonnet planting fails.
Plant nearby
-
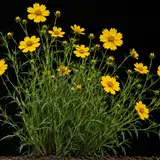
The classic Texas roadside sequence: bluebonnets bloom out in May just as Indian blanket comes on, so a mixed sowing carries colour from March into midsummer on the same lean, sunny, sharply drained ground. Both self-sow, and blanketflower's later bloom hides the browning bluebonnet plants while their pods ripen.
-
Another standard partner in Texas wildflower mixes: golden coreopsis follows the bluebonnets by a few weeks on identical ground, giving the planting a second season without any extra work. Sow both in fall and let each reseed itself.
-
Cross-reference rather than a companion-planting claim: the perennial lupines (Lupinus perennis and the garden Russell hybrids) are the sibling species this plant used to be listed under. They live for years, bloom in early summer, overwinter as a crown, and want cool summers - none of which is true of a Texas winter annual, which is why the two now have separate pages.
- Traditional pairings, thin evidence
-
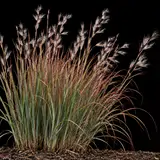
A native bunchgrass makes a better matrix for bluebonnets than turf does: it grows in clumps with open ground between, which is where bluebonnet seed germinates, and it is warm-season, so it is dormant during the bluebonnet's winter and spring. Keep it thin, though - any grass will smother seedlings if it closes over them.

Keep apart
-
The single most common reason a bluebonnet planting fails. Bermuda turf and fall-overseeded ryegrass close over the tiny winter rosettes and take the bed, and mowing turf on a turf schedule cuts the spikes off before the pods split. Bluebonnets need open, un-turfed ground that is left uncut until June.
Varieties · 5
You pick one when you add Texas Bluebonnet to your garden. Its days to maturity set your harvest window.
Texas Bluebonnet (Lupinus texensis)
Dense short spikes of deep blue flowers with white banner spots, over grey-green palmate leaves.
speciesnativewinter-annualblue-whiteThe wild type and the one everyone pictures: stubby spikes of deep blue pea flowers, each with a white banner spot that turns red once a bee has pollinated it, over silky palmate leaves. Sown in fall, it winters as a rosette, blooms from late March into May, sets pods, and dies - reseeding itself into a patch that thickens for years. Vigorous, uniform, and by far the best choice for a stand meant to persist.
Texas Maroon / 'Alamo Fire'
Spikes of rich wine-maroon pea flowers with pale banner spots over the usual palmate foliage.
cultivarmaroonwinter-annualself-sowingA deep maroon bluebonnet, bred at Texas A&M over years of selection from rare wild colour variants to put the university's colour into the state flower. Grown exactly like the species and just as tough, but it does not stay maroon: bees cross it with any blue bluebonnet nearby and saved seed reverts toward blue within a generation or two. Plant it as a block on its own and resow it if you want the colour to hold.
'Barbara Bush' (lavender bluebonnet)
Spikes of pale lavender-mauve flowers with white banner spots.
cultivarlavenderwinter-annualself-sowingA soft lavender-to-mauve selection named for the former first lady, gentler than the wild blue and effective drifted through it. Culture is identical to the species - fall sowing, scarified seed, lean sunny ground - and like the other colour forms it drifts back toward blue over a few self-sown generations unless it is grown apart and resown.
'Abbott Pink' (pink bluebonnet)
Spikes of clear rose-pink flowers with pale banner spots over grey-green palmate leaves.
cultivarpinkwinter-annualself-sowingA clear pink selection traced to a wild pink-flowered population, an old favourite for softening a blue planting. Same fall sowing, same scarification, same lean sunny ground as the species, and the same caveat: it crosses freely with blue bluebonnets and its saved seed will not stay pink for long.
White bluebonnet (albino selections)
Ivory-white spikes with faint banner spots, conspicuous among the blue.
cultivarwhitewinter-annualself-sowingSelections of the naturally occurring white-flowered bluebonnet, which turns up as scattered individuals in wild stands and has been bred up into a seed line. Striking scattered through blue and lovely in a pale planting. Grown identically to the species, and, like all the colour forms, unstable from saved seed once bees have been at it.
Grower tips
Notes from growers, tagged with the zone they grow in. A person reads every post before it appears.
Nobody has posted about Texas Bluebonnet yet. The first one usually saves someone a season.
Free account. Your post shows your grower name and zone, never your email.