Add it to your home screen and it opens full screen: no browser bars, one tap away, and everything stays signed in. Free, nothing to download from an app store.
- Tap the Share button in your browser
- Scroll down and choose “Add to Home Screen”
- Open GrowSomeFood from your home screen
- Open your browser’s menu
- Choose “Add to Home screen” or “Install app”
- Open GrowSomeFood from your home screen
Potato Onion
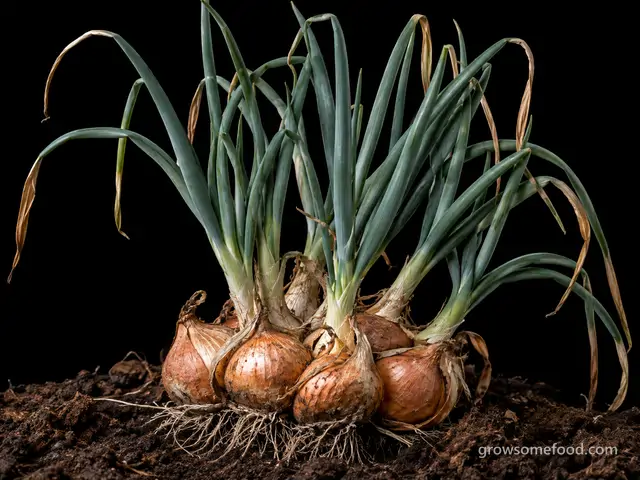
The onion you never buy twice: plant one bulb, harvest a nest of six, and replant from your own stock forever. Grown on the garlic calendar and the best-keeping onion in the garden.
Safe for people - bulbs and green tops alike, exactly like a common onion. Like every allium, toxic to dogs and cats in quantity.
Overview
The one thing to knowWell cured, the bulbs hold eight to twelve months, which means a good crop takes you right around to the next one.
The potato onion is a multiplier: you plant a single bulb and lift a whole nest of them, clustered around where the original sat, the way a potato hill gives you a hill of potatoes. That is where the name comes from - there is no potato involved. It belongs to the same Aggregatum Group as the shallot, but it tastes like a proper onion rather than a shallot, grows bigger, and keeps far longer.
It is grown from bulb to bulb. There is no seed to buy, no seedlings to raise, no day-length puzzle to solve - you plant bulbs in fall like garlic, lift them the following summer, cure them, and put a share of the harvest back in the ground in the autumn. Well cured, the bulbs hold eight to twelve months, which means a good crop takes you right around to the next one. Buy planting stock once and, barring disaster, you never buy an onion again.
Quick facts
- Life cycle
- Perennial, grown as an annual
- Height
- 18 in12 to 24
- Spread
- 10 in6 to 14
- Cold
- Takes hard frostdamaged below -10°F
- Heat
- Struggles above 90°F
Full sun · medium water · well-drained soil · 8 in apart (6 to 10) · division or bulbs/cloves
When to plant
Fall planting is open for 34 more days.
- Plant tubers Sep 13 – Oct 25 Open now · 34 days leftAbout 6 weeks before to at your first frost (Oct 25 here)Plant on the garlic calendar: bulbs go in from early fall until about the time of first frost, root before the ground freezes, and come away at the first spring warmth. Mulch 4-6 inches deep.
Frost here: last around Apr 10 (Mar 27 to Apr 24 most years), first around Oct 25. Zone averages, your own yard may run a week or two either way.
Life stages
Five stages, about 9 months from planting to the first pull. Windows are typical; your zone and weather move them.
Rooting in (fall planting)
Day 0 to 35 from planting- DoChoose your bulb size deliberately - it decides the cropPlant a SMALL bulb (under about an inch and a half) and it makes a few large onions. Plant a LARGE bulb and it makes a nest of many small ones. Nothing else you do this season matters as much. Most gardeners plant a mix: small bulbs for eating onions, large bulbs to multiply their stock.
- DoSet bulbs shallow, 6-8 inches apartPush each bulb in root-end down so the tip sits just at or barely under the soil surface - about an inch deep, deeper in the coldest zones. The cluster needs elbow room to swell, so do not crowd the row.
- WaterWater in once so roots start before the freezeOne thorough soaking at planting. After that, fall rain is usually enough; soggy ground rots a dormant bulb far faster than dryness hurts it.
- MulchMulch 4-6 inches after plantingStraw or shredded leaves stop freeze-thaw heaving over winter and suppress spring weeds. In zones 4 and colder the mulch is what makes fall planting survivable at all.
Watch for- Bulbs heaved out of the soil by frost cycles
- Green shoots showing in fall (normal - they overwinter)
Winter hold
Day 35 to 150 from planting- ProtectRe-cover any bare patches of mulchThe cold itself is not the problem - being lifted out of the ground by repeated freezing and thawing is. Walk the bed after storms and push heaved bulbs back in.
Watch for- Standing water or an ice sheet sitting over the bed (drainage problem)
- Bulbs lying on the surface after a thaw
Spring leaf growth and dividing
Day 155 to 215 from planting- FertilizeFeed nitrogen through leaf growth, then stopevery 3 weeksTwo or three light feeds (blood meal, fish emulsion) from first spring growth until the bulbs start to swell. Every leaf built now becomes bulb; nitrogen after bulbing begins just delays maturity and ruins storage.
- WeedWeed shallowly and oftenevery 2 weeksPotato onions have the same skimpy roots as any onion and lose badly to weeds. Pull them small and keep the hoe out of the shallow-set clusters.
- WaterWater about an inch a weekweeklySteady spring moisture through leaf growth sets the final size of every bulb in the nest. They cannot make it up later.
- DoLeave the nest alone as it splitsUnderground, the mother bulb is dividing into a cluster. Do not thin it, separate it, or pull soil away to look - just let it work.
Watch for- Yellow leaf tips in early spring (usually nitrogen hunger)
- A flower stalk on the odd bulb (bolting - eat that cluster first, it will not store)
- Orange pustules on leaves (rust)
Bulbing up
Day 225 to 255 from planting- DoStop all feeding once the cluster swellsLate nitrogen gives thick soft necks, and a thick neck is the single best predictor of a bulb that rots in storage instead of keeping until next spring.
- WaterTaper water off as the tops softenEase back on watering once necks start to soften and tops lean. Dry conditions at the finish cure better skins and cut storage rot.
Watch for- Thick, soft necks (poor keepers - eat those first)
- Lower leaves browning upward (the normal countdown to harvest)
Lifting and curing
Day 235 to 285 to the first pull from planting, picking to about day 290- HarvestLift the whole nest when most tops have fallenWhen about half to three-quarters of the tops have bent over at the neck, loosen the cluster with a fork on a dry day and lift the whole nest intact. Do not bend the tops down by hand to hurry it along.
- DoCure 2-3 weeks somewhere dry and airySpread the clusters, tops still attached, out of direct sun with good airflow until the necks are papery and tight and the skins crackle. Only then break the nest apart and trim tops and roots.
- DoSet your planting stock aside BEFORE you start eatingThere is no seed packet for this crop - next year's planting comes out of this year's harvest. Put back a share of small bulbs for big onions and a few large bulbs for multiplying, label them, and keep them separate from the kitchen basket.
Watch for- Rain during curing (invites neck rot)
- Curing in direct sun (cooks and scalds the bulbs)
- Nicked or bruised bulbs going into storage - eat those first
Harvest
- Half to three-quarters of the tops bent over at the neck
- The nest of bulbs firm and full, with skins papering over
- Necks softening - the signal that the cluster has finished sizing
- Lift the whole nest when most tops have fallen
- Cure 2-3 weeks somewhere dry and airy
- Set your planting stock aside BEFORE you start eating
Per plant 3 to 12 bulbs, 4 to 24 ozPicking pull once
Cook with Potato Onion
Watch out for
5 to know. 1 is high-risk: White Rot (Allium). None are active in September.
White Rot (Allium)Severity High DiseaseThe specific risk for a crop replanted from its own stock: white rot travels on planting bulbs, and a gardener saving bulbs year after year can carry it forward indefinitely without noticing.
Never replant a bulb from a cluster that wilted or rotted, be careful about accepting bulbs from a garden where alliums have collapsed, and rotate the bed even though the bulbs are your own.
Yellowing, wilting plants that pull up far too easily because the roots have gone, and - on the rotted bulb base - white cottony fungal growth with tiny black poppy-seed-like dots through it.
There is no viable garden treatment. Remove and bin infected plants, never compost them, and do not grow alliums in that soil again. This is why clean planting-stock discipline matters more here than for any other allium problem.
This is entirely about never introducing it. Buy certified disease-free seed stock, sets and plants, never plant grocery-store bulbs or cloves, quarantine new stock, and do not move soil, bulbs or tools between an affected bed and a clean one. Once it is in, it is essentially permanent.
The most serious allium disease there is. A soil fungus (Sclerotium cepivorum) rots the roots and the base of the bulb, growing a white fluffy mold over it studded with tiny black sclerotia like poppy seeds. Those sclerotia survive in the soil for twenty years or more and germinate whenever an allium is planted above them, so a bed that gets it is finished for alliums within a home gardener's timescale. It arrives on infected planting stock and on moved soil.
Downy Mildew (Onion)Severity Medium DiseaseThe reason it matters here is storage: an infected neck rots in the basket months later, and this is a crop whose entire value is in keeping until next harvest.
Cure hard, sort ruthlessly, and never replant a bulb with a discolored neck.
Pale yellow-green oval patches on leaves with a downy gray-purple fuzz in humid mornings; leaves yellowing and dying back from the tips.
Remove affected leaves, improve airflow, and apply copper protectively in a wet season. Harvest and cure carefully - infected necks invite storage rot.
Space for airflow, water at the base in the morning, rotate alliums, avoid low wet spots, and grow resistant varieties (Red Wing) where it recurs.
A cool, damp-weather disease (Peronospora destructor) that produces pale patches and fuzzy gray-violet growth on onion leaves, collapsing them and shrinking bulbs; also causes purple blotch to follow in the dead tissue.
Onion MaggotSeverity Medium PestA clustered nest gives the maggot several bulbs to work through once it is inside, so lift and destroy a whole affected cluster rather than trying to save part of it - and never keep bulbs from it for replanting.
Individual plants yellowing and wilting while their neighbors look fine, and - on pulling one - small white maggots with brown, slimy rot in the bulb base, shank or stem.
There is no rescue for a maggot-riddled bulb. Pull and destroy infested plants rather than composting them, and never save affected bulbs for replanting. Beneficial nematodes drenched into the soil help suppress the larvae in a bed you have to keep using.
Rotate alliums yearly, cover the crop with row fabric through the fly's spring egg-laying window, space plants out rather than growing them in dense rows, and never plant into fresh manure, which draws the flies in.
The larvae of a small gray fly - the onion fly is the same insect - that lays its eggs at the base of allium plants. The white maggots tunnel into the bulb, shank or stem base, and the damage they leave opens the door to soft rot, so the plant yellows, wilts and collapses into a mush. It is worst in cool, wet springs, in unrotated allium beds, and in dense rows where the maggots can work from one plant to the next.
Rust (Allium)Severity Low DiseaseRust in spring costs bulb size directly, because leaf area during spring growth is what sets how big every bulb in the nest gets.
Space clusters properly and keep the bed open.
Orange-red raised dots and streaks on the leaf blades, worst in humid spells and on crowded, poorly spaced or congested plantings.
Strip or shear off the worst-affected leaves early and let clean growth come back, improving airflow at the same time. A bulb crop usually still matures, so harvest on schedule rather than writing it off - rust rarely reaches the bulb itself.
Give wide spacing and full sun so the leaves dry quickly, avoid overhead watering and excess nitrogen, divide congested perennial clumps, and rotate alliums on a three-year cycle. Rust-tolerant varieties are available in some allium crops.
A fungal disease that raises bright orange pustules on allium leaves. The pustules destroy green tissue, and since those leaves are what feed the bulb, a heavy infection shrinks the crop or weakens the clump. It builds in humid weather, in crowded plantings and in high-nitrogen soil, and it rarely reaches the bulb itself.
ThripsSeverity Low PestA minor problem on a fall-planted crop, which does most of its growing in cool weather and is usually near harvest by the time thrips build up in summer heat.
Silvery-white streaks and fine speckling on leaves and petals, brown discolored patches, distorted buds and blooms that fail to open properly, and tiny sliver-like insects that drop out when you shake foliage or a flower over a sheet of white paper. Worst in hot, dry spells and on drought-stressed plants.
A strong water spray dislodges light infestations, and on a plant that can take it a hard shear and clean regrowth clears them outright. For heavier pressure use insecticidal soap, neem or spinosad, aimed down into the leaf sheaths and buds where thrips actually shelter, and repeat at intervals since eggs and pupae escape a single spray. Spinosad is a registered insecticide: use only a product labeled for the crop you are treating, follow the label exactly, and observe its pre-harvest interval.
Scout early, before the damage reaches the part of the plant you care about. Start with clean planting stock, keep plants well watered since drought-stressed plants suffer worst, avoid heavy nitrogen, clear weedy hosts nearby, and hang blue or yellow sticky traps to catch the first arrivals. Reflective mulch deters them, and predatory mites, lacewings and minute pirate bugs do real work outdoors.
Tiny slender sap-sucking insects that rasp at leaves, buds and petals and drink what runs out, leaving silvery-white streaking and fine flecking, brown scorched patches, and new growth that comes out twisted or fails to open. They breed fast in hot, dry weather, shelter deep in leaf sheaths, folds and unopened buds where sprays struggle to reach, and several species also transmit plant viruses - which is often more damaging than the feeding itself.
Good & bad neighbors
Plant nearby
-
The classic pair: onion scent is credited with masking carrots from the carrot rust fly, and carrot scent with confusing the onion fly. Different root depths, no real competition.
-
Cross-reference: the other perennial multiplier a gardener runs into. The walking onion makes its little bulbs on TOP of the stalk and relocates itself; the potato onion makes its cluster underground and stays exactly where you put it. They grow happily side by side and cover different jobs.
-
Cross-reference rather than a companion-planting claim: shallots are the other Aggregatum Group multiplier and share this plant's culture almost exactly. The difference is on the plate - shallots are smaller, milder and finer-flavored, potato onions bigger, sharper and much longer-keeping. Growing both gives you two flavors from one calendar.
- Traditional pairings, thin evidence
-
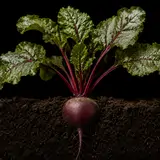
Beets and onions sit side by side comfortably with different needs, and beets are out of the ground before the onion nest needs the room.
-
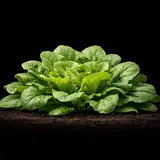
A quick spring lettuce fills the gaps between upright onion tops and is cut long before the bulbs size up.
Varieties · 4
You pick one when you add Potato Onion to your garden. Its days to maturity set your harvest window.
Storage Potato Onion 3 varieties
Yellow Potato Onion
Flattened-globe bulbs with coppery-yellow papery skin and firm white flesh.
multiplierheirloomadaptableThe classic and by far the most available potato onion, and the strain the heirloom seed-saver rescue was built around. Copper-yellow flattened bulbs, mostly 1-3 inches, in nests of roughly 3-10, with strong true onion flavor and the best storage life in the family - commonly 8-12 months cured. Widely adaptable across latitudes, which is unusual for an onion.
White Potato Onion
Flattened white bulbs with silvery papery skin and white flesh.
multiplierheirloommilderA white-skinned potato onion, less common than the yellow and generally a little milder. It divides the same way and cures the same way, but most growers report shorter storage than the yellow strain, so eat these earlier in the winter and lean on yellows for the long haul.
Green Mountain Multiplier
Yellow-brown flattened bulbs in a full nest, on sturdy short tops.
multipliercold-hardyheirloomA Northeastern heirloom multiplier selected in Vermont conditions and offered by heirloom seed keepers for its winter hardiness - the strain to look for if you want to fall-plant in a cold zone. Yellow-brown bulbs in generous nests, with good storage.
Perennial Clumping Multiplier 1 variety
I'itoi's Onion
A crowded clump of small reddish-skinned bulbs under many slim green tops.
clumpinggreen-topsheat-adaptedheirloomA small perennial clumping multiplier long grown in Tohono O'odham country in southern Arizona, named for the mountain of I'itoi. It behaves differently from a storage potato onion: it makes a dense clump of small shallot-sized bulbs and abundant slim green tops, is harvested mainly for those tops, and goes dormant through the summer heat. Plant in fall, lift and split the clump when it slows, and treat it as a standing perennial rather than a crop to cure.
Grower tips
Notes from growers, tagged with the zone they grow in. A person reads every post before it appears.
Nobody has posted about Potato Onion yet. The first one usually saves someone a season.
Free account. Your post shows your grower name and zone, never your email.