Add it to your home screen and it opens full screen: no browser bars, one tap away, and everything stays signed in. Free, nothing to download from an app store.
- Tap the Share button in your browser
- Scroll down and choose “Add to Home Screen”
- Open GrowSomeFood from your home screen
- Open your browser’s menu
- Choose “Add to Home screen” or “Install app”
- Open GrowSomeFood from your home screen
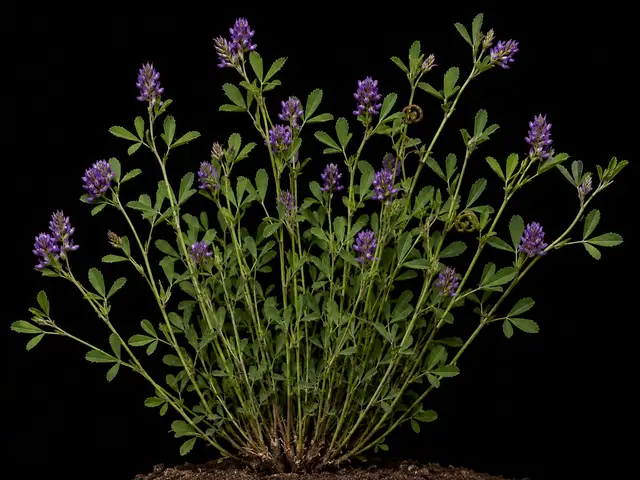
Alfalfa
The queen of forages and the deepest-rooted thing you can plant: a long-lived perennial legume that fixes more nitrogen than any common cover crop, mines the subsoil with a taproot that reaches 15 feet, and feeds bees for months.
Alfalfa is grown for soil and forage; the leaves and stems are livestock feed, not human food. Its sprouts are eaten - and are the sprout most often traced to US Salmonella and E. coli outbreaks, so use seed sold for sprouting, rinse twice daily, and cook them for anyone pregnant, elderly, very young or immune-compromised. Alfalfa seed and sprouts also contain L-canavanine, which has triggered lupus-like flares: anyone with lupus or another autoimmune condition should avoid them.
Overview
The one thing to knowWhere crimson clover and winter peas are seasonal covers, alfalfa is a perennial that holds a bed for three to five years, sending a taproot down 6 to 15 feet and, in the process, doing two jobs no annual can.
Alfalfa is the heavyweight of the legume family. Where crimson clover and winter peas are seasonal covers, alfalfa is a perennial that holds a bed for three to five years, sending a taproot down 6 to 15 feet and, in the process, doing two jobs no annual can. It fixes very large amounts of nitrogen - more per year than any other common cover crop - and it acts as a nutrient pump, pulling calcium, potassium, and trace minerals up out of subsoil that no vegetable root will ever reach and depositing them in leaves you can cut and spread on the garden. That is why alfalfa meal and alfalfa hay are sold as soil amendments in the first place: it is a plant you grow in order to move fertility upward.
It is also a serious commitment and a fussy one about two things. Alfalfa demands near-neutral soil (pH 6.5 to 7.5, and it simply fails in acid ground) and excellent drainage - it will not tolerate a high water table or a wet winter over its crowns. Get those right and the rest is easy: cut it three to five times a season at bud stage for mulch, compost, or hay, leave one cut to flower for the bumblebees, and after several years turn it under and rotate. Note two safety points before you go further: the sprouts are the ones most often behind US Salmonella outbreaks, and alfalfa is best avoided by people with lupus.
Quick facts
- Sprouts in
- 7 days4 to 12
- Soil to sprout
- 65 °F42 to 85
- Life cycle
- Perennial, lives about 4 years
- Seed to save
- About 200 days after planting120 to 400
- Height
- 30 in18 to 40
- Spread
- 14 in8 to 24
- Cold
- Takes hard frostdamaged below -25°F
- Heat
- Struggles above 100°F
- Self-sows
- Yes, expect volunteers
Full sun · low water · well-drained soil · 3 in apart (1 to 6) · direct sow
When to plant
Nothing is open today. Fall sowing opens 10 months, Jul 27 to Sep 5.
- Direct sow Jul 27 – Sep 5 Opens in 309 daysAbout 13 weeks before to 7 weeks before your first frost (Oct 25 here)In the South, fall seeding is the standard: cool moist establishment weather, far less weed competition, and a stand ready to grow the moment spring arrives, instead of a seedling trying to survive a Southern summer.
- Direct sow Aug 11 – Sep 10 Opens in 324 daysAbout 11 weeks before to 6 weeks before your first frost (Oct 25 here)A late-summer seeding dodges spring weed pressure, but the seedlings need six to eight weeks of growth before hard frost or they will not survive the winter. Do not risk it in a late season - sow in spring instead.
Frost here: last around Apr 10 (Mar 27 to Apr 24 most years), first around Oct 25. Zone averages, your own yard may run a week or two either way.
Life stages
Two stages to settle in, then three that repeat each year. Windows are typical; your zone and weather move them.
Germination
Day 0 to 7 from sowing- WaterRake the tiny seed in shallowly - a quarter inch at mostevery 3 daysAlfalfa seed is very small and the commonest establishment failure is burying it. Broadcast onto a firm, moist, weed-free bed, rake in a quarter inch, and firm the surface again so the seed sits in contact with damp soil.
- InspectUse the alfalfa inoculant, not a clover or pea oneAlfalfa nodulates with Sinorhizobium meliloti, a different bacterium from the clover and pea groups - a pea-and-vetch inoculant will not work here. Buy pre-inoculated seed or dust it with an alfalfa-specific inoculant, or the stand fixes no nitrogen at all.
Watch for- Seed sown too deep and never emerging
- A crusted surface after rain blocking the tiny seedlings
- Poor germination in acid soil below about pH 6.2
Establishment year
Day 8 to 90 from sowing- WeedWeeds decide the stand - keep them off for the first two monthsAlfalfa seedlings are slow and weak while they build a taproot, and almost every failed home stand was lost to weeds in the first eight weeks. Start on clean ground, and clip tall weeds off above the seedlings rather than pulling them and disturbing the roots.
- WaterWater lightly and often until it roots downevery 3 daysKeep the top inch damp until the seedlings have four or five true leaves. After that, back right off - once the taproot is down, alfalfa is one of the most drought-tolerant plants in the garden and resents wet ground far more than dry.
- InspectCheck the roots for pink nodules by midsummerLift one seedling in the first summer and look for nodules on the roots; cut one open, and an active nitrogen-fixing nodule is pink or red inside. White or green nodules mean the inoculation failed and the stand will never pay its way.
Watch for- Weeds outgrowing the seedlings (the main cause of stand failure)
- Pink nodules on the roots by midsummer (a good sign)
- Yellowing and stunting on acid or waterlogged soil
Spring regrowth
Mar to May, every year- FertilizeNever feed nitrogen - but do watch the pHAlfalfa makes its own nitrogen and feeding it only grows weeds. What it does demand is a near-neutral soil: it wants pH 6.5 to 7.5, and it simply fails below about 6.2. Test the bed before sowing, lime if needed, and know that lime takes months to move.
- WeedClean up the crowns as growth restartsPull or clip cool-season weeds out of the crowns in early spring, before the alfalfa closes in. An established stand shades out most competition on its own; the year to worry is the first one.
Watch for- Crowns pushing new shoots in early spring
- Cool-season weeds getting away in the gaps
- Standing water over the crowns after snowmelt
Bud to first bloom - the cutting window
May to Sep, every year- PruneCut at bud to first bloom, leaving 2-3 inches of stubblemonthlyGo by the plant, not the calendar. Cut when the stand is in bud or roughly a tenth in bloom - that is where nitrogen and feed value peak and where the crown has stored enough to regrow. Leave 2 to 3 inches of stubble and expect three to five cuts a season, roughly every 28 to 35 days.
- PollinateOr let it bloom for the bumblebeesAlfalfa flowers spring-load their pollen and slap the visitor - honeybees learn to rob them from the side without tripping them, so the real pollinators are bumblebees, leafcutter bees, and alkali bees. Leaving one cut to bloom fully is a genuine gift to native bees, at the cost of some feed quality.
- DoStop cutting 4-6 weeks before your first frostThis is the rule that decides whether the stand survives winter. A late cut sends the plant into cold weather with an empty crown. Take the last cut at least four to six weeks before the average first frost, or wait and cut after a killing frost once the plant is already dormant.
Watch for- Purple flowers opening (cut now, or leave this one for the bees)
- Alfalfa weevil larvae skeletonizing the first spring growth
- Leafhopper yellowing on the regrowth after a cut
Winter dormancy
Oct to Feb, every year- ProtectLeave the last growth standing over winterStanding stubble catches snow and insulates the crowns, which is what carries a stand through a hard winter. Do not cut it tidy in November, and keep foot traffic off frozen or thawing crowns - the crown is the one part the plant cannot regrow from.
- InspectCheck the stand each spring and plan its retirementA home alfalfa stand runs three to five years, sometimes eight, then thins as crowns are lost. Count plants in a square foot each spring; when the stand thins out, turn it under and rotate. Do NOT reseed alfalfa into alfalfa - the plant poisons its own seedlings, so give the ground a year in something else.
Watch for- Crowns rotting where water stands in winter
- Frost-heaved crowns lifted out of the soil
- A thinning stand after 4-5 years (time to rotate)
Watch out for
6 to know. 4 are high-risk: Autotoxicity (Alfalfa Following Alfalfa), Deer (browse resistance), Crown Rot, Potato Leafhopper. 2 are active in September.
Autotoxicity (Alfalfa Following Alfalfa)Severity High DisordernowThe single most surprising rule about this crop, and the reason an alfalfa patch is rotated out rather than patched up.
Worth knowing before you sow, not after a failed reseeding.
Newly sown alfalfa germinating patchily or not at all in ground that grew alfalfa within the last year. Seedlings that come up, stall at the first true leaves, and sit there without ever taking off. Stunted, forked, or branched taproots on the few plants that do establish, instead of one straight deep root. Overseeded seed disappearing into a thinning stand with no visible improvement the following season. Damage worst in the top few inches of soil and heaviest immediately around old crowns and where residue was tilled in.
There is nothing to apply and nothing to rescue once seedlings have been checked - the plants that emerged stunted will not catch up, so the honest answer is to accept the loss and re-sow the following year after a season of something else. If you must have alfalfa on that ground sooner, deep tillage and thorough irrigation to leach the top few inches shorten the wait, but a full year with another crop is what actually works.
Do not sow alfalfa into ground that has grown alfalfa within the past twelve months, and do not try to thicken an established stand by overseeding it - neither will work. Plan the rotation instead: take one full season of a different crop, ideally a grass or a cereal that will also use up the nitrogen the old stand left behind, then reseed. Where an old stand is being turned under, tilling and irrigation both help by breaking up and leaching the residue, so a wetter climate clears faster than a dry one. If a stand thins early, the productive move is to overseed it with a grass or clover rather than with more alfalfa.
Alfalfa releases water-soluble compounds - medicarpin and related saponins - from its roots and decaying residue that specifically suppress the germination and root growth of alfalfa seedlings. It is a well-documented effect rather than garden folklore, and it explains two failures that otherwise make no sense: overseeding a thinning stand to thicken it does nothing, and reseeding a bed right after turning an old stand under produces stunted plants that never establish a proper taproot. The effect is strongest in the top few inches of soil, is worse on heavy soils and in dry conditions where the compounds are not leached away, and it lasts roughly a year. Seedlings under about a year old do not yet produce enough to poison their neighbours, so a young stand can be thickened; an established one cannot.
Deer (browse resistance)Severity High WildlifenowAlfalfa is planted deliberately as a deer food plot, which tells you everything: in deer country an unfenced garden stand will be grazed to the ground and kept there, and repeated browsing without recovery kills the crowns.
Fence it, or plant it accepting that you are feeding deer.
Growth cleanly missing overnight, with the plant browsed back to a level line about as high as a deer can comfortably reach. Ragged, torn stem ends rather than the clean angled cut a rabbit leaves - the single most reliable identifier. Buds and flowers gone while the foliage below is untouched, since deer often take the best part first. Hoof prints and droppings in soft ground near the damage. Repeat visits, with fresh damage each morning once a planting has been found. On young trees, shredded and stripped bark and broken low branches in autumn - that is antler rubbing rather than feeding.
There is no chemical fix, only exclusion and recovery. Get physical protection up immediately after the first damage, because deer return to a known meal, and reinforce or rotate whatever you were relying on before. Most plants regrow from browsing if the crown and roots are intact - feed and water a grazed plant and protect the regrowth while it comes back. What does not recover in the same season is anything whose buds or flowers have been taken, and a young tree whose bark has been rubbed right around the trunk is usually lost. Where deer pressure is genuinely heavy, the honest answer is to fence properly or to grow the plants deer leave alone, rather than to keep replacing losses.
Fencing is the only thing that reliably works. Eight feet is the standard for excluding deer, or two parallel four-foot fences a few feet apart, which they will not jump because they cannot judge the landing. Short of that, cage individual plants: a sturdy wire cage or trunk guard around every young tree, left on until the trunk is thick and the canopy is above browse height, prevents both browsing and antler rubbing and is the single highest-value thing you can do for a young tree. Repellent sprays do help at moderate pressure, but they wash off and deer habituate, so reapply after rain and rotate between different types through the season. Motion-activated sprinklers, scent deterrents, and noise devices work for a while and then stop. Siting matters too: plants close to the house, in daily traffic, and screened behind other planting get browsed less than the same plant out at the boundary.
Deer are the largest garden problem across much of the country, and where pressure is high they set the limit on what you can grow at all. They browse at night and around dawn and dusk, taking tender shoots, leaves, buds, flowers, and fruit within about five feet of the ground, and they come back night after night to anything they have found and liked. Because they have no upper incisors they tear rather than cut, leaving ragged stem ends - that is how you tell deer damage from a rabbit's clean angled cut. In fall, bucks rub their antlers on young trunks and can strip the bark right around a stem, which kills a young tree outright. Palatability varies enormously between plants and between seasons: a herd short of food in late winter eats things it ignores in June, and no plant is truly deer-proof.
Crown RotSeverity High DiseaseThis is how most alfalfa stands actually die: not from cold, but from water standing over the crowns in winter, often after a late final cut left them with no reserves.
Sharp drainage and stopping cuts four to six weeks before frost are the two things that prevent it.
A plant that fails to green up or emerge in spring when everything around it does - the most common way this gets discovered, and by then it is already too late. Stems that wilt, blacken, and collapse in wet weather while the soil is clearly damp rather than dry. A crown that is soft, dark, brown, or mushy when you press or lift it, sometimes with a foul smell, instead of firm and pale. New growth that pulls away from the crown with almost no resistance. Clumps browning and going hollow in the middle while the outer growth stays alive. In stands and cover crops, patches wilting, yellowing, and thinning out after wet spells or over a mild wet winter.
There is usually no cure once the crown itself has rotted: the plant is lost, and the job is to save what you can and fix the site. Lift it, cut away every soft, dark, rotted part with a clean blade back to firm tissue, and replant only healthy divisions or firm outer growth into fresh, sharply drained soil or medium. On potted and specialist plants, repotting into fresh airy medium and keeping them drier with better airflow gives the best chance, though a badly rotted crown is usually beyond saving. Bin the rotted material rather than composting it. Replant somewhere better drained rather than back into the same wet spot - or start again from seed, cuttings, or self-sown seedlings, which is the realistic option for anything that resents being moved at all.
Drainage and airflow at the crown are everything. Match the plant to the site first: a dry-adapted perennial planted in heavy or enriched ground is on borrowed time whatever else you do. In wet or clay soil, plant on a slope, berm, raised bed, or gritty rock-garden site so water drains away from the crown rather than standing over it. Set plants at the right depth - never bury the crown - and keep mulch, dead leaves, and debris pulled back from it rather than piled against it, since damp material resting on the crown is a common trigger. Do not overwater, and ease right off during dormancy, when a resting plant wants to be barely damp rather than wet. Give crowded plantings enough space and airflow to dry out, and do not sow a stand too thickly. In cold, wet climates, divide in spring rather than fall, so plants are not recovering from surgery through the wettest months.
Crown rot is the rotting of a plant at the crown - the growing point where the stems meet the roots, right at or just below soil level. Soil fungi and water molds that live in most ground attack that tissue whenever it sits wet, cold, and airless, and because the crown is the one part a perennial cannot regrow from, losing it usually means losing the plant. It is above all a winter problem: a plant that survives hard frost perfectly well in dry ground rots out in a wet one, and the classic story is a perennial that simply never comes back in spring. Dry-adapted plants growing in heavy or over-improved soil are the most vulnerable, along with anything that has mulch, wet leaves, or piled debris sitting against the crown, and anything planted too deep.
Potato LeafhopperSeverity High PestThe main midsummer limit on a home alfalfa stand across the eastern half of the country.
If regrowth after the second cut goes yellow at the leaf tips, this is why - cut early next time, or switch to a glandular-haired variety.
A distinct V-shaped or wedge-shaped yellow patch running from the leaf tip back toward the middle - the signature, and quite different from the general paling of a nitrogen shortage. Leaves later turning red or purple, curling, and dropping. Stunted, shortened stems and a stand that simply refuses to grow after a cut. Tiny bright green wedge-shaped insects that run sideways and hop or fly when you sweep a hand across the top of the stand. Damage worst on the second and third growths of summer and heaviest on new seedings.
There is no way to reverse hopperburn on a leaf that already shows it, so the response is to cut the stand and let the regrowth start clean. Check the new growth after cutting, because migrating adults move straight onto it. Insecticides labeled for alfalfa are used against threshold populations on a field scale but are seldom warranted in a garden; the leafhopper is also highly mobile, so a sprayed patch is quickly recolonized from surrounding vegetation.
The practical home control is timing and variety. Cutting early, at bud stage, removes the population with the crop and gives the regrowth a clean start. Glandular-haired resistant varieties are genuinely effective - the sticky hairs deter the insect - and are worth choosing outright if leafhopper is a recurring problem in your area, though they take a season longer to express full resistance. Avoid stressing a stand, since a vigorous plant tolerates more feeding, and do not rely on beneficial insects, which do not suppress this pest well.
A tiny, wedge-shaped, bright lime-green insect that migrates north on storm fronts each summer and feeds by injecting saliva into the leaf veins. It is not the tissue loss that hurts but the toxin: the plant's vascular system is disrupted, and the leaves develop a distinctive V-shaped yellow wedge from the tip inward - 'hopperburn' - before turning red or purple and dropping. Growth stunts, stems shorten, and both protein content and yield fall sharply. Because the damage appears one to two weeks after the feeding that caused it, by the time a stand looks yellow the harm is already done. It hits the second and third cuttings hardest, and new seedings worst of all, and it feeds on beans, potatoes, and many other crops besides alfalfa.
Alfalfa WeevilSeverity Medium PestA first-cut problem almost exclusively.
If a garden alfalfa stand looks frosted and lacy in May, cut it rather than spray it.
Pinprick holes and skeletonized tissue on the newest leaves at the shoot tips, worked from the inside of folded growth. A frosted, greyish, lacy cast over the whole stand when you look across it in late spring - often the first thing noticed. Small pale-green larvae with black heads and a white stripe down the back, curled inside the tips; they drop when disturbed. Growth stalling and the first cut looking stemmy and leafless. Damage heaviest on the first spring growth and around the edges of the stand where the adults overwintered.
On a home stand, an early first cut is the treatment - regrowth after cutting is generally clean. If a stand is being stripped before it is ready to cut, look at the regrowth under the windrow after cutting, because larvae that survive there can check the second growth. Insecticides labeled for alfalfa exist and are used on a field scale against threshold populations, but they are rarely justified in a garden and will take out the parasitic wasps and pollinators along with the weevils.
Cut early. Taking the first cutting at bud stage rather than letting it stand removes most of the larvae with the crop and exposes the rest to sun and predators, and on a garden-scale stand that is usually the whole solution. Clear heavy debris and rank growth from the edges of the stand in autumn, where the adults overwinter. Leave the parasitic wasps that attack weevil larvae alone by not spraying broad-spectrum insecticides, since they do most of this work over time and are the main reason weevil pressure fell away across much of the country.
A small brown snout beetle whose pale green, black-headed larvae feed on the first spring growth of alfalfa, chewing the leaf tissue between the veins from inside folded shoot tips. Heavy larval feeding turns a stand grey-white and lacy from a distance and can strip the first cut of most of its leaves - which is where nearly all the feed value and nitrogen sit. Adults overwinter in field debris and along the edges of a stand and lay eggs in the stems in late winter and early spring, so damage runs ahead of the growing season and is concentrated almost entirely in the first cutting. Later cuts are usually clean, because cutting itself removes the larvae and exposes them to the sun.
AphidsSeverity Medium PestThree species specialize on alfalfa: the pea aphid (large and green), and in warm regions the spotted and blue alfalfa aphids, which inject toxins and stunt plants far out of proportion to their numbers.
Southern and desert growers should choose an aphid-resistant variety such as CUF 101 rather than plan to spray.
Dense clusters of tiny insects packed onto shoot tips, flower buds, and the undersides of young leaves. Curled, cupped, or distorted new growth that never opens properly. A sticky shine on the leaves - and on whatever sits under the plant - that later goes black with sooty mold. Tiny white cast skins left behind where a colony has been feeding. Ants running steadily up and down the stems, which is often the first thing you notice. Mottled, streaked, or misshapen leaves that do not grow out can mean a virus the aphids brought with them rather than the feeding itself.
Knock the colonies off with a hard jet of water and repeat every few days - on most plants that alone ends it. Pinch out or prune off the worst-infested tips rather than treating the whole plant. If colonies keep rebuilding, spray insecticidal soap or horticultural oil directly onto the insects, covering leaf undersides, and repeat weekly until they are gone; treat early or late in the day, and never spray a wilted or heat-stressed plant. Avoid broad-spectrum insecticides - they kill the ladybugs, lacewings, and parasitic wasps that were about to solve the problem for you, and aphid numbers usually come back worse afterward. Anything you spray must be labeled for the plant you are treating; follow that label and observe its pre-harvest interval. On anything you eat, wash leaves, heads, and buds well before use, since aphids hide down in crowns, folds, and tight growth.
Go easy on nitrogen: the soft, lush growth that heavy feeding produces is exactly what aphids breed on. Check new growth once a week through spring and early summer so you catch colonies while they are still small, and rub the first few out with your fingers. Leave flowering plants nearby and skip broad-spectrum sprays - ladybugs, lacewings, hoverflies, and parasitic wasps do most of this work for free, and they only stay if there is something for them to eat. Keep ants off the plant where you can, since they protect aphids from those predators. Water steadily so plants are not stressed, and check any new plant over before you bring it home or move it indoors, since aphids usually arrive on something else.
Aphids are small soft-bodied sap-suckers - green, black, gray, pink, or waxy white, and mostly wingless - that gather in dense colonies on the tenderest new growth: shoot tips, buds, and the undersides of young leaves. They breed extremely fast in mild weather, so a few can become hundreds inside a week. Their feeding curls and distorts soft growth, and the sticky honeydew they excrete coats everything below and turns black with sooty mold. Ants often farm and defend the colonies for that honeydew. A few aphids are normal on almost any plant and a healthy plant shrugs them off; only dense, persistent colonies do real damage, and some aphids also spread plant viruses as they feed.
Good & bad neighbors
First rule: keep Alfalfa apart. Alfalfa is autotoxic to itself: an established stand suppresses the germination and rooting of alfalfa seedlings, so you cannot overseed a thinning patch or replant the same ground straight after turning one under.
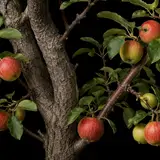
Plant nearby
-
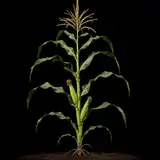
The classic rotation: corn following a turned-under alfalfa stand often needs little or no nitrogen fertilizer for a season or two, which is the single biggest reason alfalfa earns a place in a rotation.
-
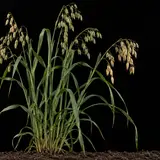
Orchardgrass / timothy (grass companions)Alfalfa is traditionally sown with a bunchgrass, which fills the gaps between crowns, suppresses weeds, adds carbon to balance the alfalfa's nitrogen, and reduces bloat risk when the stand is grazed.
-
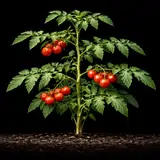
Not a bed-mate but the best use of the cuttings: fresh alfalfa spread as mulch around heavy feeders like tomatoes breaks down fast and delivers nitrogen and trace minerals from deep subsoil.
-
A thin oat nurse crop shelters slow alfalfa seedlings and holds the soil during establishment - but sow it sparingly and clip it early, because a thick nurse crop will outcompete the very seedlings it is meant to protect.
- Traditional pairings, thin evidence
-
Alfalfa is sometimes grown in orchard alleys as a deep-rooted living mulch and pollinator strip, mown for nitrogen-rich mulch under the trees. Keep it back from young trunks, where it harbours voles.
Keep apart
-
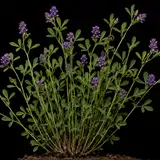
Alfalfa is autotoxic to itself: an established stand suppresses the germination and rooting of alfalfa seedlings, so you cannot overseed a thinning patch or replant the same ground straight after turning one under. Wait at least a year with a different crop in between.
Varieties · 8
You pick one when you add Alfalfa to your garden. Its days to maturity set your harvest window.
Winter-hardy dormant types (fall dormancy 2-4) 3 varieties
Vernal
Compact purple-flowered plants with a low crown; slow, early autumn shutdown.
dormantpublic-varietybacterial-wilt-resistantResists Bacterial Wilt
The benchmark winter-hardy alfalfa (fall dormancy 2) released by Wisconsin in the 1950s, and still the most widely available public variety in the North. Very cold tolerant, persistent, resistant to bacterial wilt, and forgiving of imperfect management - the sensible default for a home stand in zones 3 to 5. Newer proprietary varieties out-yield it, but few beat it for reliability and seed price.
Ladak
Deep-rooted, low-crowned plants with a strong first cut and modest regrowth.
dormantvery-winter-hardydrought-tolerantheirloomAn old, extremely winter-hardy and drought-tolerant alfalfa introduced from Ladakh in the western Himalaya, long grown across the northern Plains and the intermountain West. It puts most of its growth into one big first cut and regrows slowly afterward, which suits a low-input garden stand and a short season better than a hay operation.
Ranger
Purple-flowered, moderately upright plants, hardy and quick to green up in spring.
dormantpublic-varietywilt-resistantResists Bacterial Wilt
Another long-standing public winter-hardy variety (fall dormancy 3), bred in Nebraska for cold tolerance and bacterial wilt resistance. Slightly less dormant and a little quicker to regrow than Vernal, and one of the cheaper seeds on the shelf - a good, unglamorous choice for a garden stand.
Intermediate types (fall dormancy 4-6) 1 variety
Alfagraze
Broad, low, spreading crowns with dense regrowth after cutting or grazing.
grazing-toleranttraffic-tolerantspreading-crownThe first widely available grazing-tolerant alfalfa, bred at Georgia for broad, low crowns that survive being trampled and cut hard. Worth knowing about even if you keep no livestock: the same traits make it the most forgiving variety for a stand that will be walked on, mown at inconsistent heights, or cut a little too short.
Non-dormant southern types (fall dormancy 7-11) 2 varieties
CUF 101
Tall, upright, fast-regrowing plants that scarcely pause in a mild winter.
southerndesert-adaptedaphid-resistantResists Spotted Alfalfa Aphid, Blue Alfalfa Aphid
A classic non-dormant variety (fall dormancy 9) developed for California and the desert Southwest, carrying resistance to the aphids that plague alfalfa in hot climates. It grows through mild winters and gives many cuts a year, and it will not survive a northern winter - this is a zone 8-and-warmer plant.
Nitro
Fast, tall, leafy growth in the seeding year, with little crown development.
annual-usecover-crophigh-nitrogenAn alfalfa bred deliberately not to persist: a non-dormant type selected to pour its energy into top growth and nitrogen fixation in a single season rather than into winter survival. Sown as an annual green manure where you want alfalfa's nitrogen without committing a bed for years. Do not expect it to come back, and do not reseed alfalfa into the same ground the following year.
Other varieties 2 varieties
Common (VNS)
Unpredictable - anything from a hardy dormant type to a non-dormant southern one.
variety-not-statedinexpensiveunpredictableNot a variety at all: VNS means 'variety not stated', the cheapest alfalfa seed on the shelf and of unknown breeding, fall dormancy, and disease resistance. It may perform perfectly well, or it may be a southern non-dormant lot that dies in your first winter. For a stand you intend to keep for years, the few extra dollars for a named variety matched to your zone is the best money you will spend on this crop.
Sprouting Alfalfa
Clean, undyed, tan-yellow seed sold in food packaging rather than farm bags.
sproutingkitchenuntreatedAlfalfa seed sold as a food product for sprouting rather than for sowing: untreated, food-grade, and lot-tested. This is the only alfalfa seed that should ever go into a sprouting jar - cover-crop and field seed is routinely treated with fungicide and is not food. Even with sprouting seed, rinse twice daily and observe the raw-sprout cautions in the safety notes.
Grower tips
Notes from growers, tagged with the zone they grow in. A person reads every post before it appears.
Nobody has posted about Alfalfa yet. The first one usually saves someone a season.
Free account. Your post shows your grower name and zone, never your email.