Add it to your home screen and it opens full screen: no browser bars, one tap away, and everything stays signed in. Free, nothing to download from an app store.
- Tap the Share button in your browser
- Scroll down and choose “Add to Home Screen”
- Open GrowSomeFood from your home screen
- Open your browser’s menu
- Choose “Add to Home screen” or “Install app”
- Open GrowSomeFood from your home screen
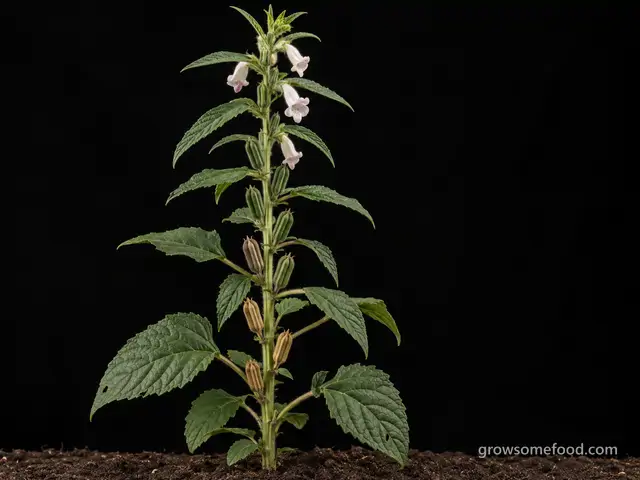
Sesame
The oldest oilseed crop in the world, and a genuinely easy one: a heat-loving, drought-proof annual with foxglove-like flowers that bees adore and capsules full of seed for tahini and toasting.
Sesame is one of the nine major food allergens recognized in the United States, added to the list by the FASTER Act in 2023, and reactions can be severe. Label anything you bake, gift, or share, and be careful about handling and storing seed around anyone with a sesame allergy - the dust from threshing carries too. The plant itself is not toxic and no part is poisonous. The seeds are high in oil and go rancid if stored warm, so keep them cool, dark, and dry.
Overview
The one thing to knowThere is one skill to learn, and it is the whole difference between a harvest and a bare patch of soil: sesame capsules shatter.
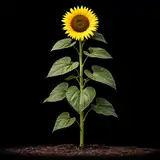
Sesame is an upright annual, two to five feet tall, that carries a column of white-to-pink tubular flowers up its stem from midsummer, each followed by an oblong capsule packed with the flat little seeds everyone knows from a burger bun, a bowl of tahini, or a jar of gomasio. It is thought to be the oldest oilseed crop in cultivation, and it earns that longevity honestly: it thrives on heat, shrugs off drought, wants lean soil, and asks for almost nothing once it is up.
For a US gardener the appeal is threefold. It grows where summer defeats other crops - Texas, Oklahoma, the Southeast, the desert Southwest. The flowers are one of the best bee plants you can put in a vegetable bed. And home-toasted sesame, ground fresh into tahini, is genuinely better than anything in a jar.
There is one skill to learn, and it is the whole difference between a harvest and a bare patch of soil: sesame capsules shatter. They split open when ripe and dump the seed on the ground - the trick behind open sesame - so you cut the plants before they are fully ripe and let them finish upside down over a sheet. Get that timing right and the crop is easy.
Quick facts
- Sprouts in
- 5 days3 to 10
- Soil to sprout
- 80 °F70 to 95
- Life cycle
- Annual
- Seed to save
- About 110 days after planting90 to 130
- Height
- 48 in24 to 72
- Spread
- 16 in10 to 24
- Cold
- Killed by frostdamaged below 32°F
- Heat
- Struggles above 105°F
- Self-sows
- Yes, expect volunteers
Full sun · low water · well-drained soil · 6 in apart (4 to 12) · direct sow
When to plant
Nothing is open today. Summer sowing opens 7 months, Apr 24 to May 22.
- Direct sow Apr 24 – May 22 Opens in 215 daysAbout 2 weeks after to 6 weeks after your last frost (Apr 10 here)Sow two to six weeks after last frost, once soil holds 70°F. This is sesame's American home range - the Texas and Southeast summer is exactly what the crop wants.
Frost here: last around Apr 10 (Mar 27 to Apr 24 most years), first around Oct 25. Zone averages, your own yard may run a week or two either way.
Life stages
Six stages, about 4 months from sowing to the first pull. Windows are typical; your zone and weather move them.
Germination
Day 0 to 5 from sowing- WaterSow shallow and keep the surface just moistdailySesame seed is tiny and must be sown no more than a quarter to half an inch deep. It comes up fast in warm soil but a crusted surface stops it dead - water lightly and often rather than heavily.
- ProtectWait for 70°F soilSesame is a hot-country crop and does nothing in cool ground. Sowing two to six weeks after last frost, into genuinely warm soil, beats sowing early every time.
Watch for- A soil crust after rain blocking the tiny seedlings
- Nothing up in a week (soil too cold, or sown too deep)
Seedling
Day 6 to 25 from sowing- ThinThin to 4-6 inches apartSesame seedlings start slowly and hate competition. Thin while they are small, to 4-6 inches in rows 24-30 inches apart - close spacing keeps the plants upright and the capsules high enough to cut cleanly.
- WeedWeed hard for the first monthThis is the crop's one vulnerable stretch. Young sesame is easily smothered; once it is a foot tall and rooting deeply, almost nothing troubles it.
Watch for- Weeds outgrowing the slow young plants
- Cutworms felling seedlings at soil level
Vegetative
Day 22 to 55 from sowing- WaterWater sparingly - sesame prefers to be dryevery 2 weeksOnce established, sesame is one of the most drought-tolerant crops in the garden and resents wet feet far more than dry ones. Water only in a genuine drought, and never let the bed stay soggy.
- FertilizeFeed lightly if at allSesame crops well on lean soil. Heavy nitrogen makes tall, soft, top-heavy plants that lodge in a summer storm and delays the dry-down you need at the end.
Watch for- Yellowing and wilting after heavy rain (waterlogging, not drought)
- Plants flopping in wind after a rich feed
Flowering
Day 50 to 90 from sowing- InspectWatch the flowers climb the stemSesame flowers from the bottom up over many weeks, a foxglove-like white or pink bell in each leaf axil, each followed by a capsule. That bottom-to-top order is why the lowest capsules ripen first and set your harvest date.
- PollinateLeave the bees to itSesame self-pollinates reliably and needs no help, but the flowers are a genuine bee magnet and a good reason to grow a patch. Do not spray anything on open flowers.
Watch for- Bees working the flowers all morning (a good sign)
- Aphids clustering on flowering tips
- Spider mite stippling in a hot dry spell
Capsule fill and dry-down
Day 85 to 110 from sowing- WaterStop watering once the lower capsules turnFrom here the whole game is a clean dry-down. Water now only feeds late growth and risks mold in ripening capsules; let the plant finish dry.
- InspectCheck the lowest capsules every few daysThe bottom capsules ripen weeks before the top ones. Once the lowest go from green to tan and the leaves start yellowing and dropping, you are days away from cutting - and once they split, seed starts hitting the ground.
Watch for- The lowest capsules turning tan (start planning the cut)
- Any capsule splitting open at the tip (cut NOW)
- Birds working the top of the plants
- A wet spell during dry-down (mold and sprouting in the capsule)
Harvest
Day 90 to 120 to the first pull from sowing- HarvestCut whole plants the moment the first capsules splitDo not wait for the whole plant to ripen - it never will at once. Cut the stalks at ground level as soon as the lowest capsules turn tan and the first one splits at the tip, and handle them upright and gently so you do not shake the seed out on the way.
- DoBundle upside down over a sheet to finishStand or hang the bundles head-down in a dry, airy, shaded place with a tarp, sheet, or bucket beneath. Over one to two weeks the capsules finish ripening and split, and the seed simply falls out. Shake the bundles daily to speed it, then winnow the chaff off in a breeze.
Watch for- Seed on the ground under the plants (you waited too long)
- Rain forecast before you cut (bring the bundles under cover)
- Damp seed going into a jar (dry it further first)
Harvest
- The lowest capsules have turned from green to tan and the leaves are yellowing and dropping
- The first capsule splits open at the tip - that is the signal to cut, not to wait
- Roughly 90-130 days from sowing, depending on variety and heat
- Cut whole plants the moment the first capsules split
- Bundle upside down over a sheet to finish
Per plant 0.5 to 3 ozPicking pull once
Cook with Sesame
Watch out for
6 to know. 2 are high-risk: Root Rot, Capsule Shatter (Seed Loss at Harvest). 4 are active in September.
Root RotSeverity High DiseasenowSesame is far more likely to be killed by a wet week than a dry month - waterlogging is the number one cause of a failed patch.
Grow it on a ridge or a raised bed and water only in genuine drought.
Wilting in the middle of the day on a plant whose soil is damp - the classic tell, and the reason people water a rotting plant and finish it off. Leaves yellowing from the bottom up, dull off-color foliage, and growth that stalls for no visible reason. Whole shoots, or one side of the plant, collapsing while the rest still looks fine. Soft, dark, or mushy tissue at the base of the stem or at the crown, sometimes with a sour smell. Lift a failing plant and look at the roots: healthy ones are firm and pale, rotted ones are brown or black and slimy, and the outer layer slips off between your fingers leaving a thread of core behind. Seedlings that topple over at soil level are the same problem, called damping-off.
There is no cure for tissue that has already rotted, so act on the conditions rather than looking for a spray. Stop watering at once and fix the drainage - open up compacted soil, or move the plant to a raised, sharply drained position or a container. Lift a badly affected plant, cut away every soft dark root and rotted section with a clean blade back to firm pale tissue, and replant only the healthy parts into fresh free-draining soil or mix. Often the better move is to give up on the plant and save its offspring instead: cuttings, offsets, or divisions taken from firm healthy growth root readily and give you a clean start. Bin the rotted material rather than composting it, and correct the drainage before you replant, because the rot comes straight back in the same wet spot.
Drainage is the whole defense. Match the plant to the site first - something that wants sharp drainage will not survive heavy clay or a low, water-collecting spot however well you tend it. Where the ground is heavy, plant on a raised bed, berm, or slope, or grow in a container. Set plants at the depth they were already growing, since burying the crown or the root flare is a common cause of rot, and keep mulch pulled back a few inches from the stem base instead of piled against it. Water the soil rather than the calendar: check that the top inch or two is dry before watering again, cut back hard in cool weather and winter dormancy, and never leave a pot standing in a full saucer. Do not plant or dig in soggy ground, and go easy on rich amendments for plants that want it lean. Rotate annual crops, and start with clean healthy plants and fresh mix.
Root rot is not one organism but a group of soil fungi and water molds - Pythium, Phytophthora, Fusarium, Rhizoctonia and others - that sit harmlessly in most soils and only turn destructive when the ground stays saturated. Waterlogged soil drives the air out, the roots suffocate, and the weakened tissue is invaded and goes soft, brown, and stringy. Because the damage is underground you usually see it first as something that looks like drought: wilting, yellowing, stunting, a plant that does not respond to being watered. Overwatering, heavy compacted ground, a low spot that collects runoff, a pot with no drainage or a saucer left standing full, and cold wet soil in winter are the usual causes. Once roots have actually rotted there is no cure - this is a problem you prevent rather than treat.
Capsule Shatter (Seed Loss at Harvest)Severity High DisordernowRead this before the season rather than after it.
Nearly all sesame harvest disappointment is a week of hesitation at cutting time.
The lowest capsules turning from green to tan while the top of the plant is still flowering - that is the clock starting. The first capsule splitting open at its tip, which means cut this week, not next. Loose seed on the soil beneath the plants, or seed running out when you brush past a row. Leaves yellowing and dropping from the bottom up. Seed scattering out of the bundles as you carry them, which means you were rough or waited too long.
Once seed is on the ground it is gone, though it will often volunteer next summer in a warm zone. Salvage what is left by cutting immediately and standing the bundles head-down over a tarp indoors. If a whole row got away from you, sweep and sieve what has fallen on bare soil or plastic mulch, and treat next year's timing as the fix - this is a scheduling problem rather than a plant-health one.
Cut early rather than late: when the lowest capsules have turned tan, the leaves are yellowing, and the first capsule splits, cut every plant at ground level that week. Check the patch every two or three days once dry-down starts, rather than once a week. Handle cut stalks upright and gently, and carry them over a sheet if you have far to go. Stop watering as soon as the lower capsules turn so the plant finishes cleanly. Where you can get non-shattering seed, it removes the problem entirely.
Sesame's defining problem, and the reason most first-time growers end a season with a beautiful crop and almost no seed. The plant flowers from the bottom of the stem upward over many weeks, so its capsules ripen in the same order - the lowest are dry and splitting while the top ones are still green. A ripe capsule dehisces, springing open at the tip and pouring its seed onto the ground at the slightest knock, which is exactly the trick behind the phrase open sesame. There is no way to make a plant ripen evenly, so the crop is never harvested ripe; it is cut early and finished off the plant. Commercial growers get around it with bred non-shattering lines that are not generally sold in garden packets.
Charcoal Rot (Sesame)Severity Medium DiseasenowTurns up in the same hot, dry, stressed conditions sesame otherwise loves, which catches people out - the crop tolerates drought well, but drought plus extreme heat at flowering is what lets this one in.
A plant that wilts and dies abruptly at or just after flowering while its neighbours look fine. Lower stems and the crown going ashy grey or silver, with the outer tissue shredding away. Fine black pinpricks scattered through the greyed stem tissue, visible when you scrape it with a thumbnail. Damage concentrated on the hottest, driest, most stressed part of the row.
There is no cure for an infected plant and no worthwhile spray for a garden. Pull affected plants and destroy them rather than composting, harvest whatever capsules are salvageable off them, and put the bed onto a different family next season. Where it recurs, longer rotation and steadier moisture through the peak heat are the only levers that matter.
Rotate away from sesame, beans, cowpeas, sorghum, corn, and melons for two to three years, since all of them host it. Avoid drought stress in the hottest weeks, which is the trigger even though the crop is drought-tolerant overall. Do not crowd the planting, keep soil organic matter up, and remove and destroy infected stems rather than turning them into a bed. Sow into warm, well-drained ground and avoid heavy nitrogen, which makes soft tissue.
A soil-borne fungus (Macrophomina phaseolina) that attacks sesame stems and roots in hot weather, especially where plants are drought-stressed on top of high heat. Infected plants wilt suddenly, often after flowering, and the lower stem goes ashy grey and shreds, peppered with tiny black specks - the sclerotia that give the disease its name and let it survive in the soil for years. It has a wide host range across beans, cowpeas, corn, sorghum, and melons, which is why a tight rotation between those crops keeps it building.
Birds & WildlifeSeverity Medium WildlifenowFinches and sparrows work sesame capsules as they open, at exactly the moment the crop is most vulnerable to shatter anyway.
Cutting the plants early and finishing them under cover solves the birds and the shattering in one move - which is another reason not to leave the crop standing.
Fruit disappearing from the outermost, most exposed parts of the plant first, and from the top of a tree where you cannot reach anyway. Single neat pecks and gouges in ripening fruit, with several fruits sampled rather than one eaten through - the classic sign that it was birds rather than an animal. Heads of grain or seed going visibly lighter and emptier as they ripen, with hulls and chaff scattered underneath. Freshly sown seed vanishing off the surface of a bed before it germinates. Bird traffic in and out of the plant picking up as the crop colors, and birds waiting on nearby wires and branches. Wasps arriving at the pecked and split fruit shortly afterward.
There is no treatment once a crop is being taken - only protection and timing, so the answer is to get netting on and to pick what is ready. Reflective tape, flash ribbon, spinners, and decoy predators do work, but only for a few days at a time: birds habituate fast, so move and rotate them and never rely on them as the main defense for a crop you care about. Cut and gather grain or seed heads a little early, at firm dough, and finish drying them under cover instead of leaving them standing for the flocks. Plant a little extra, or a decoy crop the birds prefer, and accept sharing anything that crops heavily. On a wild or foraged patch, fruit going to birds and small mammals is the point of the plant rather than a problem to solve.
Net, and net early. Bird netting draped over a frame or hoops so it stands off the fruit, with the edges closed at ground level, is the only thing that reliably works at harvest scale - and it has to go on before the crop starts to color, because once birds have found the food they are far harder to displace. Keep fruit trees small enough that netting them is actually feasible; that decision gets made years earlier, at planting. Bags of mesh, organza, or paper slipped over individual heads, clusters, or prize fruit protect a small crop without netting the whole plant. Then shorten the exposure: pick promptly and completely rather than leaving ripe fruit hanging as a lure, clear split and dropped fruit that draws birds and wasps alike, and where a crop can finish off the plant, harvest a little early and ripen or dry it under cover. Rake in or cover broadcast seed so it is not lying in plain view.
Birds find ripening fruit and seed before you do. Robins, waxwings, starlings, catbirds, jays, sparrows, finches, blackbirds, and doves all work a garden, and the pressure arrives in a narrow window - the last days before harvest, when sugar rises, color changes, and the crop softens or the grain hardens. A flock can strip a small planting in a day or two, and birds that only peck rather than take whole fruit still leave wounds that rot or draw wasps. Squirrels, chipmunks, and other wildlife usually turn up on the same crop at the same time. This is competition rather than disease: the birds are not harming the plant, and a big tree or a heavy-cropping bush often has enough for everyone - but on a small planting it can be the difference between a harvest and none.
Spider MitesSeverity Medium PestThe one pest that regularly matters on sesame, because the crop is grown in exactly the hot dry conditions mites multiply in.
A hose-down of the leaf undersides in a heat wave usually settles it; do not spray plants that are in flower.
Fine pale stippling or speckling across the upper leaf surface, as though the color had been sandblasted out of it, and later a dull bronze or rusty cast over the whole leaf. Delicate webbing across leaf joints, shoot tips, and undersides - that comes with a heavy infestation and means you caught it late. Leaves that dry, curl, and drop early while the plant looks thirsty no matter how much you water it. Hold a leaf over a sheet of white paper and tap it: the specks that fall and then start walking are mites. With a hand lens, look on the undersides for the mites themselves, pale or reddish, and their round translucent eggs. Damage that shows up first on the hottest, dustiest, most sheltered side of a plant, or on a pot sitting near a radiator indoors.
Start with water. A strong jet aimed at the leaf undersides, repeated every few days for a couple of weeks, knocks populations down and breaks the cycle - on many plants that alone ends it. On anything that regrows quickly, shearing back badly infested growth resets the plant to clean foliage. If it keeps building, spray insecticidal soap or horticultural oil directly onto the undersides where the mites actually live, and repeat every five to seven days for three rounds: contact sprays do not kill the eggs, so a single application always fails. Anything you spray must be labeled for the plant you are treating - follow the label and observe its pre-harvest interval on anything you eat. Predatory mites are an effective release in a greenhouse or on an indoor plant. Above all, correct the heat, dust, and drought stress that caused it, or the mites simply come back.
Do not let plants get drought-stressed - that is the single strongest trigger, and a plant watered steadily through heat is far less likely to have a mite problem at all. Hose the foliage down, undersides included, during hot dry spells: it knocks mites off, washes away the dust they thrive in, and raises the humidity around the plant for a while. Indoors and under cover, keep the air from going hot, dry, and stagnant, wipe or rinse the leaves occasionally, and keep pots away from radiators and heating vents. Inspect any plant carefully before you bring it indoors for winter or set it among others, since mites almost always arrive on something else. Avoid broad-spectrum insecticides: they wipe out the predatory mites, lacewings, and lady beetles that do most of this work for you, and reliably leave you with a worse outbreak than you started with.
Spider mites are not insects but tiny sap-feeding arachnids, smaller than a grain of salt, and you almost always notice the damage before you notice them. They live on the undersides of leaves and drain the cells one at a time, which is why the leaf goes finely stippled with pale dots before it bronzes and dries. They breed explosively in hot, dry, dusty, still air - a generation can pass in a week at high temperature - so a barely visible population becomes a webbed, bronzed plant within a fortnight. Drought-stressed plants and plants wintered indoors in dry heated air are the classic hosts. Broad-spectrum insecticides make matters worse rather than better, because they kill the predatory mites and lady beetles that normally hold mites in check.
AphidsSeverity Low PestDense clusters of tiny insects packed onto shoot tips, flower buds, and the undersides of young leaves.
Dense clusters of tiny insects packed onto shoot tips, flower buds, and the undersides of young leaves. Curled, cupped, or distorted new growth that never opens properly. A sticky shine on the leaves - and on whatever sits under the plant - that later goes black with sooty mold. Tiny white cast skins left behind where a colony has been feeding. Ants running steadily up and down the stems, which is often the first thing you notice. Mottled, streaked, or misshapen leaves that do not grow out can mean a virus the aphids brought with them rather than the feeding itself.
Knock the colonies off with a hard jet of water and repeat every few days - on most plants that alone ends it. Pinch out or prune off the worst-infested tips rather than treating the whole plant. If colonies keep rebuilding, spray insecticidal soap or horticultural oil directly onto the insects, covering leaf undersides, and repeat weekly until they are gone; treat early or late in the day, and never spray a wilted or heat-stressed plant. Avoid broad-spectrum insecticides - they kill the ladybugs, lacewings, and parasitic wasps that were about to solve the problem for you, and aphid numbers usually come back worse afterward. Anything you spray must be labeled for the plant you are treating; follow that label and observe its pre-harvest interval. On anything you eat, wash leaves, heads, and buds well before use, since aphids hide down in crowns, folds, and tight growth.
Go easy on nitrogen: the soft, lush growth that heavy feeding produces is exactly what aphids breed on. Check new growth once a week through spring and early summer so you catch colonies while they are still small, and rub the first few out with your fingers. Leave flowering plants nearby and skip broad-spectrum sprays - ladybugs, lacewings, hoverflies, and parasitic wasps do most of this work for free, and they only stay if there is something for them to eat. Keep ants off the plant where you can, since they protect aphids from those predators. Water steadily so plants are not stressed, and check any new plant over before you bring it home or move it indoors, since aphids usually arrive on something else.
Aphids are small soft-bodied sap-suckers - green, black, gray, pink, or waxy white, and mostly wingless - that gather in dense colonies on the tenderest new growth: shoot tips, buds, and the undersides of young leaves. They breed extremely fast in mild weather, so a few can become hundreds inside a week. Their feeding curls and distorts soft growth, and the sticky honeydew they excrete coats everything below and turns black with sooty mold. Ants often farm and defend the colonies for that honeydew. A few aphids are normal on almost any plant and a healthy plant shrugs them off; only dense, persistent colonies do real damage, and some aphids also spread plant viruses as they feed.
Good & bad neighbors
All of these are traditional pairings. The evidence is thin, so treat them as a nudge, not a rule.
Plant nearby
-
A traditional West African and Indian intercrop: the cowpea fixes nitrogen and covers the ground during sesame's slow first month, and both crops finish dry in the same heat.
-
Two crops that genuinely want the same thing - full sun, heat, lean freely drained soil, and very little water - so they share a bed happily and are ready to leave it at about the same time.
Keep apart
-
Squash wants rich soil and steady heavy water, which is close to the opposite of what sesame needs, and its sprawl smothers the slow young sesame seedlings during their one vulnerable month.
-
Sunflowers are allelopathic and heavy competitors, and they shade out a crop that needs every hour of sun. They also draw the same seed-eating birds to the patch just as sesame capsules start to open.
Varieties · 3
You pick one when you add Sesame to your garden. Its days to maturity set your harvest window.
White and cream sesame 1 variety
White Sesame
Upright stems hung with pale flowers and oblong green capsules that ripen tan; small flat cream-colored seeds.
white-sesameall-purposeThe standard cream-seeded sesame, and what most garden seed sold simply as sesame turns out to be. Upright plants three to five feet tall carrying a long column of white-to-pale-pink flowers, followed by capsules of small flat cream seeds. Mild and versatile: this is the type for tahini, halva, baking, and everyday toasting. Generally among the faster types to finish, which makes it the right pick anywhere the season is tight.
Black sesame 1 variety
Black Sesame
Similar upright plants with pink-flushed flowers; matte jet-black seeds.
black-sesamestrong-flavorThe jet-black, always-unhulled sesame of Japanese, Korean, and Chinese cooking - kuro goma. Stronger, more bitter, and more aromatic than white sesame, and the type to grow if you want black sesame paste, dressings, ice cream, or sweets where the flavor is meant to lead. Because the color lives in the seed coat, black sesame is never hulled, which also means it keeps more of the calcium and minerals. It tends to want a slightly longer, hotter season than white types.
Benne (Southern landrace) 1 variety
Sea Island Benne
Shorter, branchier plants than modern sesame; small, round, buff-to-brown seeds.
heirloomlandracesouthernThe small-seeded Southern landrace benne, carried to the Lowcountry by enslaved West Africans and grown alongside Carolina Gold rice, revived in recent decades by Southern seed growers and chefs. Seeds are smaller, rounder, and buff-to-brown, and the flavor is the reason to grow it - deeper, more roasted, almost cocoa-like next to modern commercial sesame. Plants are shorter and branchier, adapted to humid Southeast summers, and they shatter readily, so cut them early and finish the bundles head-down.
Grower tips
Notes from growers, tagged with the zone they grow in. A person reads every post before it appears.
Nobody has posted about Sesame yet. The first one usually saves someone a season.
Free account. Your post shows your grower name and zone, never your email.