Add it to your home screen and it opens full screen: no browser bars, one tap away, and everything stays signed in. Free, nothing to download from an app store.
- Tap the Share button in your browser
- Scroll down and choose “Add to Home Screen”
- Open GrowSomeFood from your home screen
- Open your browser’s menu
- Choose “Add to Home screen” or “Install app”
- Open GrowSomeFood from your home screen
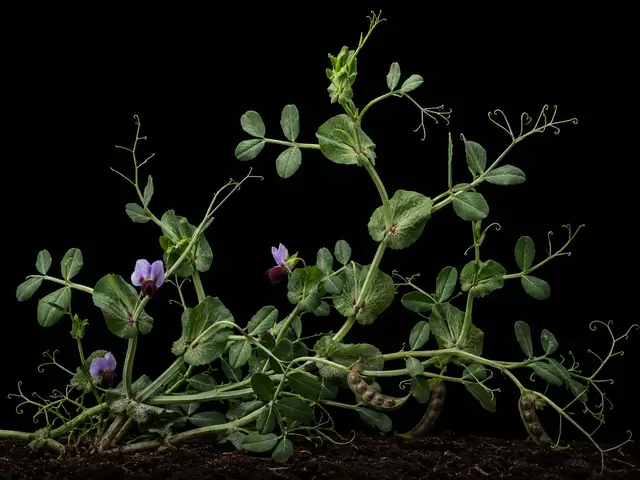
Austrian Winter Pea
The easiest nitrogen cover crop to live with: a winter-hardy field pea that blankets a bed from fall to spring, fixes a lot of nitrogen, dies when you cut it, never becomes a weed - and hands you a crop of gourmet pea shoots on the way.
The shoots, tendrils, flowers and mature seeds are all edible - but cover-crop seed is very often sold treated with fungicide and dyed pink, blue or green, and treated seed must never be eaten or fed to animals. If you plan to pick shoots, buy untreated seed and check the bag tag. Do not confuse this with the ornamental sweet pea (Lathyrus odoratus), which climbs at the same season and looks similar in leaf and flower but whose pods and seeds are toxic - keep sweet peas out of the food garden.
Overview
Austrian winter pea is the garden pea's field-grown cousin - the same species, Pisum sativum, selected over centuries for forage and soil rather than for sweet pods. Sown in autumn, it comes up fast in cooling soil, knits into a low green mat that protects the bed through winter, and then surges in spring into a knee-high tangle of hollow stems and tendrils topped with purple-and-maroon bicolor flowers. Cut at bloom, it delivers one of the largest nitrogen contributions of any cover crop, in a form that breaks down quickly - its residue is soft and low in carbon, so the nitrogen is available to the next crop within weeks rather than months.
What makes it the friendliest legume cover for a home garden is what it does not do. Unlike hairy vetch, it is not a weedy self-sower; unlike cereal rye, it dies easily when mowed or crimped and leaves no tough residue to fight; and unlike crimson clover it does not need a mild winter to be worth sowing. And it has a bonus no other cover crop offers: the tender growing tips are pea shoots, a genuine gourmet salad green, so a bed of green manure also feeds you through the cool months. One important caution first - cover-crop seed is often sold fungicide-treated and dyed, and treated seed must never be eaten, so buy untreated seed if you intend to pick.
Quick facts
- Sprouts in
- 10 days6 to 16
- Soil to sprout
- 60 °F40 to 75
- Life cycle
- Annual
- Seed to save
- About 260 days after planting100 to 300
- Height
- 36 in18 to 60
- Spread
- 8 in4 to 14
- Cold
- Takes hard frostdamaged below 0°F
- Heat
- Struggles above 85°F
Full sun or part sun · medium water · well-drained soil · 2 in apart (1 to 4) · direct sow
When to plant
Fall sowing is open for 4 more days. Next: fall, Aug 11 to Sep 5.
- Direct sow Aug 26 – Sep 25 Closes in 4 daysAbout 9 weeks before to 4 weeks before your first frost (Oct 25 here)THE main use: sow four to eight weeks before your first frost so the stand is 6-8 inches tall and rooted before hard cold. It overwinters as a green mat, surges in spring, and is terminated at bloom for a big shot of nitrogen ahead of summer crops.
- Direct sow Aug 11 – Sep 5 Opens in 324 daysAbout 11 weeks before to 7 weeks before your first frost (Oct 25 here)The standard mix: sow with cereal rye, oats, or triticale as a nurse crop. The grain gives the weak-stemmed peas something to lean on, adds carbon to balance their nitrogen, and holds the soil if the peas winterkill in a hard year.
Frost here: last around Apr 10 (Mar 27 to Apr 24 most years), first around Oct 25. Zone averages, your own yard may run a week or two either way.
Life stages
Six stages, about 7 weeks from sowing to the first pull. Windows are typical; your zone and weather move them.
Germination
Day 0 to 10 from sowing- WaterBroadcast and rake the seed in 1-2 inches deepevery 4 daysWinter pea seed is large and needs real soil cover - rake or scratch it in 1 to 2 inches, not a light dusting. Broadcast onto a firm, moist bed and water in. Sown into cooling autumn soil it comes up fast and evenly.
- InspectUse pea and vetch inoculant on new groundWinter peas nodulate with Rhizobium leguminosarum biovar viciae - the pea, lentil and vetch group. Most cover-crop seed is sold pre-inoculated; on ground that has never grown peas or vetch, dust the seed, or the stand will fix little nitrogen.
Watch for- Seed left on the surface for birds and mice
- Slow, patchy emergence from a dry or loose seedbed
- Seed rotting in cold saturated soil
Fall establishment
Day 11 to 60 from sowing- WeedLet the stand knit together before coldWinter peas grow fast in cool weather, throwing weak, hollow, tendrilled stems that lean on each other into a low mat. Keep weeds down while it fills in; once the stand closes it suppresses them itself.
- ProtectGet 6-8 inches of growth in before hard frostA fall-sown stand needs to be up and rooted before hard cold - sow about a month to six weeks before your first frost. A well-established stand takes far more cold than a spindly late-sown one, which is the difference between a cover that overwinters and one that does not.
Watch for- Deer, rabbits and birds grazing the young stand
- Thin growth from a sowing that went in too late
- Nitrogen nodules forming on the roots (a good sign)
Winter cover (fall-sown stands)
Day 80 to 200 from sowing- ProtectLet it hold the soil through winterWinter peas overwinter as a low green mat that shields the soil, suppresses weeds, and keeps fixing nitrogen through mild spells. They are hardy to roughly 0 to 10°F with reasonable snow cover - less than hairy vetch, more than crimson clover - so zone 6 and warmer is their reliable range.
- InspectWatch for the spring surgeAfter winter the stand takes off, going from an ankle-high mat to a knee-high tangle in a matter of weeks and building most of its nitrogen just before it flowers. That surge is your cue that the shoot-picking window and then the termination window are opening.
Watch for- Winterkill in zones colder than about 6 (grow it as a spring cover there)
- Patches thinning after a wet mild winter (crown and root rot)
- Rapid green-up and vining in early spring
Picking pea shoots
Day 40 to 210 to the first pull from sowing, picking to about day 240- HarvestPinch the top 4-6 inches of tender tipsweeklyThe growing tips, young leaves and curling tendrils are pea shoots - a genuine gourmet green with a sweet, intense fresh-pea flavor. Snap off the top 4 to 6 inches wherever it snaps cleanly; anything that bends rather than breaks is too old. The plant branches and gives you more, so pick often.
- InspectOnly pick shoots if the seed was untreatedCover-crop seed is routinely sold treated with fungicide and dyed pink, blue or green. Treated seed is not food, and neither is anything grown from it in the first weeks. If you want to eat the shoots, buy untreated seed and keep the bag tag - and never eat shoots from a stand whose seed source you do not know.
Watch for- Tips that bend instead of snapping (past their best - move along the row)
- Pea aphids massing on the growing tips you were about to pick
- Powdery mildew on the stand as spring warms
Bloom - the terminate window
Day 70 to 265 from sowing- PollinateLet the purple-and-maroon flowers feed the beesUnlike the white-flowered garden pea, winter peas bloom in bicolored purple and maroon, and bumblebees work them hard at a lean time of year. Leaving the stand to flower for a week or two before you cut it is a real gift to early pollinators.
- PruneWatch for bloom, then TERMINATE - go by the plant, not the dateTerminate at early-to-full bloom, when fixed nitrogen and biomass peak. A spring-sown stand blooms roughly 60 to 80 days after sowing; a fall-sown stand not until the following spring, so this reminder can arrive months early - leave it open and act when the purple flowers appear. Mow, crimp, or till it in, then wait two weeks before planting.
Watch for- Purple-and-maroon bicolor flowers opening (terminate now for maximum nitrogen)
- Bumblebees working the bloom
- The stand starting to lodge and mat down under its own weight
Dry seed and die-off (only if you let it run past bloom)
Day 270 to 300 from sowing- HarvestOr let a patch dry down into field peasLeft past bloom, the stand sets short pods of small, dark, speckled field peas - the split-pea-soup pea, and perfectly good eating cooked. Pull the plants when most pods are tan and rattle, dry them under cover a week or two, then thresh in a sack and winnow. Save the cleanest seed to re-sow your next cover.
- DoUnderstand the tradeoff before you let it seedEvery day past bloom moves nitrogen out of the leaves and into the seed, so a stand grown for dry peas gives the following crop far less. Unlike hairy vetch, though, winter pea is not a weedy self-sower - volunteers are few, shallow-rooted and easy to pull, so letting a corner run to seed is a low-risk choice.
Watch for- Pods going tan and rattling
- Nitrogen benefit falling away the longer the stand stands
- A few easy-to-pull volunteers the following season
Harvest
- Shoots: the top 4-6 inches snap cleanly instead of bending
- For nitrogen: terminate at early-to-full bloom, when biomass and fixed nitrogen peak
- Roots carry pink, active nitrogen-fixing nodules
- Pinch the top 4-6 inches of tender tips · weekly
- Only pick shoots if the seed was untreated
Per plant 1 to 8 ozPicking cut and it regrows
Watch out for
6 to know. 2 are high-risk: Treated Cover-Crop Seed, Root Rot. 3 are active in September.
Treated Cover-Crop SeedSeverity High DisordernowThe one genuine safety issue with growing this crop for its shoots, and the reason to buy untreated seed at the outset rather than discover the problem at picking time.
Seed that is dyed pink, blue, green, or purple rather than its natural color - the deliberate industry warning, and the clearest sign. A bag tag carrying wording such as treated seed, do not use for food or feed, or a chemical name and EPA signal word. Dusty colored residue on your hands or on the bag. Seed bought loose or unlabeled from a farm store bin, where you cannot check the tag at all. Sprouting or shoot-growing seed sold in food packaging rather than farm packaging is the alternative you are looking for.
There is nothing to do to a stand already grown from treated seed except not eat it - grow it out as a cover crop, terminate it as green manure, and buy untreated seed next time for the bed you intend to pick from. The treatment is on the seed coat rather than systemic through the whole plant, but there is no home way to verify what was used or at what rate, so the only sound rule is to treat the whole stand as non-food.
Decide before you buy. If you intend to eat any part of the crop - pea shoots, sprouts, flowers, or seed - buy seed explicitly labeled untreated, or seed sold as food for sprouting, and keep the bag tag with the record of what you sowed where. Ask the supplier directly if the listing does not say; untreated cover-crop seed is widely available and usually costs no more. Never eat anything from a stand whose seed source you cannot account for, including a bed sown by someone else or from an unlabeled leftover bag. Store treated and untreated seed separately and clearly labeled so they cannot be confused a season later.
Seed sold for agricultural cover-cropping is frequently treated with fungicide, and sometimes insecticide, before bagging. Treated seed is dyed a bright warning color - typically pink, blue, green, or purple - and is legally not food: it must not be eaten, sprouted, or fed to animals, and the bag tag will say so. This matters for cover crops whose growing parts are edible, because a gardener who buys a farm-store bag of peas, vetch, clover, or alfalfa may reasonably assume the resulting plants are food. Seed sold for planting is also not subject to the food-safety handling that seed sold for sprouting or eating is. The hazard is entirely avoidable and entirely upstream: it is decided at the moment you choose which bag to buy.
Root RotSeverity High DiseaseThe commonest way a fall-sown winter pea stand is actually lost, and it gets blamed on cold: a mild wet winter on heavy ground rots the roots and crowns out while a colder, drier winter would have left the stand untouched.
Sow on well-drained ground, and rotate away from peas, lentils and vetch.
Wilting in the middle of the day on a plant whose soil is damp - the classic tell, and the reason people water a rotting plant and finish it off. Leaves yellowing from the bottom up, dull off-color foliage, and growth that stalls for no visible reason. Whole shoots, or one side of the plant, collapsing while the rest still looks fine. Soft, dark, or mushy tissue at the base of the stem or at the crown, sometimes with a sour smell. Lift a failing plant and look at the roots: healthy ones are firm and pale, rotted ones are brown or black and slimy, and the outer layer slips off between your fingers leaving a thread of core behind. Seedlings that topple over at soil level are the same problem, called damping-off.
There is no cure for tissue that has already rotted, so act on the conditions rather than looking for a spray. Stop watering at once and fix the drainage - open up compacted soil, or move the plant to a raised, sharply drained position or a container. Lift a badly affected plant, cut away every soft dark root and rotted section with a clean blade back to firm pale tissue, and replant only the healthy parts into fresh free-draining soil or mix. Often the better move is to give up on the plant and save its offspring instead: cuttings, offsets, or divisions taken from firm healthy growth root readily and give you a clean start. Bin the rotted material rather than composting it, and correct the drainage before you replant, because the rot comes straight back in the same wet spot.
Drainage is the whole defense. Match the plant to the site first - something that wants sharp drainage will not survive heavy clay or a low, water-collecting spot however well you tend it. Where the ground is heavy, plant on a raised bed, berm, or slope, or grow in a container. Set plants at the depth they were already growing, since burying the crown or the root flare is a common cause of rot, and keep mulch pulled back a few inches from the stem base instead of piled against it. Water the soil rather than the calendar: check that the top inch or two is dry before watering again, cut back hard in cool weather and winter dormancy, and never leave a pot standing in a full saucer. Do not plant or dig in soggy ground, and go easy on rich amendments for plants that want it lean. Rotate annual crops, and start with clean healthy plants and fresh mix.
Root rot is not one organism but a group of soil fungi and water molds - Pythium, Phytophthora, Fusarium, Rhizoctonia and others - that sit harmlessly in most soils and only turn destructive when the ground stays saturated. Waterlogged soil drives the air out, the roots suffocate, and the weakened tissue is invaded and goes soft, brown, and stringy. Because the damage is underground you usually see it first as something that looks like drought: wilting, yellowing, stunting, a plant that does not respond to being watered. Overwatering, heavy compacted ground, a low spot that collects runoff, a pot with no drainage or a saucer left standing full, and cold wet soil in winter are the usual causes. Once roots have actually rotted there is no cure - this is a problem you prevent rather than treat.
Birds & WildlifeSeverity Medium WildlifenowTwo windows here.
Doves, pigeons, and jays take the big peas straight off the surface of a freshly sown bed, which is the main reason to rake the seed in 1-2 inches rather than broadcasting it bare. Later, geese and doves graze a young winter stand hard in some gardens.
Fruit disappearing from the outermost, most exposed parts of the plant first, and from the top of a tree where you cannot reach anyway. Single neat pecks and gouges in ripening fruit, with several fruits sampled rather than one eaten through - the classic sign that it was birds rather than an animal. Heads of grain or seed going visibly lighter and emptier as they ripen, with hulls and chaff scattered underneath. Freshly sown seed vanishing off the surface of a bed before it germinates. Bird traffic in and out of the plant picking up as the crop colors, and birds waiting on nearby wires and branches. Wasps arriving at the pecked and split fruit shortly afterward.
There is no treatment once a crop is being taken - only protection and timing, so the answer is to get netting on and to pick what is ready. Reflective tape, flash ribbon, spinners, and decoy predators do work, but only for a few days at a time: birds habituate fast, so move and rotate them and never rely on them as the main defense for a crop you care about. Cut and gather grain or seed heads a little early, at firm dough, and finish drying them under cover instead of leaving them standing for the flocks. Plant a little extra, or a decoy crop the birds prefer, and accept sharing anything that crops heavily. On a wild or foraged patch, fruit going to birds and small mammals is the point of the plant rather than a problem to solve.
Net, and net early. Bird netting draped over a frame or hoops so it stands off the fruit, with the edges closed at ground level, is the only thing that reliably works at harvest scale - and it has to go on before the crop starts to color, because once birds have found the food they are far harder to displace. Keep fruit trees small enough that netting them is actually feasible; that decision gets made years earlier, at planting. Bags of mesh, organza, or paper slipped over individual heads, clusters, or prize fruit protect a small crop without netting the whole plant. Then shorten the exposure: pick promptly and completely rather than leaving ripe fruit hanging as a lure, clear split and dropped fruit that draws birds and wasps alike, and where a crop can finish off the plant, harvest a little early and ripen or dry it under cover. Rake in or cover broadcast seed so it is not lying in plain view.
Birds find ripening fruit and seed before you do. Robins, waxwings, starlings, catbirds, jays, sparrows, finches, blackbirds, and doves all work a garden, and the pressure arrives in a narrow window - the last days before harvest, when sugar rises, color changes, and the crop softens or the grain hardens. A flock can strip a small planting in a day or two, and birds that only peck rather than take whole fruit still leave wounds that rot or draw wasps. Squirrels, chipmunks, and other wildlife usually turn up on the same crop at the same time. This is competition rather than disease: the birds are not harming the plant, and a big tree or a heavy-cropping bush often has enough for everyone - but on a small planting it can be the difference between a harvest and none.
Pea AphidSeverity Medium PestWorth knowing about mainly because the shoot tips the aphids colonize are exactly the tips you were going to pick and eat.
Rinse shoots well, and pick past a colonized tip rather than spraying a crop you are eating raw.
Colonies of large pale-green aphids packed onto shoot tips, tendrils, and flower stalks, thickest on the softest new growth. Aphids dropping off the plant the moment you brush against it - a habit fairly specific to this species. Sticky honeydew on the foliage below, ants running the stems, and white cast skins where a colony has been. Yellowing, stunting, downward-rolled leaves, or a mottled stand that does not grow away, which points to a virus the aphids brought rather than the feeding itself.
On a cover crop, usually nothing at all - the predators arrive and the stand outgrows it. Knock heavy colonies off with a jet of water, or pinch out and remove the worst-infested tips. Insecticidal soap sprayed directly onto the insects works if a stand is genuinely being checked, but it also hits the beneficials, so keep it to spot treatment. Never spray a stand you intend to pick shoots or flowers from without checking the product label for that use and its pre-harvest interval.
Encourage the beneficial insects that legume flowers already draw, and skip broad-spectrum sprays that remove them. Do not over-feed nitrogen, since soft lush growth is what the colonies build on - and a legume should not be getting nitrogen anyway. Check the growing tips weekly through spring, and rub out the first colonies by hand while they are small. Where virus has been a recurring problem in a legume rotation, avoid planting a new stand immediately downwind of an old one, since that is how the winged aphids move.
The pea aphid is a large, long-legged, pale-green aphid that specializes on legumes - peas, vetch, clover, alfalfa, lentil, faba bean - and colonizes the growing tips, tendrils, flower stalks, and developing pods. It builds fastest in the mild weather of spring, when a handful of overwintered females can become a coating within two weeks, and it drops off the plant readily when disturbed. On a vigorous cover-crop stand the feeding itself is usually cosmetic and is held in check by the ladybugs, lacewings, hoverflies, and parasitic wasps that legume flowers attract. What matters more is that it transmits viruses between legumes, including pea enation mosaic and bean leafroll, which stunt and yellow a stand out of all proportion to the number of insects present.
Powdery MildewSeverity Medium DiseaseOn a winter pea stand this turns up in spring as the weather warms, usually alongside the heat that was about to end the crop anyway - so the answer is normally to terminate the cover rather than treat it.
It does end the shoot-picking season, since mildewed tips are not worth eating.
Round white powdery spots on the upper leaf surfaces that spread and merge until whole leaves look dusted. It usually starts on the oldest, lowest, most shaded leaves and works upward, so check there first. Look at the undersides too, and at stems, buds, and flower stalks, which get coated as it advances. Leaves that yellow, brown, curl, or go crisp and drop early under the coating. New growth that opens small, crumpled, or twisted where the fungus has reached the shoot tips. On plants where it gets onto the fruit, a dull gray film, russeted or scarred skin, and cracking. Late in the season, tiny dark specks scattered through the white felt - that is the fungus setting up to overwinter on the debris.
Start early: sprays protect healthy tissue, they do not clean up leaves that are already coated. Pick off and bin the worst leaves as soon as you see them, and open the plant up by thinning or pruning so air moves through. On anything that regrows quickly, shearing the whole plant back forces a clean flush and beats spraying. If it keeps spreading, potassium bicarbonate, horticultural oil, or neem applied weekly will hold it - cover both leaf surfaces. Sulfur also works, but it burns the foliage of some plants, should never go on in heat, and must not be mixed with or applied close behind an oil spray. Whatever you use must be labeled for the plant you are treating: follow that label and observe its pre-harvest interval on anything you eat. Do not compost badly infected material. Late-season mildew on a plant that is finishing anyway is usually cosmetic; on a crop still filling out it is worth acting on.
Give plants room. Crowding and still air are the biggest single driver, so space at the full recommended distance, thin seedlings properly, and divide or prune out congested growth until air moves through the plant. Full sun and an open position help; deep shade and a still corner against a wall are where it always starts. Water at the base rather than overhead, and water early in the day so nothing stays damp overnight. Keep plants evenly watered - drought stress at the roots leaves them far more susceptible, even though the fungus itself likes dry air. Go easy on nitrogen, since soft lush growth is the most vulnerable. Where resistant varieties exist for what you are growing, choosing one is the single most effective thing you can do on a plant that mildews every year. Clear infected leaves and stems away at the end of the season rather than composting them.
Powdery mildew is a fungal disease that coats leaves - and often stems, buds, and fruit - in a white-to-gray powder that looks like spilled talcum. It is not one fungus but a large family of them, each fairly specialised to its own group of plants, which is why mildew on one crop rarely jumps to an unrelated one beside it. Unlike most leaf diseases it does not need wet leaves: it thrives on warm dry days followed by humid nights, and it takes hold fastest where plants stand crowded in still air or in shade. The coating blocks light, so heavily covered leaves yellow, brown, and drop early. On many plants that is mostly disfiguring and arrives late enough not to matter; where it strips away the leaves a crop still needed to finish, it costs you size, sweetness, and quality.
Damping-OffSeverity Low DiseasenowAn establishment problem here rather than a season-long one: sow into a moist, well-drained bed while the soil still has some warmth, and it rarely appears.
Seedlings that fail to emerge or collapse at the soil line soon after germinating, and thin, patchy establishment in cold wet conditions.
None for affected seedlings; reduce watering, improve drainage and airflow, and resow more thinly if needed.
Sow into warm-enough, well-drained, moist (not soggy) soil with good seed-to-soil contact, and don't sow too deep or too early into cold ground.
A seedling rot that collapses young desert marigold seedlings sown too thickly or kept too wet in cool conditions - a minor issue easily avoided by lean, well-drained sowing and careful watering.
Good & bad neighbors
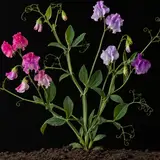
First rule: keep Sweet Pea apart. Never grow the ornamental sweet pea (Lathyrus odoratus) beside an edible pea stand.
Plant nearby
-
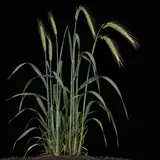
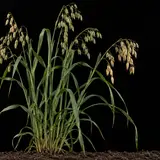
The definitive winter pea partner: rye gives the weak-stemmed peas something to lean on, adds the carbon that balances their nitrogen, and holds the bed on its own if a hard winter takes the peas out.
-
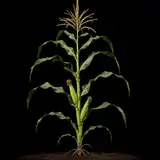
Corn following a winter pea cover often needs much less nitrogen fertilizer - the classic reason to put a legume cover on a bed over winter.
-
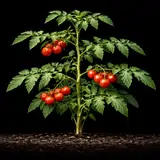
The payoff crop: terminated at bloom, a winter pea stand leaves a large, fast-releasing nitrogen credit and a soft mulch, ideal for the heavy feeders transplanted after it.
-
A fast nurse crop that establishes ahead of the peas and supports them; in cold zones the oats winterkill and leave a clean mat of residue over the surviving pea stand.
-
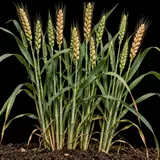
Triticale and wheat are both used the same way as rye - structure for the vines, carbon for the mix, and insurance against pea winterkill. Slug points at the wheat entry, the closest catalog match.
-
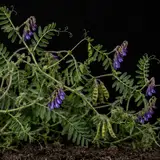
Often blended with winter pea for a hardier, longer-lived legume mix - but note the vetch brings its own management problem, since it self-sows aggressively and must be terminated before it seeds. The peas will not.
Keep apart
-
Never grow the ornamental sweet pea (Lathyrus odoratus) beside an edible pea stand. It climbs at the same season and looks similar in leaf and flower, and its pods and seeds are TOXIC - the danger is picking or eating the wrong shoot, not competition.
Varieties · 6
You pick one when you add Austrian Winter Pea to your garden. Its days to maturity set your harvest window.
Winter-hardy types (Austrian winter pea) 4 varieties
Common Austrian Winter Pea (VNS)
Low fall rosettes, spring vining growth, purple-and-maroon bicolor flowers, small dark speckled seeds.
cover-cropnitrogen-fixerinexpensiveThe standard, unnamed winter pea seed that most farm stores and cover-crop suppliers sell - variety not stated, inexpensive, and perfectly serviceable for a garden cover. Winter hardiness varies a little from lot to lot, so in zone 5 or 6 it is worth sowing it with a grain nurse crop rather than relying on it alone. Check whether the seed is fungicide-treated before you plan on eating any shoots.
Whistler
Vigorous prostrate winter growth with strong spring recovery and bicolor bloom.
improvedcover-croppacific-northwestA named winter pea released from Pacific Northwest breeding work and selected for winter survival and biomass. Where common VNS seed has winterkilled on you, a named hardy variety like this is the sensible upgrade - the extra cost per pound is small next to the cost of resowing a failed cover.
Lynx
Tendril-rich growth that grips itself and stands better than a leafy pea; bicolor flowers.
improvedcover-cropsemi-leaflessA named winter field pea grown for cover and forage, notable for semi-leafless (tendril-heavy) types in this lineage that grip each other and lodge less than a conventional leafy pea. That standing habit makes a tidier stand to cut and a slightly easier one to interplant.
Spring forage field peas 2 varieties
4010 Forage Pea
Tall upright vines with pale flowers, making bulk quickly in one season.
spring-sownnot-winter-hardyfast-biomassforageA spring forage pea, widely sold alongside Austrian winter pea and constantly mistaken for it. It grows tall and fast and makes a great deal of biomass in a single spring or summer - and it will winterkill almost anywhere, so it is the wrong choice for an overwintering cover. Read the bag: if it does not say winter pea, treat it as a spring crop.
Arvika
Leafy, tender, fast-growing vines with pale flowers.
spring-sownnot-winter-hardyforageheirloomAn old Swedish spring forage pea still sold as a cover-crop and shoot-growing pea, valued for quick, heavy, tender growth. Excellent for a fast spring nitrogen cover or for growing pea shoots in trays, but like all spring types it does not overwinter - do not substitute it for Austrian winter pea in an autumn sowing.
Grower tips
Notes from growers, tagged with the zone they grow in. A person reads every post before it appears.
Nobody has posted about Austrian Winter Pea yet. The first one usually saves someone a season.
Free account. Your post shows your grower name and zone, never your email.