
Add it to your home screen and it opens full screen: no browser bars, one tap away, and everything stays signed in. Free, nothing to download from an app store.
- Tap the Share button in your browser
- Scroll down and choose “Add to Home Screen”
- Open GrowSomeFood from your home screen
- Open your browser’s menu
- Choose “Add to Home screen” or “Install app”
- Open GrowSomeFood from your home screen
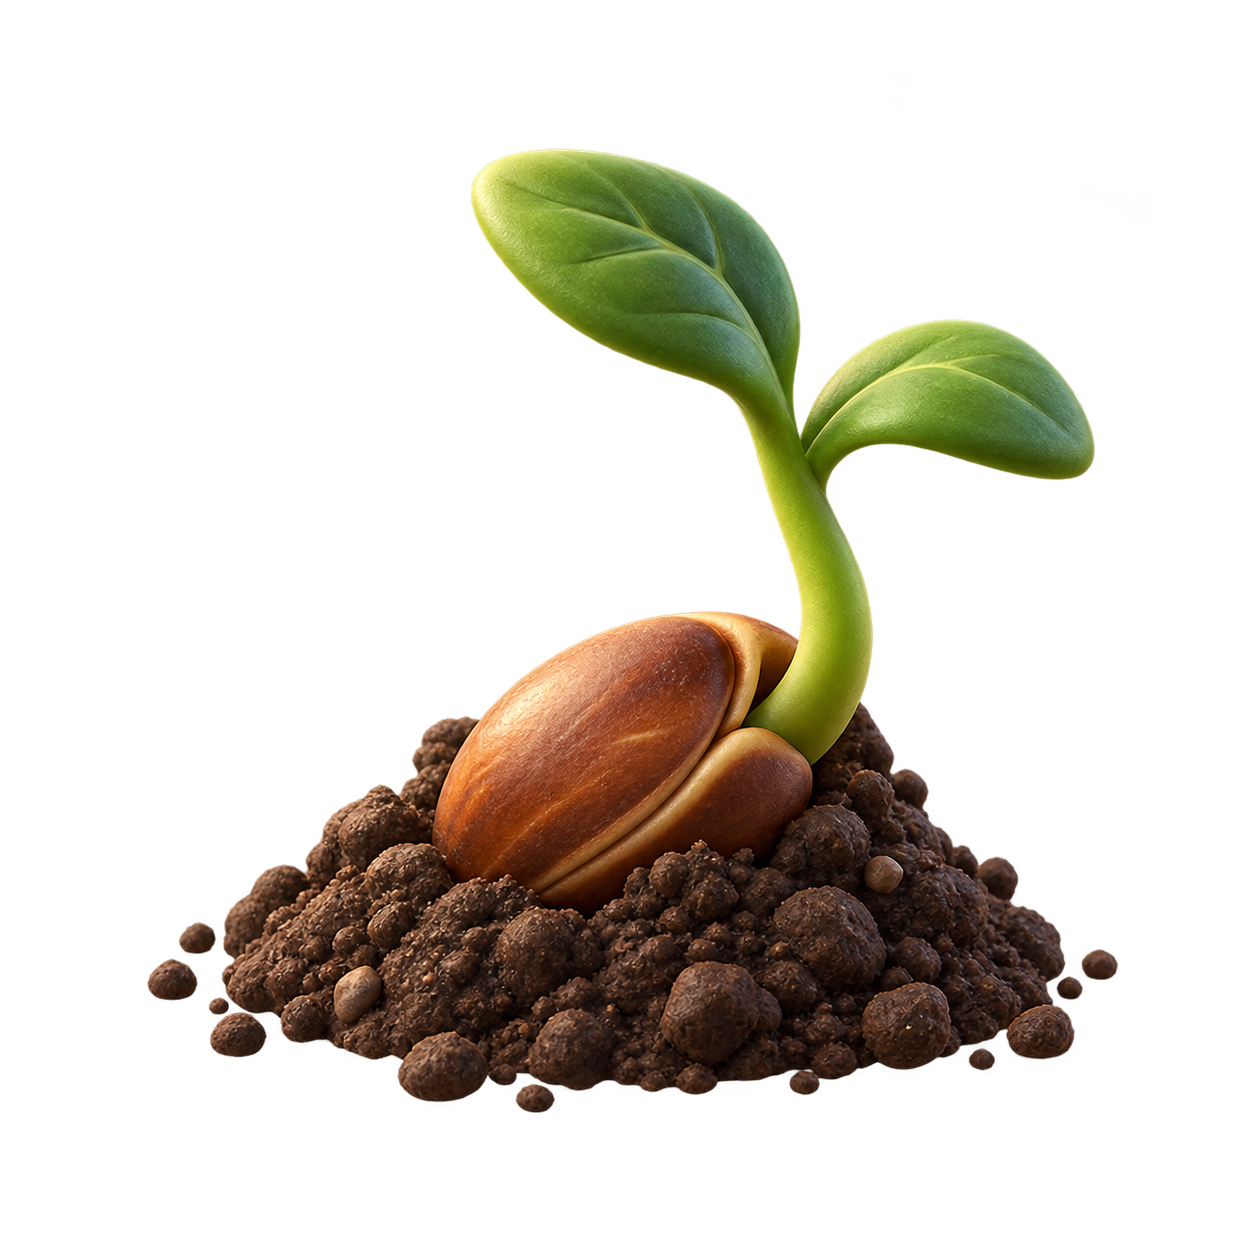
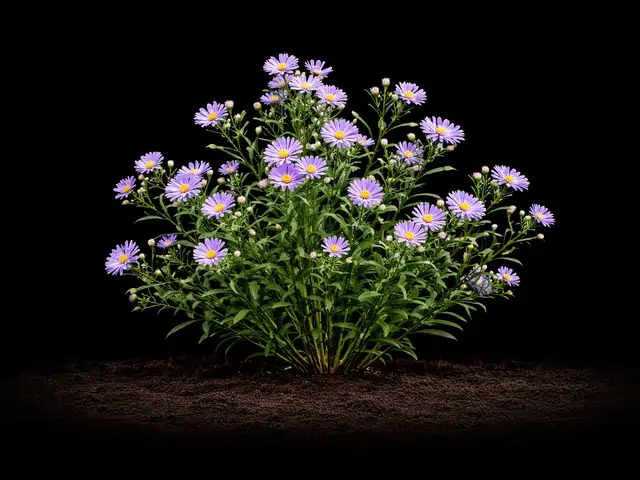
Aster
The perennial that saves the best for last: clouds of star-shaped blooms in late summer and fall, and one of the year's most important nectar sources for pollinators.
Safety notes Non-toxic ornamental, not a food plant. Sap can irritate very sensitive skin - wear gloves if you're prone to dermatitis when dividing or cutting back.
Overview
Asters are the closing act of the flowering year. When most of the garden is winding down, these hardy perennials explode into clouds of small, daisy-like stars - purple, blue, pink, and white with golden centers - from late summer clear into November. That timing makes them ecological heavyweights: as one of the last major nectar and pollen sources of the season, asters feed migrating monarchs and late bees when almost nothing else is blooming.
Quick facts
- Sprouts in
- 18 daysRange: 10–30 days
- Soil temperature
- 70 °FRange: 60–75 °F
- Start indoors
- 7 weeks before transplantRange: 6–8 weeks
- Height
- 36 inRange: 12–60 in
- Spread
- 24 inRange: 12–36 in
- Cold
- Takes hard frostdamaged below -40°F
- Heat
- Struggles above 95°F
- Life cycle
- Perennial, lives about 5 years
- Save seeds
- About 130 days after plantingRange: 110–150 days
- Self-sows
- Yes, expect volunteers
- Soil
- Well-drained
- Water
- Medium
- Plant spacing
- 18 inRange: 12–24 in
When to plant
Nothing is open today. Spring transplanting opens 5 months, Mar 27 to May 22.
- Transplant Mar 27 – May 22 Opens in 159 daysAbout 2 weeks before to 6 weeks after your last frost (Apr 10 here)Spring planting lets roots establish before the fall bloom - the surest timing in cold zones. This is also when you divide and replant existing clumps, as growth resumes; division is the main way asters are propagated.
- Transplant Aug 16 – Sep 13 Opens in 301 daysAbout 10 weeks before to 6 weeks before your first frost (Oct 25 here)Fall planting works where winters are mild enough for roots to settle before hard freeze; mulch well.
Frost here: last around Apr 10 (Mar 27 to Apr 24 most years), first around Oct 25. Zone averages, your own yard may run a week or two either way.
Life stages
Establish, grow, repeat
Getting established and returning each season are different parts of the story.
Stage 1 of 4 · Getting established
Year 1 - rooting in
Day 0 to 90 after transplanting
Care at this stage
-
Water deeply and regularly the first season
A new aster's whole first-year job is roots. Keep soil evenly moist while it establishes; don't let it dry out.
-
Mulch to hold moisture and buffer cold
A 2-3 inch mulch ring conserves water in year one and protects the crown through the first winter.
Months are typical seasonal windows; climate, variety, and plant age can shift them.
Watch out for
4 to know. 1 is high-risk: Aster Yellows. None are active in October.
Aster YellowsSeverity High DiseaseSeason: Jun–SepFlowers turning green and deformed, tufted leafy growth from the cone, upright bushy witches'-broom shoots, yellowed stunted plants.
Named for asters, where it was first well documented, but it infects dozens of ornamental and vegetable species - a garden-wide concern, not just an aster problem.
Flowers turning green and deformed, tufted leafy growth from the cone, upright bushy witches'-broom shoots, yellowed stunted plants.
None - it cannot be cured. Pull and destroy infected plants immediately (do not compost) to keep leafhoppers from spreading it to healthy asters and other crops.
Control leafhoppers and remove nearby weedy hosts; keep plants vigorous; there are no resistant fixes, so vigilance and prompt removal are key.
An incurable disease caused by a phytoplasma (a bacteria-like organism) spread by aster leafhoppers. It deforms flowers into stunted, greenish, leafy tufts and causes witches'-broom growth. It has a huge host range beyond asters - many flowers and vegetables are susceptible.
Powdery MildewSeverity Medium DiseaseSeason: Jul–SepRound white powdery spots on the upper leaf surfaces that spread and merge until whole leaves look dusted.
New York asters (Symphyotrichum novi-belgii) are the mildew-prone ones; New England asters and named resistant cultivars stay far cleaner, so variety choice is the practical fix. Divide crowded clumps every few years. Mostly cosmetic on the lower leaves while the flowers carry on above them.
Round white powdery spots on the upper leaf surfaces that spread and merge until whole leaves look dusted. It usually starts on the oldest, lowest, most shaded leaves and works upward, so check there first. Look at the undersides too, and at stems, buds, and flower stalks, which get coated as it advances. Leaves that yellow, brown, curl, or go crisp and drop early under the coating. New growth that opens small, crumpled, or twisted where the fungus has reached the shoot tips. On plants where it gets onto the fruit, a dull gray film, russeted or scarred skin, and cracking. Late in the season, tiny dark specks scattered through the white felt - that is the fungus setting up to overwinter on the debris.
Start early: sprays protect healthy tissue, they do not clean up leaves that are already coated. Pick off and bin the worst leaves as soon as you see them, and open the plant up by thinning or pruning so air moves through. On anything that regrows quickly, shearing the whole plant back forces a clean flush and beats spraying. If it keeps spreading, potassium bicarbonate, horticultural oil, or neem applied weekly will hold it - cover both leaf surfaces. Sulfur also works, but it burns the foliage of some plants, should never go on in heat, and must not be mixed with or applied close behind an oil spray. Whatever you use must be labeled for the plant you are treating: follow that label and observe its pre-harvest interval on anything you eat. Do not compost badly infected material. Late-season mildew on a plant that is finishing anyway is usually cosmetic; on a crop still filling out it is worth acting on.
Give plants room. Crowding and still air are the biggest single driver, so space at the full recommended distance, thin seedlings properly, and divide or prune out congested growth until air moves through the plant. Full sun and an open position help; deep shade and a still corner against a wall are where it always starts. Water at the base rather than overhead, and water early in the day so nothing stays damp overnight. Keep plants evenly watered - drought stress at the roots leaves them far more susceptible, even though the fungus itself likes dry air. Go easy on nitrogen, since soft lush growth is the most vulnerable. Where resistant varieties exist for what you are growing, choosing one is the single most effective thing you can do on a plant that mildews every year. Clear infected leaves and stems away at the end of the season rather than composting them.
Powdery mildew is a fungal disease that coats leaves - and often stems, buds, and fruit - in a white-to-gray powder that looks like spilled talcum. It is not one fungus but a large family of them, each fairly specialised to its own group of plants, which is why mildew on one crop rarely jumps to an unrelated one beside it. Unlike most leaf diseases it does not need wet leaves: it thrives on warm dry days followed by humid nights, and it takes hold fastest where plants stand crowded in still air or in shade. The coating blocks light, so heavily covered leaves yellow, brown, and drop early. On many plants that is mostly disfiguring and arrives late enough not to matter; where it strips away the leaves a crop still needed to finish, it costs you size, sweetness, and quality.
AphidsSeverity Low PestSeason: May–JulDense clusters of tiny insects packed onto shoot tips, flower buds, and the undersides of young leaves.
Dense clusters of tiny insects packed onto shoot tips, flower buds, and the undersides of young leaves. Curled, cupped, or distorted new growth that never opens properly. A sticky shine on the leaves - and on whatever sits under the plant - that later goes black with sooty mold. Tiny white cast skins left behind where a colony has been feeding. Ants running steadily up and down the stems, which is often the first thing you notice. Mottled, streaked, or misshapen leaves that do not grow out can mean a virus the aphids brought with them rather than the feeding itself.
Knock the colonies off with a hard jet of water and repeat every few days - on most plants that alone ends it. Pinch out or prune off the worst-infested tips rather than treating the whole plant. If colonies keep rebuilding, spray insecticidal soap or horticultural oil directly onto the insects, covering leaf undersides, and repeat weekly until they are gone; treat early or late in the day, and never spray a wilted or heat-stressed plant. Avoid broad-spectrum insecticides - they kill the ladybugs, lacewings, and parasitic wasps that were about to solve the problem for you, and aphid numbers usually come back worse afterward. Anything you spray must be labeled for the plant you are treating; follow that label and observe its pre-harvest interval. On anything you eat, wash leaves, heads, and buds well before use, since aphids hide down in crowns, folds, and tight growth.
Go easy on nitrogen: the soft, lush growth that heavy feeding produces is exactly what aphids breed on. Check new growth once a week through spring and early summer so you catch colonies while they are still small, and rub the first few out with your fingers. Leave flowering plants nearby and skip broad-spectrum sprays - ladybugs, lacewings, hoverflies, and parasitic wasps do most of this work for free, and they only stay if there is something for them to eat. Keep ants off the plant where you can, since they protect aphids from those predators. Water steadily so plants are not stressed, and check any new plant over before you bring it home or move it indoors, since aphids usually arrive on something else.
Aphids are small soft-bodied sap-suckers - green, black, gray, pink, or waxy white, and mostly wingless - that gather in dense colonies on the tenderest new growth: shoot tips, buds, and the undersides of young leaves. They breed extremely fast in mild weather, so a few can become hundreds inside a week. Their feeding curls and distorts soft growth, and the sticky honeydew they excrete coats everything below and turns black with sooty mold. Ants often farm and defend the colonies for that honeydew. A few aphids are normal on almost any plant and a healthy plant shrugs them off; only dense, persistent colonies do real damage, and some aphids also spread plant viruses as they feed.
Spider MitesSeverity Low PestSeason: Jul–AugFine pale stippling or speckling across the upper leaf surface, as though the color had been sandblasted out of it, and later a dull bronze or rusty cast over the whole leaf.
A hot-dry-spell pest on asters, and rarely serious if the clump is watered through heat.
Fine pale stippling or speckling across the upper leaf surface, as though the color had been sandblasted out of it, and later a dull bronze or rusty cast over the whole leaf. Delicate webbing across leaf joints, shoot tips, and undersides - that comes with a heavy infestation and means you caught it late. Leaves that dry, curl, and drop early while the plant looks thirsty no matter how much you water it. Hold a leaf over a sheet of white paper and tap it: the specks that fall and then start walking are mites. With a hand lens, look on the undersides for the mites themselves, pale or reddish, and their round translucent eggs. Damage that shows up first on the hottest, dustiest, most sheltered side of a plant, or on a pot sitting near a radiator indoors.
Start with water. A strong jet aimed at the leaf undersides, repeated every few days for a couple of weeks, knocks populations down and breaks the cycle - on many plants that alone ends it. On anything that regrows quickly, shearing back badly infested growth resets the plant to clean foliage. If it keeps building, spray insecticidal soap or horticultural oil directly onto the undersides where the mites actually live, and repeat every five to seven days for three rounds: contact sprays do not kill the eggs, so a single application always fails. Anything you spray must be labeled for the plant you are treating - follow the label and observe its pre-harvest interval on anything you eat. Predatory mites are an effective release in a greenhouse or on an indoor plant. Above all, correct the heat, dust, and drought stress that caused it, or the mites simply come back.
Do not let plants get drought-stressed - that is the single strongest trigger, and a plant watered steadily through heat is far less likely to have a mite problem at all. Hose the foliage down, undersides included, during hot dry spells: it knocks mites off, washes away the dust they thrive in, and raises the humidity around the plant for a while. Indoors and under cover, keep the air from going hot, dry, and stagnant, wipe or rinse the leaves occasionally, and keep pots away from radiators and heating vents. Inspect any plant carefully before you bring it indoors for winter or set it among others, since mites almost always arrive on something else. Avoid broad-spectrum insecticides: they wipe out the predatory mites, lacewings, and lady beetles that do most of this work for you, and reliably leave you with a worse outbreak than you started with.
Spider mites are not insects but tiny sap-feeding arachnids, smaller than a grain of salt, and you almost always notice the damage before you notice them. They live on the undersides of leaves and drain the cells one at a time, which is why the leaf goes finely stippled with pale dots before it bronzes and dries. They breed explosively in hot, dry, dusty, still air - a generation can pass in a week at high temperature - so a barely visible population becomes a webbed, bronzed plant within a fortnight. Drought-stressed plants and plants wintered indoors in dry heated air are the classic hosts. Broad-spectrum insecticides make matters worse rather than better, because they kill the predatory mites and lady beetles that normally hold mites in check.
Good & bad neighbors
Plant nearby
-
The definitive fall native-border pairing: same sun, soil, and bloom season, and together they carry pollinators from late summer through frost.
-
Extends the pollinator buffet earlier in summer before asters take over; both love sun and even moisture.
-
Classic native-perennial and pollinator-garden partner - complementary height and overlapping late-summer bloom.
-
Both late-season pollinator plants with similar full-sun needs; sunflowers add height behind a stand of asters.
- Traditional pairings, thin evidence
-
A common ornamental-bed pairing; both attract beneficial insects and share sunny, well-drained conditions.
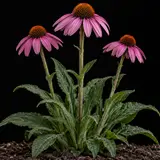


Varieties · 3
You pick one when you add Aster to your garden. Its days to maturity set your harvest window.
Fall native asters (Symphyotrichum) 2 varieties
New England
Symphyotrichum novae-angliae: the robust native workhorse, 3-5 feet, with dense clusters of purple, pink, or magenta blooms and golden centers in fall.
Variety details for New England
Tall sturdy stems topped with masses of purple-to-magenta daisy flowers with yellow centers.
nativetallpollinatorspeciesResists powdery-mildew-tolerant
The top aster for pollinators and migrating monarchs; more mildew-resistant than New York asters. Pinch in early summer to control height.
New York
Symphyotrichum novi-belgii: the classic 'Michaelmas daisy', 1-4 feet, in an enormous range of blue, purple, pink, and white cultivars.
Variety details for New York
Bushy plants covered in blue, purple, pink, or white daisy flowers in fall.
nativepollinatorspeciescut-flowerBeautiful and floriferous but more prone to powdery mildew than New England types - give it airflow.
Alpine aster (Aster alpinus) 1 variety
Alpine
Aster alpinus: a low, early-blooming (late spring/early summer) alpine species just 6-12 inches tall, with single blue, purple, or pink daisies.
Variety details for Alpine
Low tufts of foliage with single purple, blue, or pink daisy flowers with yellow centers.
compactearlyrock-gardenspring-bloomingUnlike the fall natives on this page it is a Eurasian mountain plant in a different genus - not a North American native, so the native-range badge here does not apply to it - and it flowers early, suiting rock gardens and edging rather than the fall border.
Grower tips
Notes from growers, tagged with the zone they grow in. A person reads every post before it appears.
Nobody has posted about Aster yet. The first one usually saves someone a season.
Free account. Your post shows your grower name and zone, never your email.