Add it to your home screen and it opens full screen: no browser bars, one tap away, and everything stays signed in. Free, nothing to download from an app store.
- Tap the Share button in your browser
- Scroll down and choose “Add to Home Screen”
- Open GrowSomeFood from your home screen
- Open your browser’s menu
- Choose “Add to Home screen” or “Install app”
- Open GrowSomeFood from your home screen
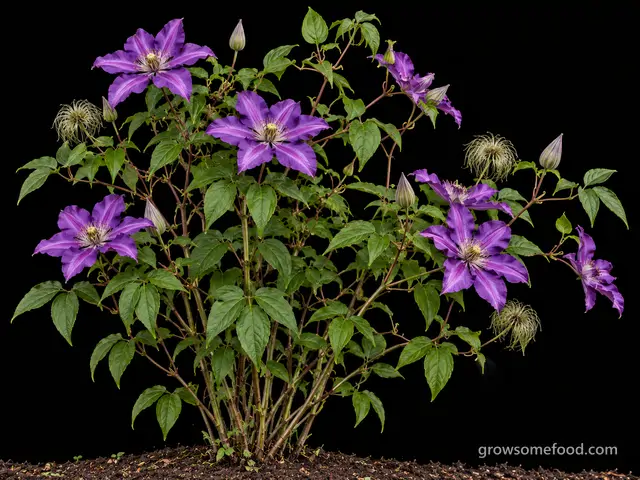
Clematis
The most-grown ornamental vine in America, and the one people most often get wrong - not because it is difficult, but because there are three pruning groups and cutting the wrong one at the wrong time removes the entire year's flowers. Plant the crown deep, shade the roots, and learn your group.
Clematis is not food. Like other buttercup-family plants it contains ranunculin, which turns to protoanemonin when leaves or stems are crushed: the fresh sap raises a rash and, on sensitive skin, blisters after a long pruning session, and chewing any part burns the mouth and causes drooling, vomiting and diarrhea in people and pets. Wear gloves and long sleeves to prune, and wash afterward. Drying breaks the irritant down, so it is the fresh plant that matters.
Overview
The one thing to knowIt is a plant with one genuinely confusing rule, and almost every clematis disappointment traces back to it: pruning groups.
Clematis is the vine Americans actually plant: on the mailbox, up the porch post, through the climbing rose, over the split-rail fence. The genus runs from spring-flowering montana vines that swallow a whole garage to nodding viticella bells, from four-armed native leather flowers to the enormous flat saucers of the large-flowered hybrids - and it flowers somewhere in the range from April to September, so between two or three well-chosen plants you can have clematis in bloom for half the year.
It is not a difficult plant. It is a plant with one genuinely confusing rule, and almost every clematis disappointment traces back to it: pruning groups. Some clematis flower on wood made last year, some on wood made this year, and some on both, so the same late-winter haircut that doubles the display on one plant erases it entirely on another. There are three groups, the labels usually say which one you have, and the rule of thumb when the label is gone is simple - flowers before June, prune after flowering; flowers after June, cut it down in late winter.
Two other things matter and both happen at planting. Plant the crown 2 to 4 inches below the soil surface, deeper than it sat in the pot: that gives the plant dormant buds underground, which is what lets it survive clematis wilt, the sudden one-day collapse that otherwise looks like a death sentence. And follow the old rule - head in the sun, feet in the shade - mulching and shading the root zone while the top climbs into the light. Do those and clematis is a thirty-year plant that asks for one pruning session a year.
Quick facts
- Life cycle
- Perennial, lives about 30 years
- Height
- 10 ft3 to 30
- Spread
- 36 in24 to 96
- Support
- Grows better on a trellis or stake
- Cold
- Takes hard frostdamaged below -30°F
- Heat
- Struggles above 95°F
Full sun or part sun or part shade · medium water · well-drained soil · 36 in apart (24 to 72) · transplant or cuttings
When to plant
Fall transplanting is open for 6 more days. Next: spring, Mar 27 to May 22.
- Transplant Aug 16 – Sep 27 Closes in 6 daysAbout 10 weeks before to 4 weeks before your first frost (Oct 25 here)Fall planting into warm soil lets roots establish before winter, which pays off in the first summer. Same deep planting rule. Mulch generously over the crown and water until the ground is cold.
- Transplant Mar 27 – May 22 Opens in 187 daysAbout 2 weeks before to 6 weeks after your last frost (Apr 10 here)Plant in spring into deep, rich, well-drained soil with the crown 2 to 4 inches BELOW the surface - deeper than the pot - so buried buds can rebuild the plant after clematis wilt. Top in sun, roots mulched and shaded. Water deeply through the first summer.
Frost here: last around Apr 10 (Mar 27 to Apr 24 most years), first around Oct 25. Zone averages, your own yard may run a week or two either way.
Life stages
One stage to settle in, then three that repeat each year. Windows are typical; your zone and weather move them.
Year 1 - plant deep and shade the roots
Day 0 to 240- ProtectBury the crown 2-4 inches BELOW the soil surfaceClematis is the one climber you plant deeper than it sat in the pot. Set the crown 2 to 4 inches under the surface so there are dormant buds below ground. This is your insurance against clematis wilt, which can take the whole top of a plant in a day: a deeply planted vine simply pushes new shoots from underground and carries on, while a shallowly planted one dies. Do it at planting - there is no second chance.
- MulchHead in the sun, feet in the shadeClematis wants its flowers in sun and its roots cool and evenly moist. Mulch 2 to 3 inches over the root zone, keeping it clear of the crown itself, and shade the ground at the base with a low perennial, a small shrub, or even a flat stone laid over the root zone. A clematis baking in a hot, dry strip of soil at the foot of a wall will never do what the catalogue picture showed.
- SupportTie the stems in gently - they snapYoung clematis stems are famously brittle, and a snapped stem is both a lost shoot and an open wound for clematis wilt. Guide the growth onto its support and tie loosely with soft ties every foot or so until the leaf stalks start doing the work themselves. Clematis climbs by wrapping its leaf STALKS around thin things, so it needs netting, wire, twine or twiggy growth - it cannot grip a smooth post or a flat wall.
- PruneCut a brand-new plant back hard its first late winterCounterintuitive but standard: in the first late winter after planting, cut any new clematis - whatever its pruning group - back to about 12 inches, just above a strong pair of buds. It forces several stems from the base instead of one bare whip, and a multi-stemmed plant is both fuller and far more likely to survive a wilt attack. On a Group 1 or Group 2 vine this costs you one season of flowers and buys you a decade of better plant.
Watch for- Crown planted at pot level rather than 2-4 inches deep
- Bare, hot, dry soil at the base of the vine
- Stems snapping where they were tied too tight or left unsupported
Late winter and spring - the pruning decision
Feb to May, every year- PruneNot sure of the group? Use the June ruleIf you do not know what you have, watch it for one season and apply the simplest rule there is: a clematis that flowers BEFORE June is pruned right after it flowers, and a clematis that flowers AFTER June is cut down in late winter. Until you know, the safe move in late winter is to remove only dead wood and leave everything else - you may get fewer flowers, but you will not lose the year. Nobody ever killed a clematis by not pruning it.
- PruneGroup 3: cut the whole vine down to about 12 inchesgroup-3 onlyLate winter, before growth starts. Cut every stem back to about 12 inches from the ground, just above the lowest strong pair of fat buds, and clear the old growth off the support. It looks brutal and it is exactly right: this group flowers on wood it makes this season, so the whole vine regrows from the base each year. Doing it also keeps the plant from turning into a bare-legged tangle with all its flowers on the roof.
- PruneGroup 2: dead wood out, then back to the top pair of live budsgroup-2 onlyLate winter, and lightly. Work down each stem from the tip until you reach the topmost pair of fat, live, green-centred buds, and cut just above them; take out anything dead, damaged or tangled entirely. That is all. This group carries its big early flowers on last year's wood, so a hard cut removes them - and rewards you with a late, smaller second flush instead of the display you bought it for.
- PruneGroup 1: do not prune nowgroup-1 onlyPut the pruners down. This group flowers in April and May on wood made last summer, so anything you cut in late winter is this year's display. Remove genuinely dead stems if you must and leave the rest. If the vine needs reducing, that happens in the few weeks straight after it finishes flowering - and these are big plants by nature, so the honest answer is often to give it more room rather than to keep cutting it.
- SupportGuide and tie the new growth as it extendsweeklyNew clematis growth extends fast and blindly, and left alone it bundles itself into a knot at head height. Walk the vine weekly through spring, spread the stems out sideways across the support, and tie them loosely where they need it - a fan spread wide and low gives flowers from the ground up instead of a bare stem with a hat. Handle gently; the stems are brittle enough to snap between your fingers.
- FertilizeFeed as growth starts, and again after the first flushClematis are hungry for a vine. Work a balanced or rose-type fertilizer in around the root zone as the buds break in early spring, and repeat after the first flush of flowers. Avoid high nitrogen, which gives you leaves and stems instead of flowers. A generous mulch of compost each spring covers most of what these plants need.
Watch for- Group 2 or Group 1 plants cut hard in late winter - the year's flowers go with the cut
- Brittle new stems snapping in wind or during tying
- Slugs shearing off the first soft shoots of hard-pruned Group 3 plants at ground level
Bloom season
Apr to Sep, every year- WaterDeep water through bloom - shallow watering is wastedevery 5 daysClematis roots go deep and the top few inches of soil against a wall or fence dry out fast. Soak slowly and thoroughly once or twice a week in warm weather rather than sprinkling daily, and keep the mulch topped up. Drought during bloom shortens the display and shrinks the flowers; drought during bud formation costs you flowers outright.
- PruneGroup 1: prune NOW, in the weeks right after floweringgroup-1 onlyThis is the whole pruning window for the early spring bloomers. As soon as flowering finishes, cut back whatever has outgrown its space, take out dead and tangled wood, and thin congested growth so light reaches the framework. Everything the plant makes from now until fall is next spring's flowers, so finish by midsummer and then leave it alone.
- PruneGroup 2: deadhead the first flush to earn a secondgroup-2 onlyWhen the big early flowers fade, cut each spent stem back by roughly a third to a strong pair of buds. The plant responds by pushing new growth that flowers again in late summer - smaller blooms, often single where the first flush was double, but a real second season. Skip this and you generally get one flush and a lot of seed heads.
- HarvestCut for the vase, or leave the seed headsweeklyClematis cuts reasonably well: take stems in the cool morning when the flowers are just fully open, sear or recut the ends, and expect several days. Many gardeners get more out of leaving them - the silky, feathered seed heads that follow on Group 3 and the species types hold on the vine into winter and are as good as the flowers in a bad light.
Watch for- A stem collapsing suddenly from the tip down in May or June - clematis wilt
- All the flowers up at the top of a bare stem (spread the growth sideways next spring)
- Powdery mildew on crowded large-flowered hybrids in late summer
Fall and winter
Oct to Jan, every year- MulchTop up the mulch, keeping it off the crownA fresh 2 to 3 inch layer of compost or bark over the root zone in late fall holds moisture, moderates the winter soil, and feeds the plant as it breaks down. Keep it pulled back an inch or two from the crown itself so the buried buds are not sitting in a wet collar. In zones 4 and 5, a deeper layer over the root zone is cheap insurance.
- InspectLeave the seed heads and take stock of the frameworkThe silky plumed seed heads are worth keeping through winter - they catch frost and low light, and cutting them off achieves nothing. With the leaves down, look at what you actually have: how many stems come from the base, where the flowers were, and how high the bare legs run. That is the information you need in February when the pruning decision comes round again.
Watch for- Mulch piled against the crown holding water on the buried buds
- Rabbits and voles gnawing stems at ground level under snow
- A vine that made all its flowers at the very top - a note to spread it wider next spring
Watch out for
5 to know. 1 is high-risk: Clematis Wilt (stem wilt). 2 are active in September.
Clematis Wilt (stem wilt)Severity High DiseaseOverwhelmingly a large-flowered-hybrid problem, and overwhelmingly a young-plant problem.
If you have lost one clematis to wilt, the two changes that matter are planting the next one deep and choosing a viticella.
A shoot wilting suddenly from the tip downward over a day or two, the leaves going limp and then black and papery - most often in May or June with the buds still unopened. A dark, sunken, sometimes split patch on the stem low down, often at a leaf node, with everything above it dead and everything below it still green. Whole young plants collapsing while the soil is moist and the roots, if you scrape down, are firm and pale. Damage restricted to a large-flowered hybrid while a viticella or a species clematis a few feet away is untouched. Leaf stalks blackening where they join the stem, which is often the earliest visible sign.
Cut the affected stem right out, back below the dark lesion into clean healthy tissue, or to ground level if the whole stem has gone, and bin the material rather than composting it. Sterilize the pruners afterward so you are not carrying it to the next plant. Then water, mulch and wait: a deeply planted clematis usually pushes new shoots from below the soil line within a few weeks, and often flowers again later the same season. Do not dig the plant up in the first year after a collapse - the roots are alive, and this is exactly the situation deep planting was for. Fungicides are not a practical home control and cannot reach a fungus already inside the stem. If a plant wilts repeatedly over several seasons, replace it with a viticella or species clematis in fresh soil rather than persisting with the same hybrid in the same spot.
Plant deep - this is the defense that actually works. Set the crown 2 to 4 inches BELOW the soil surface, deeper than it sat in the pot, so there are dormant buds underground that can rebuild the plant if the top is lost. Buy a strong plant with several stems rather than a single whip, and cut a new plant back to about 12 inches its first late winter to build a multi-stemmed base. Protect the brittle lower stems from injury, since wounds are the entry point: a collar of wire mesh, a length of pipe, or a low shrub at the base keeps string trimmers and hoes away. Tie stems in gently and often, because a snapped stem is an open door. Keep the roots cool and evenly moist, water at the base rather than overhead, and clear fallen clematis foliage in autumn. Where wilt has been a recurring problem, plant a viticella, texensis or small-flowered species instead - they are effectively resistant.
Clematis wilt is the one dramatic failure of this plant, and it looks far worse than it is. A shoot - or the whole top of a young vine - collapses within a day or two, usually in late spring or early summer just as the flower buds are about to open: leaves and stems go limp, then black and papery, while the roots stay perfectly healthy underground. The cause is a fungus, Calophoma clematidina, which enters through a wound or a leaf node low on a stem and blocks the water-conducting tissue above it. It hits the large-flowered hybrids hardest, especially young plants in their first few years; the small-flowered species and the viticella and texensis groups are largely unaffected. It is rarely fatal to a plant that was planted deeply, because clematis regenerate from dormant buds below the soil line - which is precisely why the deep-planting rule exists.
Clematis Sap (protoanemonin irritant)Severity Medium DisordernowThe exposure that catches gardeners out is the annual Group 3 cut-down, which means handling armfuls of fresh stems and leaves in one session.
Gloves and long sleeves for that job specifically, and wash afterward. Garden clematis is not a plant to keep where a dog or a goat chews the fence line.
Itching, redness or blisters on hands and forearms after an afternoon of cutting or pulling; drooling, mouth pawing or vomiting in a pet that has chewed the vine; grazing animals with access to fresh growth along a fence line.
For skin contact, wash the area promptly with soap and water and treat as contact dermatitis; see a clinician for extensive blistering. If a person or pet has chewed or swallowed any part, rinse the mouth and call poison control or your veterinarian rather than waiting for symptoms.
Wear gloves and long sleeves for any cutting, pulling or pruning, and wash skin afterward. Keep fresh growth away from chewing pets and grazing animals, and do not leave fresh cuttings where livestock can reach them.
A direct hazard to people, pets and livestock, shared across the genus. Clematis, like other members of the buttercup family, contains ranunculin, which converts on crushing or chewing to protoanemonin - an acrid irritant. Contact with the sap causes stinging, redness and, in sensitive people, genuine blistering after prolonged handling, and chewing any part burns the mouth and causes drooling, vomiting and diarrhea. Drying breaks the compound down, so dried plant material is not the concern; fresh growth is.
Slugs & SnailsSeverity Medium PestThe hidden cost of hard pruning: a Group 3 clematis cut to 12 inches sends its entire season up from ground level in spring, and slugs shear those first soft shoots off overnight.
Losing them can cost the year's flowers. Protect the crown from the moment growth starts until the shoots are a foot tall and toughening - pull the mulch back off the crown, and hand-pick after dark for the two or three weeks that matter.
Irregular ragged holes chewed out of the middle of leaves and along the edges - not the clean-edged cuts a caterpillar leaves. Seedlings that vanish overnight, or that are cut off at soil level with nothing left behind. Silvery dried slime trails across leaves, soil, pots, and paving in the morning: this is the giveaway that tells you it was mollusks rather than an insect. Chewed pits in ripe fruit, especially where it rests on the ground. Damage that shows up on the lowest, dampest leaves first and gets worse after rain or evening watering. Turn over a board, an upturned pot, or a clump of dense mulch during the day and look for the animals themselves sheltering in the cool underneath.
Hand-picking works and costs nothing: go out an hour after dark with a headlamp, drop what you find into soapy water, and repeat nightly for a week or two - persistence is what wins, not any single product. Shallow beer traps sunk to soil level catch them too, but need emptying and refilling daily to be worth anything. Iron-phosphate bait is the standard control and is far lower-risk around pets and wildlife than the old metaldehyde products, but it is not harmless: many formulations include EDTA, and a dog that eats a quantity of pellets can develop iron toxicosis. Scatter it thinly per the label, never in piles, and keep dogs off a baited bed. Clear fallen foliage and debris in autumn, where the eggs are laid. In a wet climate this is a population you manage each season rather than one you eradicate - and on most established plants light grazing is cosmetic and needs nothing at all.
Take away the daytime shelter first: lift boards and upturned pots, clear piles of debris, keep dense mulch pulled back from crowns and stems, and give crowded plantings enough airflow to dry out. Water in the morning rather than the evening so the surface is dry by the time they come out. Copper tape around containers and raised beds gives them a shock they will not cross, and it is the one barrier that reliably works. Get plants past the vulnerable stage quickly - start seedlings in pots and set them out at a decent size rather than direct-sowing into a cold wet bed, since most plants stop being worth defending once the leaves toughen. Leave the ground beetles, frogs, toads, and ground-feeding birds alone, because they eat mollusks all night for free and broad-spectrum slug pellets kill them too. Where thick-leaved or resistant varieties exist for what you are growing, they take far less damage.
Slugs and snails are nocturnal mollusks that rasp ragged holes in soft leaves, shear off seedlings at ground level, and chew into ripe fruit that touches the soil. They feed at night and in the early morning and spend the day hidden under boards, pots, dense mulch, leaf litter, and low foliage, becoming active in exactly the cool, damp, shaded conditions that suit young plants. Damage is heaviest in wet spells and on tender spring growth: a single wet week can erase a row of seedlings while an established, tough-leaved plant of the same species is barely marked. They lay clusters of small pearly eggs in damp soil and under debris, so a garden with plenty of cover carries a resident population year after year rather than being invaded from outside.
Powdery MildewSeverity Low DiseasenowMostly a late-summer disfigurement of the large-flowered hybrids, worst on a plant crowded against a still, shaded wall or tucked under a house eave where rain never reaches it.
The viticella group is rarely troubled. Airflow does more than spraying: mount the support clear of the wall, thin congested growth, and water at the base. On a Group 3 plant it is largely moot, since the whole vine comes off in late winter anyway.
Round white powdery spots on the upper leaf surfaces that spread and merge until whole leaves look dusted. It usually starts on the oldest, lowest, most shaded leaves and works upward, so check there first. Look at the undersides too, and at stems, buds, and flower stalks, which get coated as it advances. Leaves that yellow, brown, curl, or go crisp and drop early under the coating. New growth that opens small, crumpled, or twisted where the fungus has reached the shoot tips. On plants where it gets onto the fruit, a dull gray film, russeted or scarred skin, and cracking. Late in the season, tiny dark specks scattered through the white felt - that is the fungus setting up to overwinter on the debris.
Start early: sprays protect healthy tissue, they do not clean up leaves that are already coated. Pick off and bin the worst leaves as soon as you see them, and open the plant up by thinning or pruning so air moves through. On anything that regrows quickly, shearing the whole plant back forces a clean flush and beats spraying. If it keeps spreading, potassium bicarbonate, horticultural oil, or neem applied weekly will hold it - cover both leaf surfaces. Sulfur also works, but it burns the foliage of some plants, should never go on in heat, and must not be mixed with or applied close behind an oil spray. Whatever you use must be labeled for the plant you are treating: follow that label and observe its pre-harvest interval on anything you eat. Do not compost badly infected material. Late-season mildew on a plant that is finishing anyway is usually cosmetic; on a crop still filling out it is worth acting on.
Give plants room. Crowding and still air are the biggest single driver, so space at the full recommended distance, thin seedlings properly, and divide or prune out congested growth until air moves through the plant. Full sun and an open position help; deep shade and a still corner against a wall are where it always starts. Water at the base rather than overhead, and water early in the day so nothing stays damp overnight. Keep plants evenly watered - drought stress at the roots leaves them far more susceptible, even though the fungus itself likes dry air. Go easy on nitrogen, since soft lush growth is the most vulnerable. Where resistant varieties exist for what you are growing, choosing one is the single most effective thing you can do on a plant that mildews every year. Clear infected leaves and stems away at the end of the season rather than composting them.
Powdery mildew is a fungal disease that coats leaves - and often stems, buds, and fruit - in a white-to-gray powder that looks like spilled talcum. It is not one fungus but a large family of them, each fairly specialised to its own group of plants, which is why mildew on one crop rarely jumps to an unrelated one beside it. Unlike most leaf diseases it does not need wet leaves: it thrives on warm dry days followed by humid nights, and it takes hold fastest where plants stand crowded in still air or in shade. The coating blocks light, so heavily covered leaves yellow, brown, and drop early. On many plants that is mostly disfiguring and arrives late enough not to matter; where it strips away the leaves a crop still needed to finish, it costs you size, sweetness, and quality.
AphidsSeverity Low PestColonies build on the soft spring shoot tips and on the flower buds, and they collapse under predators by early summer on an established plant.
Aim a hose jet carefully - clematis stems snap easily - and watch a hard-pruned Group 3 vine in particular, which is nothing but soft new tissue in May.
Dense clusters of tiny insects packed onto shoot tips, flower buds, and the undersides of young leaves. Curled, cupped, or distorted new growth that never opens properly. A sticky shine on the leaves - and on whatever sits under the plant - that later goes black with sooty mold. Tiny white cast skins left behind where a colony has been feeding. Ants running steadily up and down the stems, which is often the first thing you notice. Mottled, streaked, or misshapen leaves that do not grow out can mean a virus the aphids brought with them rather than the feeding itself.
Knock the colonies off with a hard jet of water and repeat every few days - on most plants that alone ends it. Pinch out or prune off the worst-infested tips rather than treating the whole plant. If colonies keep rebuilding, spray insecticidal soap or horticultural oil directly onto the insects, covering leaf undersides, and repeat weekly until they are gone; treat early or late in the day, and never spray a wilted or heat-stressed plant. Avoid broad-spectrum insecticides - they kill the ladybugs, lacewings, and parasitic wasps that were about to solve the problem for you, and aphid numbers usually come back worse afterward. Anything you spray must be labeled for the plant you are treating; follow that label and observe its pre-harvest interval. On anything you eat, wash leaves, heads, and buds well before use, since aphids hide down in crowns, folds, and tight growth.
Go easy on nitrogen: the soft, lush growth that heavy feeding produces is exactly what aphids breed on. Check new growth once a week through spring and early summer so you catch colonies while they are still small, and rub the first few out with your fingers. Leave flowering plants nearby and skip broad-spectrum sprays - ladybugs, lacewings, hoverflies, and parasitic wasps do most of this work for free, and they only stay if there is something for them to eat. Keep ants off the plant where you can, since they protect aphids from those predators. Water steadily so plants are not stressed, and check any new plant over before you bring it home or move it indoors, since aphids usually arrive on something else.
Aphids are small soft-bodied sap-suckers - green, black, gray, pink, or waxy white, and mostly wingless - that gather in dense colonies on the tenderest new growth: shoot tips, buds, and the undersides of young leaves. They breed extremely fast in mild weather, so a few can become hundreds inside a week. Their feeding curls and distorts soft growth, and the sticky honeydew they excrete coats everything below and turns black with sooty mold. Ants often farm and defend the colonies for that honeydew. A few aphids are normal on almost any plant and a healthy plant shrugs them off; only dense, persistent colonies do real damage, and some aphids also spread plant viruses as they feed.
Good & bad neighbors
First rule: keep Sweet Autumn Clematis apart. Do not buy this as your clematis.
Plant nearby
-
The classic pairing, and it works horticulturally as well as visually: a Group 3 clematis threaded through a climbing rose flowers on the rose's bare legs in high summer, and because the clematis is cut to 12 inches every late winter you can prune the rose without fighting a tangle. Keep the clematis crown a foot or two out from the rose so their roots are not in direct competition.
-
One of the best foot-shaders: a mound of catmint at the base keeps the clematis root zone cool and covered, wants the same sun, and hides the bare lower stems that even well-grown clematis develop. Shear it after the first bloom to keep it tidy.
-
For a clematis in part shade, hostas do the feet-in-the-shade job better than anything - broad leaves covering the root run completely, in the same moist rich soil, with no competition for the vertical space.
- Traditional pairings, thin evidence
-
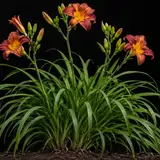
A tough, dense clump at the base of a sunny clematis shades the roots, tolerates the same conditions, and needs no attention. Useful in the hot, dry strip of soil along a fence or wall where finer perennials fail.
Keep apart
-
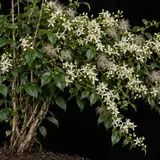
Do not buy this as your clematis. Clematis terniflora is sold in every garden center as sweet autumn clematis and is invasive across the eastern US, seeding itself by the thousand into woodland edges and fencerows - and it is frequently mislabelled Clematis paniculata. For the same late-summer froth of scented flowers, plant the viticella hybrid Sweet Summer Love or the native virgin's bower instead.
Varieties · 11
You pick one when you add Clematis to your garden. Its days to maturity set your harvest window.
Group 1 - no pruning (early spring bloomers) 2 varieties
Clematis montana Rubens
A curtain of small four-sepalled soft pink flowers with a vanilla scent, over bronze-flushed divided leaves.
group-1old-woodvery-vigorousspring-bloomThe one that covers a garage. A hugely vigorous spring species reaching 25 to 30 feet, smothered in small vanilla-scented soft pink flowers over bronze-tinged foliage for two or three weeks in April and May, then quiet for the rest of the year. Plant it where that scale is wanted - on a large arbor, a wall, a dead tree - and prune it only in the weeks straight after it flowers, if at all.
Clematis armandii (evergreen clematis)
Glossy dark evergreen lance-shaped leaves with clusters of small white star flowers carrying a strong vanilla-almond scent.
group-1evergreenfragrantold-woodThe evergreen clematis, and the only one in common cultivation: long, leathery, dark lance-shaped leaves year-round on a vigorous 15 to 25 foot vine, with clusters of small, intensely vanilla-scented white flowers in March and April. Needs zone 7 or warmer and shelter from cold wind, which browns the foliage. Superb on a shaded wall in the mild South and the Pacific Northwest; not a plant for the cold interior.
Group 2 - light pruning (early large-flowered) 3 varieties
Nelly Moser
Very large pale pinkish-mauve flowers with a broad crimson stripe down the middle of each of the eight sepals.
group-2old-woodbicolorshade-tolerantThe classic bicolor and one of the most recognizable flowers in gardening: pale mauve-pink sepals each with a deep carmine bar down the centre, up to eight inches across, in May and June with a lighter repeat in late summer. Notably good in part shade - in fact it needs it, because full sun bleaches the bar out within days. Prune lightly in late winter only.
The President
Deep purple-blue pointed sepals with a silver underside and a contrasting red-purple stamen boss.
group-2old-woodpurple-bluerepeat-bloomAn 1876 hybrid still sold everywhere, and deservedly: rich purple-blue flowers with a silvery reverse and a boss of reddish stamens, six to seven inches across, from late spring with a solid second flush in late summer. Compact enough at 6 to 8 feet for a container or an obelisk, and one of the better Group 2 plants for reliability.
Duchess of Edinburgh
Fully double pure-white rosette flowers, four to five inches across, in the first flush; single white flowers in the second.
group-2doublewhiteold-woodAn 1874 double white, and the classic argument for Group 2 pruning done properly: the first flush in May and June carries fully double rosette flowers with a faint scent, while the late-summer repeat on new growth comes single. Cut this plant hard in late winter and you get only the single flowers - which is exactly the mistake the pruning groups exist to prevent.
Group 3 - hard pruning (late bloomers) 6 varieties
Jackmanii
Good first pickFlat four-sepalled velvety violet-purple flowers about four inches across, carried in a solid sheet over the whole vine.
group-3new-woodpurplehistoricThe clematis that made the genus: George Jackman's 1858 cross, still probably the most planted named clematis in the world. Broad velvety violet-purple flowers with four sepals, borne in sheets from July into September on a vigorous 10 to 12 foot vine that flowers on new wood, so the annual cut to 12 inches keeps it perfect. Tough, cold-hardy, and about as close to foolproof as clematis gets - the right first one.
Ville de Lyon
Rounded carmine-red flowers deepening at the sepal edges, with a tuft of pale cream stamens.
group-3new-woodcarmine-redlong-seasonThe old carmine-red standard from 1899: glowing crimson-red flowers with cream stamens, four to five inches across, from June through September on new wood. Prone to losing its lower leaves as the season goes on, which is the standard argument for planting something at its feet - and the annual hard cut keeps that from becoming permanent.
Etoile Violette (viticella)
Many small nodding four-sepalled deep violet-purple flowers with bright gold stamen bosses, borne in profusion.
group-3viticellanew-woodpurpleA viticella hybrid from 1885 and one of the best clematis anyone can plant: masses of small nodding deep-violet flowers with gold stamens from July to September on a 10 to 15 foot vine. The viticella group is effectively resistant to clematis wilt, tolerates more heat and humidity than the large-flowered hybrids, and asks for nothing but the annual cut to 12 inches. Where wilt has been a problem, this is the answer.
Grower tips
Notes from growers, tagged with the zone they grow in. A person reads every post before it appears.
Nobody has posted about Clematis yet. The first one usually saves someone a season.
Free account. Your post shows your grower name and zone, never your email.