Add it to your home screen and it opens full screen: no browser bars, one tap away, and everything stays signed in. Free, nothing to download from an app store.
- Tap the Share button in your browser
- Scroll down and choose “Add to Home Screen”
- Open GrowSomeFood from your home screen
- Open your browser’s menu
- Choose “Add to Home screen” or “Install app”
- Open GrowSomeFood from your home screen
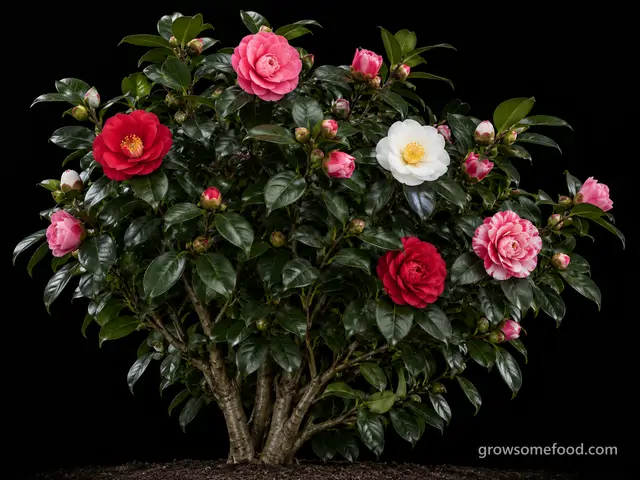
Camellia
The great winter shrub of the American South: glossy evergreen leaves and formal, almost rose-like flowers from October through April, when nothing else is blooming. Long-lived and undemanding in acid soil and shade - and, worth being clear about, a different species from the tea plant.
Camellias are among the safest landscape shrubs there are: the ASPCA lists Camellia japonica as non-toxic to dogs, cats and horses, and nothing on the plant irritates skin. They are not food either. Tea comes from a different species, Camellia sinensis, and the ornamental camellias grown for flowers are not it - do not brew their leaves. Camellia seed and the pressed seed cake sold as a soil amendment contain saponins and are not for eating.
Overview
The one thing to knowBetween the two species most people grow, bloom runs from fall to spring: sasanquas (Camellia sasanqua) open in October and November, japonicas (C.
Camellias are the winter shrubs of the American South - dense, glossy evergreens carrying formal, almost rose-like flowers through the months when the rest of the garden has stopped. Between the two species most people grow, bloom runs from fall to spring: sasanquas (Camellia sasanqua) open in October and November, japonicas (C. japonica) take over from midwinter into April. They are slow, they are patient, and they are extraordinarily long-lived - hundred-year-old specimens are unremarkable in Charleston, Mobile and Sacramento.
Two things decide whether a camellia thrives, and neither is difficult. The first is soil: acid ground, roughly pH 5.0 to 6.5, rich in organic matter and genuinely free-draining. The second is planting depth, which kills more camellias than cold ever does - the top of the root ball must sit at or slightly above the surrounding grade, never buried. Add shelter from hot afternoon sun and drying wind, and the rest of camellia care is one annual pruning cut, a hose in August, and picking up the fallen flowers.
One point worth stating plainly: the camellia in your yard is not the tea plant. Tea comes from Camellia sinensis - the same genus, a different species, with narrow leaves and small plain white flowers, grown for its young shoots rather than its bloom. The ornamental C. japonica and C. sasanqua planted for flowers are not it. Their leaves are not tea, they carry none of the processing tradition behind the drink, and they should not be brewed. If you want to grow tea, buy C. sinensis by that name; it is a perfectly good zone 7-9 shrub in its own right, and it is grown commercially on Wadmalaw Island in South Carolina.
Quick facts
- Life cycle
- Perennial, lives about 100 years
- Height
- 8 ft4 to 15
- Spread
- 6 ft4 to 10
- Cold
- Takes light frostdamaged below 0°F
- Heat
- Struggles above 100°F
Part sun or part shade or shade · medium water · well-drained soil · 6 ft apart (4 to 10) · transplant or cuttings
When to plant
Fall transplanting is open for 20 more days. Next: spring, Mar 27 to May 22.
- Transplant Aug 2 – Oct 11 Open now · 20 days leftAbout 12 weeks before to 2 weeks before your first frost (Oct 25 here)The classic Southern camellia window. Roots grow through a mild winter, so a fall-planted shrub is established before it meets its first summer. Set the top of the root ball above grade, mulch with pine bark or pine straw, and water until the ground is cold.
- Transplant Mar 27 – May 22 Opens in 187 daysAbout 2 weeks before to 6 weeks after your last frost (Apr 10 here)Spring planting works everywhere and lets you buy in bloom, which is the honest way to choose a camellia. The trade-off is a first summer spent establishing - water deeply and weekly right through it.
Frost here: last around Apr 10 (Mar 27 to Apr 24 most years), first around Oct 25. Zone averages, your own yard may run a week or two either way.
Life stages
One stage to settle in, then three that repeat each year. Windows are typical; your zone and weather move them.
Years 1-2 - rooting in
The first year after planting- ProtectPlant HIGH - the top of the root ball above gradeThis is the single most important thing you will ever do for a camellia. Set the plant so the top of the root ball sits an inch or two ABOVE the surrounding soil, and mound soil up to meet it. A camellia planted level, or an inch low, sits in a saucer and dies of root rot years later - and by then nobody connects the two. Dig the hole wide and no deeper than the root ball, and never bury the trunk flare or pile mulch against it.
- WaterDeep soak weekly through the first two summersweeklyA new camellia has a shallow, fine root system and no reserves. Soak it slowly and deeply once a week in warm weather - more in sandy soil, less in clay - and check the root ball itself rather than the ground beside it, because a container root ball can be bone dry in damp soil. Ease off in winter. After two summers an established camellia is genuinely drought-tolerant.
- MulchMulch 2-3 inches with pine bark or pine strawAn acid organic mulch does three jobs at once: holds summer moisture over the shallow roots, keeps the soil cool, and slowly holds the pH down where camellias want it. Spread it 2-3 inches deep out to the drip line and pull it back a few inches clear of the trunk. Refresh it every fall - which also buries any petal blight overwintering in the litter.
Watch for- Planted too deep - if you cannot see the flare where the trunk widens into roots, it is buried
- Yellow leaves with green veins on new growth (soil not acid enough)
- Wilting on one side in wet ground - root rot, not thirst
Spring flush and the only pruning window
Apr to Jun, every year- PrunePrune ONLY in the weeks right after bloomCamellias set next season's flower buds on the new growth in early summer, so anything cut from about July onward is next winter's flowers. Inside the post-bloom window you can do a lot: thin interior branches for light and air, shorten a limb, or hard-renovate an overgrown old shrub, which camellias take remarkably well. Most established plants need nothing more than the removal of dead or crossing wood - a camellia is not a shrub that requires pruning.
- FertilizeFeed lightly after bloom, then stop by midsummerA light application of an acid-forming azalea and camellia fertilizer once flowering finishes is plenty - these are slow, frugal shrubs and overfeeding gives soft growth instead of buds. Stop by midsummer so the new wood hardens before winter. Yellow leaves with green veins are a pH problem, not hunger; more fertilizer makes that worse rather than better.
Watch for- New growth pruned after early summer - the flower buds go with it
- Tea scale specks packed on the undersides of leaves that look yellow-stippled from above
- Soft new leaves scorching in hot afternoon sun
Summer - next season's flower buds form
Jul to Sep, every year- WaterWater through late summer - this is what buys winter flowersweeklyCamellias form their flower buds in July, August and September. A dry spell now is the commonest single reason a shrub sets a heavy crop of buds in fall and then drops every one of them unopened months later. Deep-soak weekly through the bud-set period and keep the mulch topped up. Nothing you do in December can rescue a bud crop that was made in a drought.
- ThinDisbud the heavy setters for fewer, better flowersLarge formal doubles often set two or three fat buds at the end of every shoot and cannot finish them all - so they shed them. Pinching off all but the strongest bud in each cluster, once the buds are pea-sized, gives fewer but larger and more reliable flowers. Optional on most varieties; worth doing on show-flower types and on anything that dropped buds last year.
Watch for- Fat buds forming at the shoot tips - the season's flower crop is being set now
- Drought stress in August, which shows up as bud drop in January
- Sooty mold blackening leaves below a scale infestation
Bloom season
Oct to Apr, every year- InspectPick up every fallen flower, all seasonCamellia petal blight overwinters as hard black bodies in spent blooms lying under the shrub, and picking those blooms up is the only control a home gardener actually has. Go round every few days through the bloom season, collect fallen and browned flowers, and bin or burn them - do not compost them and do not leave them on the ground. Refresh the mulch each fall to bury anything you missed.
- ProtectShelter opening blooms from freeze and early sunOpen camellia flowers turn brown in a hard freeze - the plant is fine, the display is not. Site japonicas out of direct early-morning sun so frozen buds thaw slowly rather than fast, and give them a wall, a fence or evergreens as a windbreak at the cold edge of the range. Where a freeze is forecast on a shrub in full bloom, a light cover for the night saves that week's flowers.
- HarvestCut blooms for bowls, not for vasesweeklyCamellia flowers have almost no stem and take up very little water, so they are cut short and floated in a shallow bowl rather than arranged - which is exactly how they have been shown for two hundred years. Pick a bloom just fully open, with an inch of stem and a leaf or two, in the cool of the morning. Expect two or three days afloat. Sasanquas shatter their petals; japonicas hold their shape.
Watch for- Brown blotches spreading from the flower centre outward with darker veins - petal blight, not frost
- Fat buds dropping whole and unopened
- Browning only on the outer petals of blooms that were open during a freeze
Watch out for
5 to know. 3 are high-risk: Root Rot, Scale & Sooty Mold, Camellia Petal Blight. 3 are active in September.
Root RotSeverity High DiseasenowPhytophthora root rot kills more camellias than cold does, and planting too deep is usually how it starts.
Set the top of the root ball an inch or two ABOVE grade, mound soil up to meet it, and never let the trunk flare be buried or mulched over. Heavy clay and a low spot are both fatal - build a raised bed instead. A shrub that wilts, yellows and dies back on one side in wet ground is telling you this.
Wilting in the middle of the day on a plant whose soil is damp - the classic tell, and the reason people water a rotting plant and finish it off. Leaves yellowing from the bottom up, dull off-color foliage, and growth that stalls for no visible reason. Whole shoots, or one side of the plant, collapsing while the rest still looks fine. Soft, dark, or mushy tissue at the base of the stem or at the crown, sometimes with a sour smell. Lift a failing plant and look at the roots: healthy ones are firm and pale, rotted ones are brown or black and slimy, and the outer layer slips off between your fingers leaving a thread of core behind. Seedlings that topple over at soil level are the same problem, called damping-off.
There is no cure for tissue that has already rotted, so act on the conditions rather than looking for a spray. Stop watering at once and fix the drainage - open up compacted soil, or move the plant to a raised, sharply drained position or a container. Lift a badly affected plant, cut away every soft dark root and rotted section with a clean blade back to firm pale tissue, and replant only the healthy parts into fresh free-draining soil or mix. Often the better move is to give up on the plant and save its offspring instead: cuttings, offsets, or divisions taken from firm healthy growth root readily and give you a clean start. Bin the rotted material rather than composting it, and correct the drainage before you replant, because the rot comes straight back in the same wet spot.
Drainage is the whole defense. Match the plant to the site first - something that wants sharp drainage will not survive heavy clay or a low, water-collecting spot however well you tend it. Where the ground is heavy, plant on a raised bed, berm, or slope, or grow in a container. Set plants at the depth they were already growing, since burying the crown or the root flare is a common cause of rot, and keep mulch pulled back a few inches from the stem base instead of piled against it. Water the soil rather than the calendar: check that the top inch or two is dry before watering again, cut back hard in cool weather and winter dormancy, and never leave a pot standing in a full saucer. Do not plant or dig in soggy ground, and go easy on rich amendments for plants that want it lean. Rotate annual crops, and start with clean healthy plants and fresh mix.
Root rot is not one organism but a group of soil fungi and water molds - Pythium, Phytophthora, Fusarium, Rhizoctonia and others - that sit harmlessly in most soils and only turn destructive when the ground stays saturated. Waterlogged soil drives the air out, the roots suffocate, and the weakened tissue is invaded and goes soft, brown, and stringy. Because the damage is underground you usually see it first as something that looks like drought: wilting, yellowing, stunting, a plant that does not respond to being watered. Overwatering, heavy compacted ground, a low spot that collects runoff, a pot with no drainage or a saucer left standing full, and cold wet soil in winter are the usual causes. Once roots have actually rotted there is no cure - this is a problem you prevent rather than treat.
Scale & Sooty MoldSeverity High PestnowTea scale is THE camellia pest across the South.
It packs the leaf UNDERSIDES with white and brown specks, so the first thing most people see is yellow mottling on the upper surface and sooty black film on the leaves below. Turn a mottled leaf over before doing anything else. Thorough oil coverage of the undersides timed to the crawlers, plus thinning the shrub for light and air, is the control; a badly encrusted interior branch is better pruned out.
Rows of small brown, tan, black, white, or waxy bumps along stems, twigs, leaf midribs, and leaf undersides that do not brush off but can be scraped loose with a fingernail. A sticky shine on the leaves - and on the floor, table, or path beneath the plant - that later turns black with sooty mold. Ants running steadily up and down the stems, since they farm and defend scale for that honeydew; often the first sign anything is wrong. Yellowing leaves, weak thin growth, and dieback of individual branches or canes that are heavily encrusted. On fruit crops, scale covers and sooty mold directly on the fruit. Check the leaf undersides and the shaded inner wood, which is where colonies build up unseen.
Horticultural oil is the main control: it works by smothering, so it has to coat the insects thoroughly - stems, twigs, and leaf undersides - and it usually needs repeating, because the waxy covering shields them and no single pass reaches everything. On deciduous woody plants a dormant-season oil smothers the overwintering stage while the leaves are out of the way, and timing a growing-season spray to the crawler stage, when the young are mobile and uncovered, is far more effective than spraying settled adults. On a small plant or a light infestation, scrub or wipe the scales off by hand, or dab them with a cotton swab of rubbing alcohol. Prune out and destroy badly encrusted wood rather than trying to save it. Wash off the sooty mold once the scale is gone - it lives on the honeydew, not on the plant, and stops once the supply does. Anything you spray must be labeled for the plant, and oils can burn delicate foliage, so test first.
Inspect. Look over leaf undersides and stems regularly - on a crop you pick, every harvest is a scouting chance - and check every new plant thoroughly before you buy it, plant it, or set it beside anything else, because scale almost always arrives on a plant rather than flying in. Quarantine new houseplants for a few weeks. Keep plants unstressed and not over-fertilized, since soft, forced growth is what populations build on. Prune for airflow and light to open up the shaded inner growth where scale hides, and prune out heavily infested wood as routine maintenance - on anything that gets a hard annual pruning, that alone removes most of any buildup. Leave the lady beetles, lacewings, and parasitic wasps alone, since they normally keep scale down to nothing, and keep ants off the plant where you can, because ants protect the colonies from those predators. Indoors, avoid hot, dry, still winter air.
Scale insects are sap-suckers that spend most of their lives immobile, fixed to a stem, twig, or leaf underside beneath a waxy or shell-like cover. They look far more like bumps, blisters, or crusty encrustations than like insects, which is why an infestation is usually well established before anyone notices it. Soft scales excrete large amounts of sticky honeydew that drips onto everything below and grows a black sooty mold - and those blackened leaves are often the first thing a gardener actually sees. Armored scales produce no honeydew but sit under a hard shield that protects them from most sprays. They spread as tiny mobile crawlers in the weeks after hatching, which is the only stage that moves and the only stage that is easy to kill. Populations build on stressed plants, on crowded shaded growth, and above all on plants kept indoors in dry, still air over winter.
Camellia Petal BlightSeverity High DiseaseThe commonest serious camellia problem across the Southeast and the Pacific Northwest.
Japonicas suffer most because they hold their spent flowers; sasanquas shatter and escape much of it. The disease never harms the shrub, only the display.
Brown blotches spreading from the base of the flower outward, with the petal veins staying darker than the tissue between them - unlike frost, which browns the outer petal edges first and hits only the blooms that were open during the freeze. Flowers going leathery brown and dropping whole within a day or two of opening. A ring of collapsed brown blooms on the ground under the shrub. Small hard black lumps about the size of a lentil in last year's fallen flowers and in the litter underneath. Bloom after bloom affected while the leaves, stems and buds stay entirely healthy - that is the signature of this disease and rules out root or scale problems.
No spray cures an infected flower, and fungicide programs are impractical at home - the blooms open over months and each one would need protecting individually. What works is relentless removal: strip and bin blighted blooms as they appear, keep the ground under the shrub clear, and refresh the mulch every autumn. Do not move soil, mulch or fallen flowers from an affected shrub to another part of the garden, and do not give away rooted cuttings in that soil. Expect improvement over several seasons rather than a fix in one, and understand that where the disease is widespread, spores blowing in from neighboring gardens make this something you manage rather than eliminate.
Sanitation is the whole defense. Pick up every fallen flower every few days through the entire bloom season and bin or burn them - never compost them and never leave them lying under the shrub, because that is precisely where next year's infection is made. Pick the spent flowers off the plant too, since japonicas hold on to them. Each fall, rake off and replace the top few inches of mulch and litter, then mulch 3 to 4 inches deep, which buries any sclerotia too far down to shoot. Avoid overhead watering while the shrub is in bloom. Sasanquas, which flower earlier and shatter their petals, escape much of the damage, so they are the better choice in a badly affected garden. Inspect any new camellia and remove its flowers and the surface of its potting mix before planting.
Camellia petal blight is caused by the fungus Ciborinia camelliae, and it attacks the flowers only - the shrub itself stays perfectly healthy while every bloom rots. Small brown specks appear on the petals and enlarge into blotches that spread from the base of the flower outward, until the whole bloom goes leathery brown and drops, often within a day or two of opening. The petal veins stay noticeably darker than the tissue between them, which is what separates blight from ordinary freeze damage. The fungus overwinters as hard black bodies called sclerotia in the fallen flowers and the top inch of soil under the bush, and releases its spores in late winter and spring, exactly when the flowers open. It travels on the wind and arrives in bought plants, and once it is loose in a garden it is very difficult to be rid of.
Iron Chlorosis (Alkaline Soil)Severity Medium DisordernowCamellias want soil around pH 5.
0 to 6.5, and yellow leaves with green veins on the newest growth are the usual sign the ground is too sweet - most often beside a concrete foundation, a mortared wall or a limed lawn. Test before planting rather than after. Chelated iron greens the shrub for a season; elemental sulfur plus a pine bark or pine straw mulch is what actually fixes it.
Yellow leaves with a distinct network of green veins, worst on the NEWEST growth at the shoot tips - that vein pattern is what separates it from a nitrogen shortage, which yellows the oldest leaves uniformly. Whole plants going progressively paler over a season rather than suddenly. Brown scorched leaf margins and shoot-tip dieback in advanced cases. Symptoms concentrated on the side of a plant nearest a foundation, wall, path, driveway, or a stretch of limed lawn. One plant affected while a neighbor that does not need acid soil looks perfect.
Correct the soil, and use iron only to buy time. Chelated iron sprayed on the leaves or drenched into the root zone greens a plant up within a week or two, but it wears off in a season and has to be repeated indefinitely - it fixes nothing. The real fix is lowering pH with elemental sulfur applied to the surface and watered in, retesting each season until you are in range, then holding it there with acidic mulch and acid fertilizer. Expect one to two years; there is no fast route. Note that other shortages look identical - manganese deficiency produces the same yellow-with-green-veins pattern on some plants - so a plant that does not green up from iron should be tested rather than dosed again. Where the pH is high because of nearby concrete or genuinely calcareous subsoil, the plant is in the wrong place, and moving it into a properly built acidic bed or container will succeed where years of amendment will not.
Test the soil pH before you plant, not after, and match the plant to the ground - an acid-loving plant in limy soil will never be truly healthy however it is fed. Where the pH is too high, acidify with elemental sulfur worked in the season BEFORE planting, since sulfur takes months of soil biology to work and cannot be rushed, and retest before you commit plants. On genuinely alkaline ground the honest answer is often a raised bed of acidic mix, or a container, rather than fighting the native soil forever. Keep an acidic organic mulch topped up - pine bark, pine straw, sawdust - and site acid-lovers away from concrete foundations and mortared walls, which leach lime for decades. Never apply lime, wood ash or mushroom compost where the roots reach, use acid-forming fertilizers such as ammonium sulfate, and improve drainage, because cold waterlogged soil hurts uptake even at the right pH.
Not an infection but a nutrient lockout caused by soil chemistry. Iron is abundant in almost every soil, but as pH rises it converts to forms roots cannot take up, so a plant that needs acid ground slowly starves for iron while standing in soil full of it. The symptom is unmistakable: new leaves go pale yellow or cream while the veins stay green, giving a fine green net over a yellow leaf. It shows first and worst on the newest growth, because iron does not move around inside a plant to be recycled. It does not spread between plants, does not respond to fungicides, and does not resolve on its own - left uncorrected the plant grows less each year, leaves get smaller and paler, shoot tips die back, crops fall away, and it eventually dies. Worst near concrete, mortar, paths and limed ground, and in cold, wet, compacted soil.
Bud DropSeverity Medium DisorderVery large formal doubles and any shrub in a container are the habitual offenders.
If your camellia dropped its buds this winter, the fix belongs to next August, not to this week.
Fat, well-formed flower buds falling off whole and unopened, often with a short piece of stem attached, from late fall through winter. Buds browning at the tip and drying without ever opening. A heavy set visible in September followed by a bare shrub in January. Damage worst after a dry late summer, on a plant in a container, or on one planted where roof runoff soaks the ground. Leaves that look entirely healthy throughout - if the foliage is yellowing or whole branches are dying back, the problem is at the roots instead and this is not what you are looking at.
There is nothing to apply once the buds are falling - the cause was months earlier. Do not respond by fertilizing, which makes matters worse. Check the drainage and the mulch, correct next summer's watering, and thin the buds on varieties that habitually over-set. If buds are browning at the tips after a freeze rather than dropping green and intact, that is cold damage rather than this disorder, and the answer is siting: out of direct early-morning sun so frozen tissue thaws slowly, out of the wind, and at the cold edge of the range under the shelter of a wall or evergreens.
Water through late summer. The single most useful thing you can do for next winter's flowers is keep the soil evenly moist in July, August and September while the buds are forming - a slow soaking once a week and a 2 to 3 inch mulch of pine bark or pine straw covers most of it. Feed lightly with an acid fertilizer after bloom and stop by midsummer, since late nitrogen pushes growth at the expense of flowers. Make sure the drainage is genuinely good, because wet feet cause bud drop as reliably as drought does. Shelter the shrub from wind and from sudden hard freezes. And disbud the heavy setters: pinching off all but the strongest bud in each cluster, once they are pea-sized, gives fewer but far more reliable flowers.
Bud drop is the commonest camellia complaint and it is a disorder rather than an infection: the shrub sets a heavy crop of flower buds in late summer and then sheds them whole and unopened over the following weeks. The usual cause is water. Camellias form their buds in July, August and September, and a dry spell in that window leaves the plant unable to carry what it made. Sudden hard cold, a plant standing in soggy ground, too much nitrogen, root disturbance, and simply setting more buds than the shrub can finish all produce the same result. Some varieties, particularly the very large formal doubles, drop routinely. It is disappointing rather than dangerous, and a shrub that drops one year usually flowers normally the next once the summer watering is corrected.
Good & bad neighbors
Plant nearby
-
Azaleas and rhododendronsThe traditional Southern woodland-garden trio. All three want acid soil, high shade, cool moist roots and an organic mulch, so one well-built bed serves them all - and they bloom in sequence rather than in competition.
-
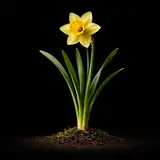
Daffodils come up through the litter under a camellia exactly as the japonicas are blooming, and go dormant before the shrub needs the water. Plant them out toward the drip line so the bulbs are not disturbed by mulch renewal at the trunk.
-
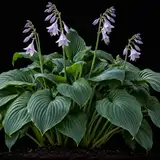
A classic skirt for the bare ankles of an older camellia, wanting the same shade and moisture. Keep the hostas out beyond the trunk rather than crowded against it, since a camellia hates having soil or mulch heaped over its root flare.
-
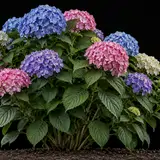
The two shrubs share a bed happily: the same acid, humus-rich, well-drained soil and the same morning-sun-afternoon-shade exposure, and their seasons hand off cleanly - hydrangea carries the summer while the camellia is only making buds, and the camellia carries the winter.
- Traditional pairings, thin evidence
-
FernsFiligree texture against the camellia's heavy glossy leaves, in exactly the same shaded, humus-rich, evenly moist ground. Ferns also tolerate the shallow surface roots that make it hard to plant anything deep-rooted close to a mature camellia.
-
A native acid-soil shrub with the same soil and light needs, deciduous so it does not compete with the camellia's evergreen mass, and carrying spring bottlebrush flowers and blazing fall color in the gaps between camellia seasons.
Varieties · 9
You pick one when you add Camellia to your garden. Its days to maturity set your harvest window.
Japonica (winter and spring bloom) 4 varieties
Debutante
Full, rounded, light-pink peony-form blooms 3-4 inches across on upright glossy growth.
pinkpeony-formearlyheirloomAn old Southern favorite from the 1900s: light-pink peony-form flowers in profusion from midwinter, on a vigorous upright shrub that flowers young and reliably. One of the easiest japonicas for a first camellia, and an early bloomer, so give it shelter from hard freezes.
Pink Perfection
Small, flawlessly symmetrical shell-pink formal doubles with concentric ranks of rounded petals and no visible stamens.
pinkformal-doublelong-seasonheirloomThe textbook formal double: small, perfectly geometric shell-pink flowers with petals laid in exact overlapping rows, over a long midwinter-to-spring season on a compact, slow, well-behaved shrub. In cultivation in Japan for centuries and in the West since 1875 - the flower most people picture when they hear the word camellia.
Sasanqua (fall bloom) 2 varieties
Yuletide
Single, flat, vivid scarlet flowers 2-3 inches across with a prominent yellow stamen boss, on dense upright dark-green growth.
redfall-bloomuprightsun-tolerantThe best-known sasanqua in America and the reason many people plant one: single fire-red flowers with a bold gold boss of stamens, opening around the holidays on a dense, upright, glossy shrub that takes sun, shears into a hedge, and trains flat against a wall. Blooms when nothing else does and looks deliberate rather than accidental doing it.
Setsugekka
Semi-double pure-white flowers to 4 inches with wavy petals and gold stamens, on vigorous open growth.
whitefall-bloomfragrantespalierA large white sasanqua with semi-double, faintly ruffled flowers and a light fragrance, blooming October into December on a vigorous, open shrub that espaliers beautifully. One of the classics of the type - old enough to be everywhere in the South, good enough to deserve it.
Cold-hardy hybrids (April and Winter's series) 2 varieties
April Remembered
Semi-double flowers shading from cream at the base to soft pink at the petal edges, 3-4 inches across.
hardy-hybridpinkspring-bloomlong-seasonFrom the April series bred at North Carolina State for cold tolerance: semi-double cream-to-pink flowers over a long early-spring season on a vigorous upright shrub hardy to about zone 6b. This is the group that lets gardeners in the upper South and the mid-Atlantic grow camellias at all - plant in spring, shelter from wind and morning sun, and mulch heavily.
Winter's Star
Single, open, lavender-pink flowers about 3 inches across with gold stamens, on upright growth.
hardy-hybridlavender-pinkfall-bloomsun-tolerantFrom Dr William Ackerman's Winter's series at the US National Arboretum, bred with C. oleifera after the brutal winters of the late 1970s killed the Arboretum's camellia collection: single lavender-pink flowers in October and November on an upright shrub hardy to roughly zone 6b, and more sun-tolerant than a japonica.
Tea plant (Camellia sinensis) - a different species 1 variety
Camellia sinensis (the tea plant)
Plain, open, twiggy shrub with matte narrow finely toothed leaves and small nodding white flowers with yellow stamens - nothing like an ornamental camellia in bloom.
sinensisgrown-for-leafdifferent-speciesshearedThe tea plant, and a genuinely different species from the camellias grown for flowers. An open, twiggy evergreen with narrow toothed leaves and small nodding white flowers in fall, hardy roughly in zones 7-9 and kept sheared waist-high so it keeps pushing the young shoots that are picked. Grown commercially at the Charleston Tea Garden on Wadmalaw Island, South Carolina. If you want to grow tea, buy this plant by name - and do not brew the leaves of an ornamental camellia, which is a different species entirely.
Grower tips
Notes from growers, tagged with the zone they grow in. A person reads every post before it appears.
Nobody has posted about Camellia yet. The first one usually saves someone a season.
Free account. Your post shows your grower name and zone, never your email.